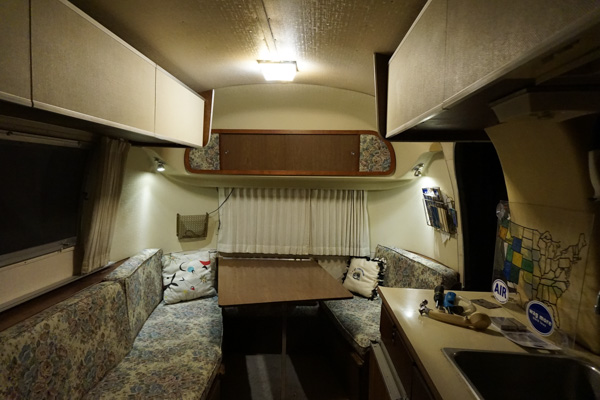
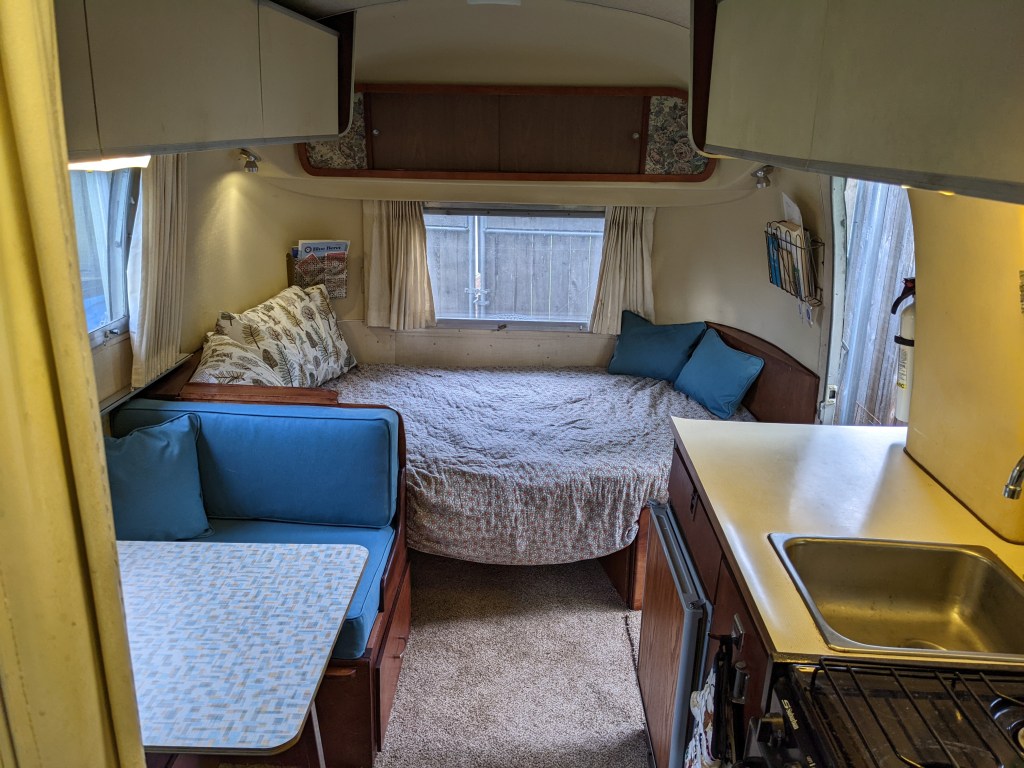
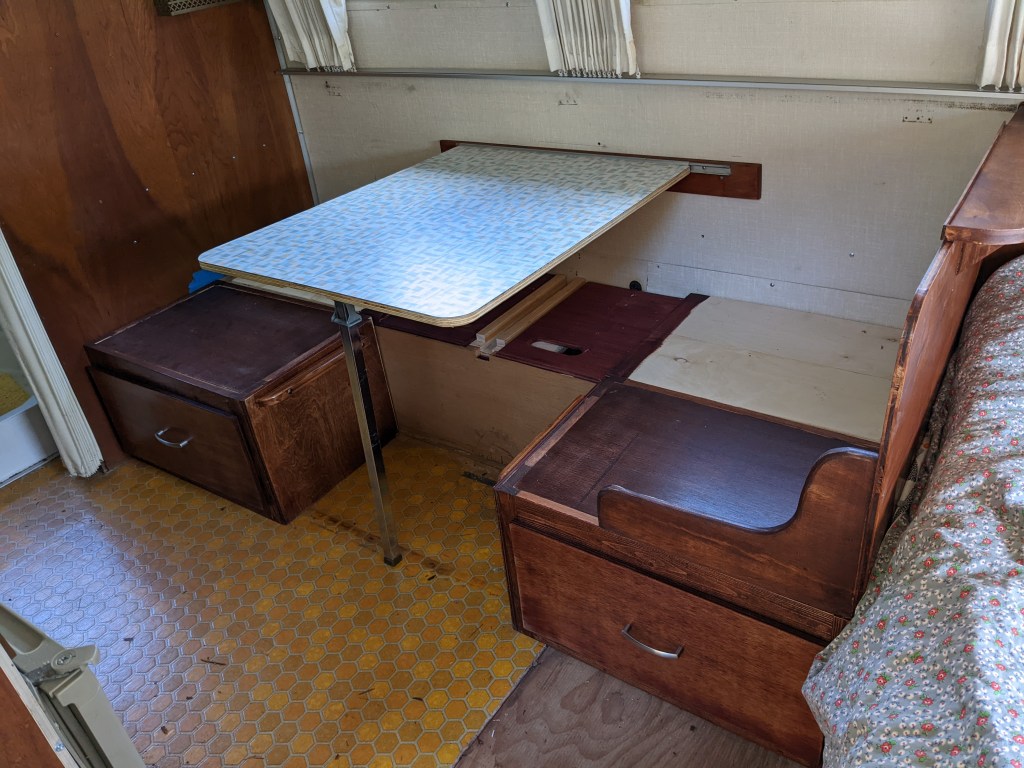
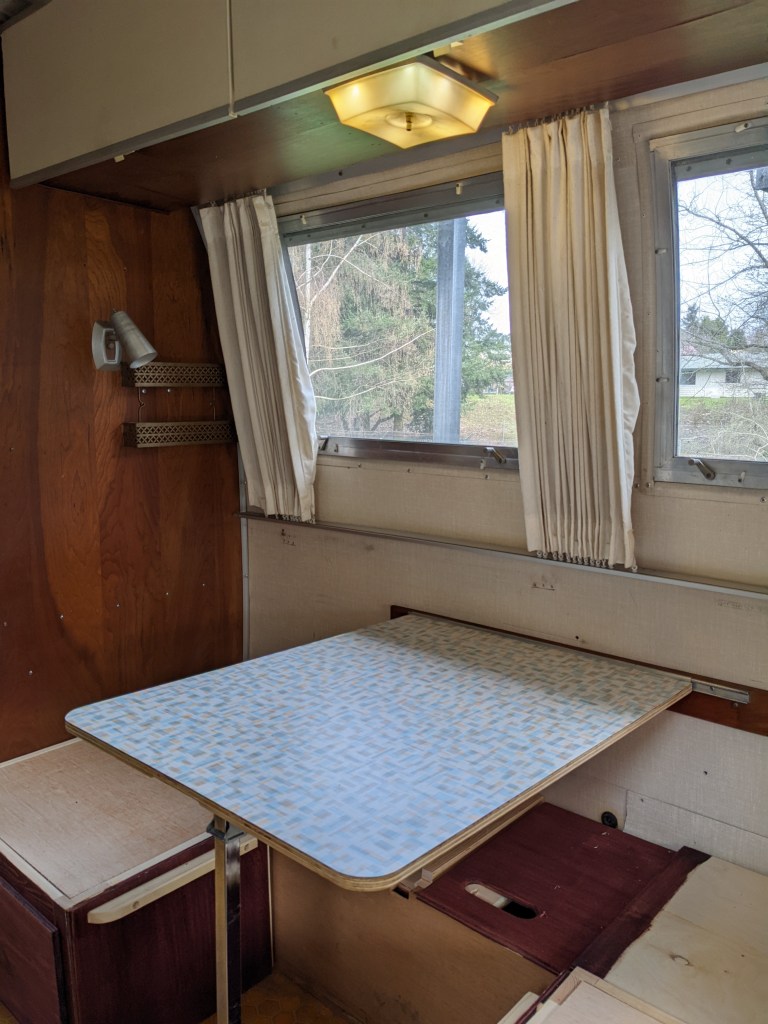
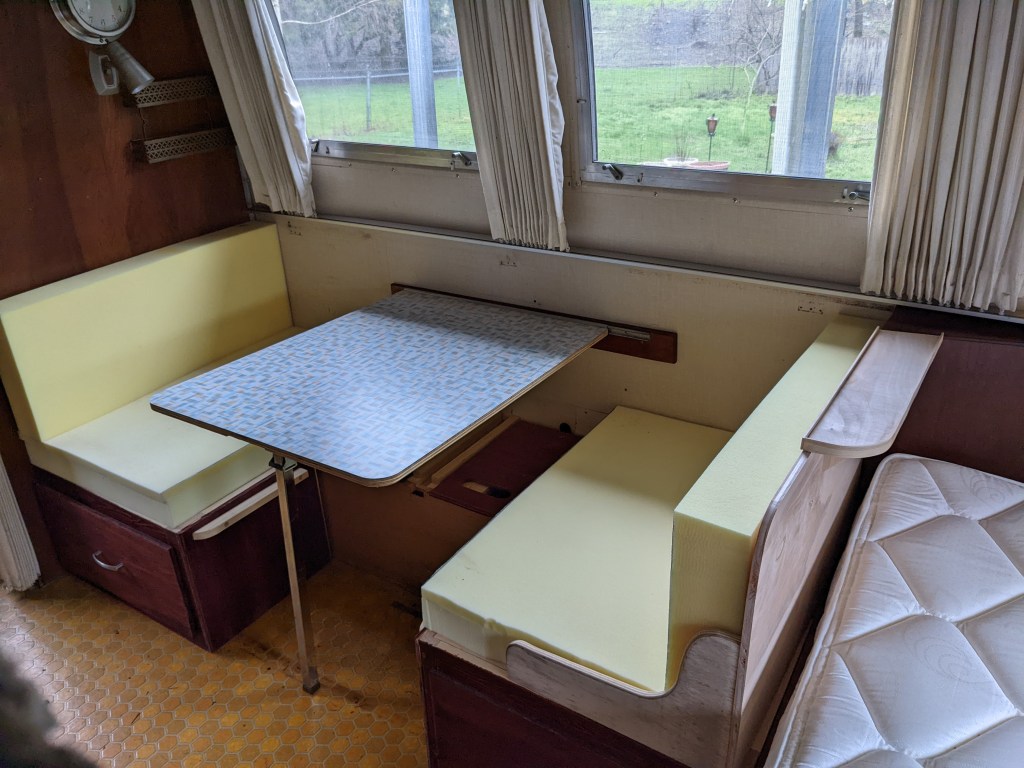
And here it is! Just for a quick reference, here’s how it looked before – Dinette in the front, couch/pull out bed on the side:
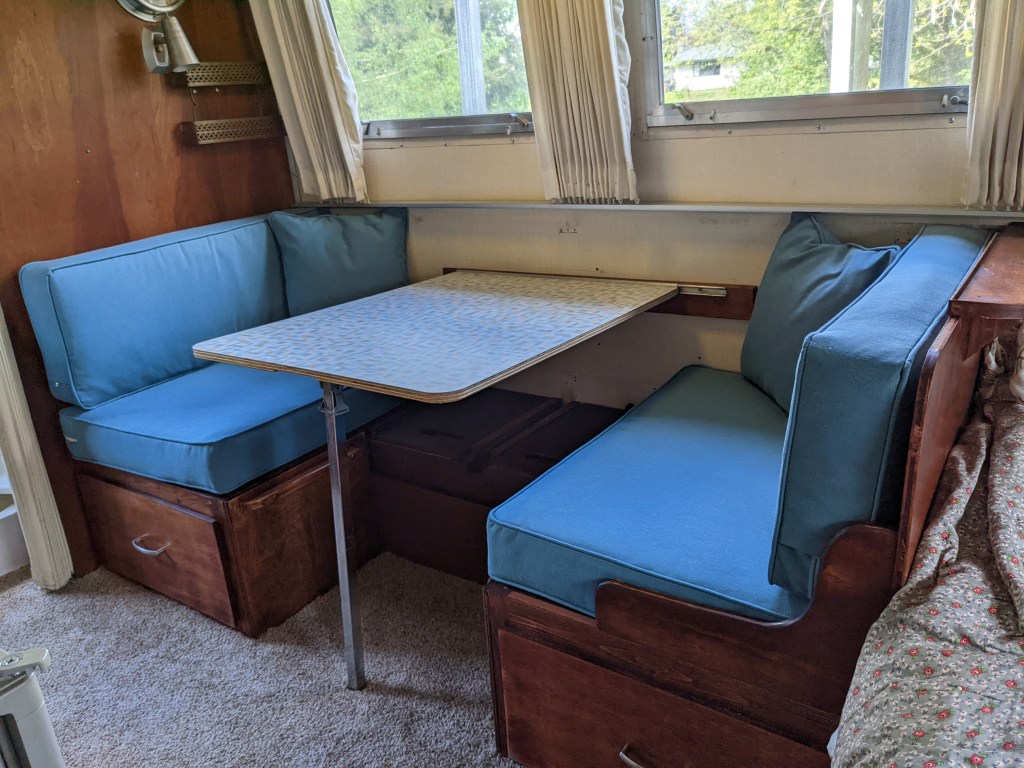
And now…
So there we go! It took me all winter, but I think the result is a layout that looks like it could have come from the Airstream factory and will be more practical, and more comfortable to use. Hopefully the composting toilet will prove it’s worth as well! Next winter I will do the kitchen countertop to match the new table, but this time I did all I could with the time I had available, because now it’s time to go camping!
Just a few things left to go – first off, venting the composting toilet.
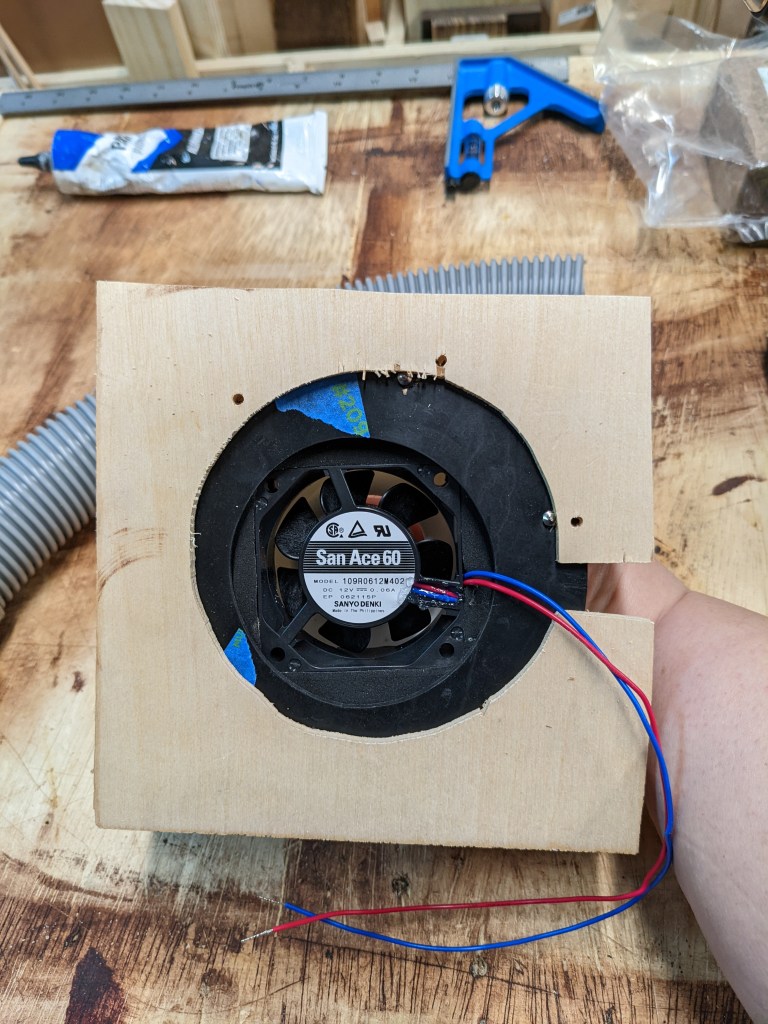
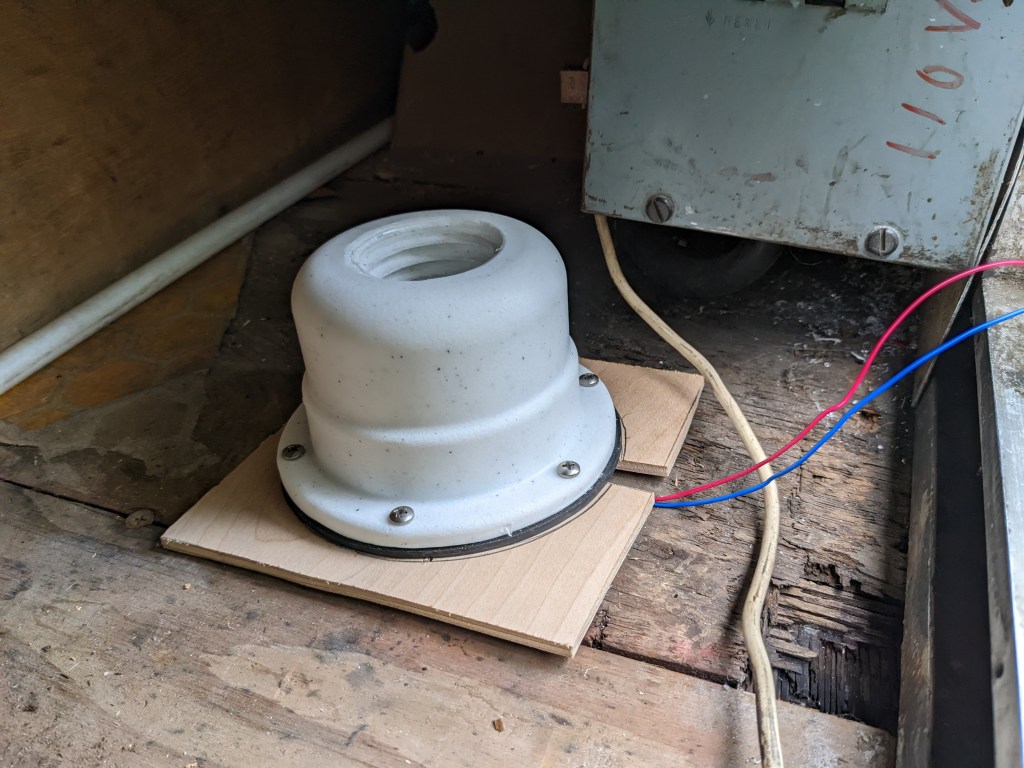
The plan is to vent it out this hole in the floor, which is where we used to feed the electric cord out of the utility area. The rim on this hole stands up about 1/4 inch, which is a little bit of a problem.
So I measured it and cut a 1/4 inch riser for the fan – just enough to lift it up and clear that lip.
I took that out and it fit perfectly over the hole.
Ignore that gaping hole in the floor, it is stable. That is the original floor, everything forward of that was replaced in 2004.
I attached a couple more wires to the fan so it would reach over to the junction block. I wrapped them in a plastic wiring loom to protect them and tucked it into the channel below the door opening, and fastened them down to the floor.
Over at the junction I added them to the last open spot on the fused block, and attached the ground to the ground block. I also finished hooking up the 12v plug over the bed and got it plugged in and fastened down as well. I don’t want anything shaking loose while going down the road.
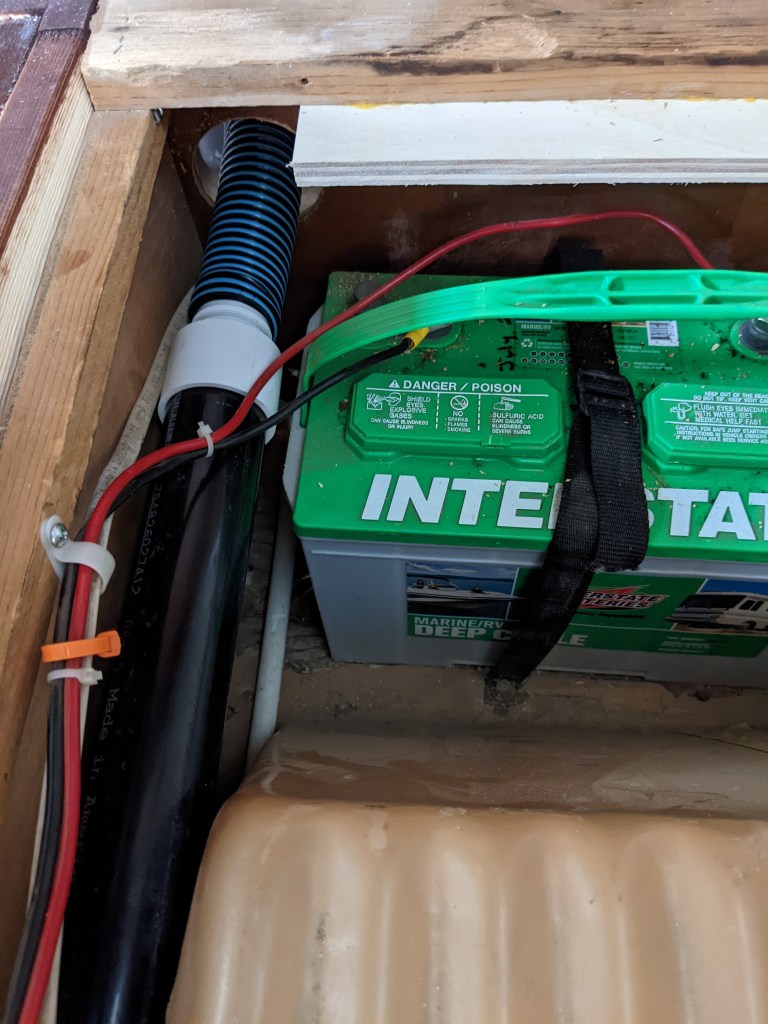
I know it looks chaotic, but it’s all pretty stable. The stupidest thing there is that towel, which I put there to soak up some water from a tiny leak in that water hammer device, but putting the towel under it lifts it up just enough that it makes it stop leaking, so as long as the towel stays there, everything stays dry!
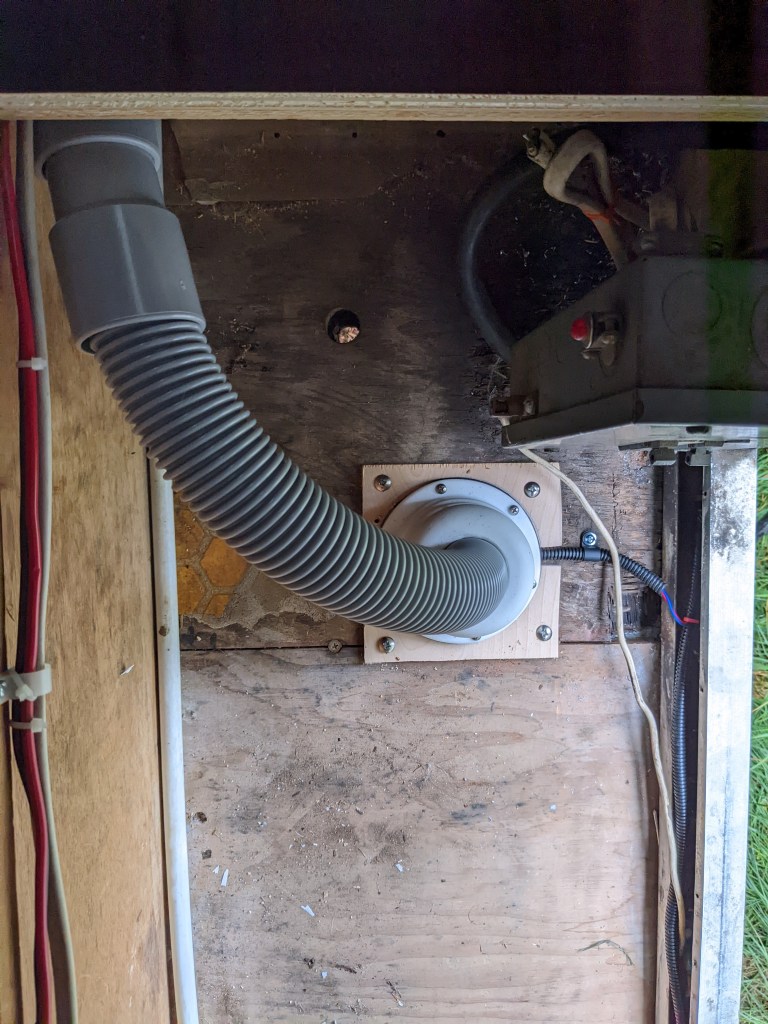
Looking down on my new fan install, I was able to hook up the vent tube, which goes to a section of hard PVC back to the battery compartment:
The flexible tube then goes through the wall into the closet:
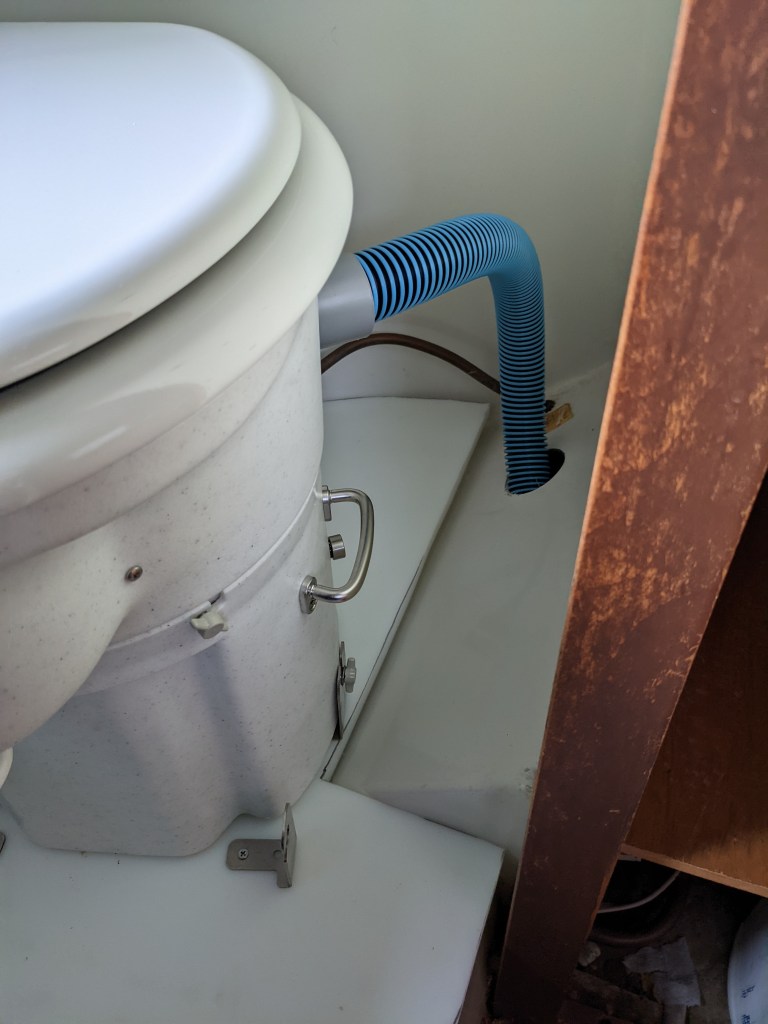
And goes out through a hole I cut in the fiberglass bathroom shell to the toilet. And I’ll just add that hole was hard to cut, in fact the hole saw gripped that fiberglass and STOPPED and the drill body turned so hard I thought I’d sprained my wrist, but it seems to be ok. Scared me though! I turned the clutch way down on the drill to stop it from doing that to me again as I finished the cut, and went at it very gently.
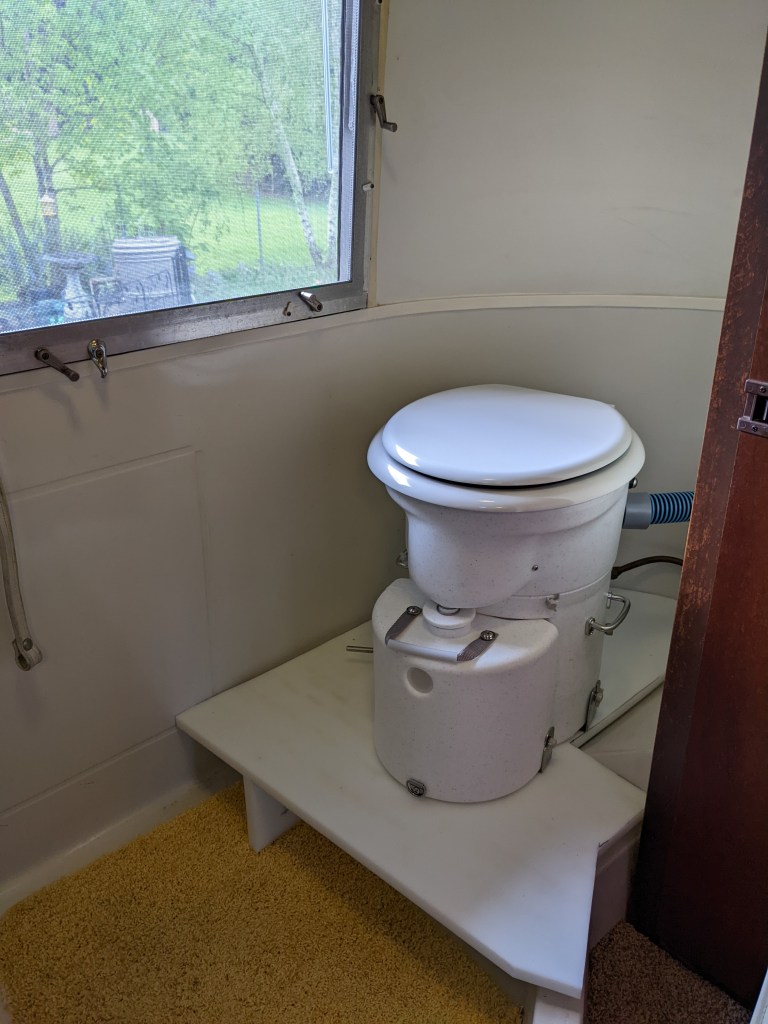
And then the vent attaches to the composting toilet. The fan at the other end will pull air from the toilet, to help keep the composting container at the right level of moisture. It’s also supposed to help keep bugs from finding it. There are screens on both the intake on the other side of the toilet, and inline in the ventilation hoses close to the fan. So that completes installation of the composting toilet.
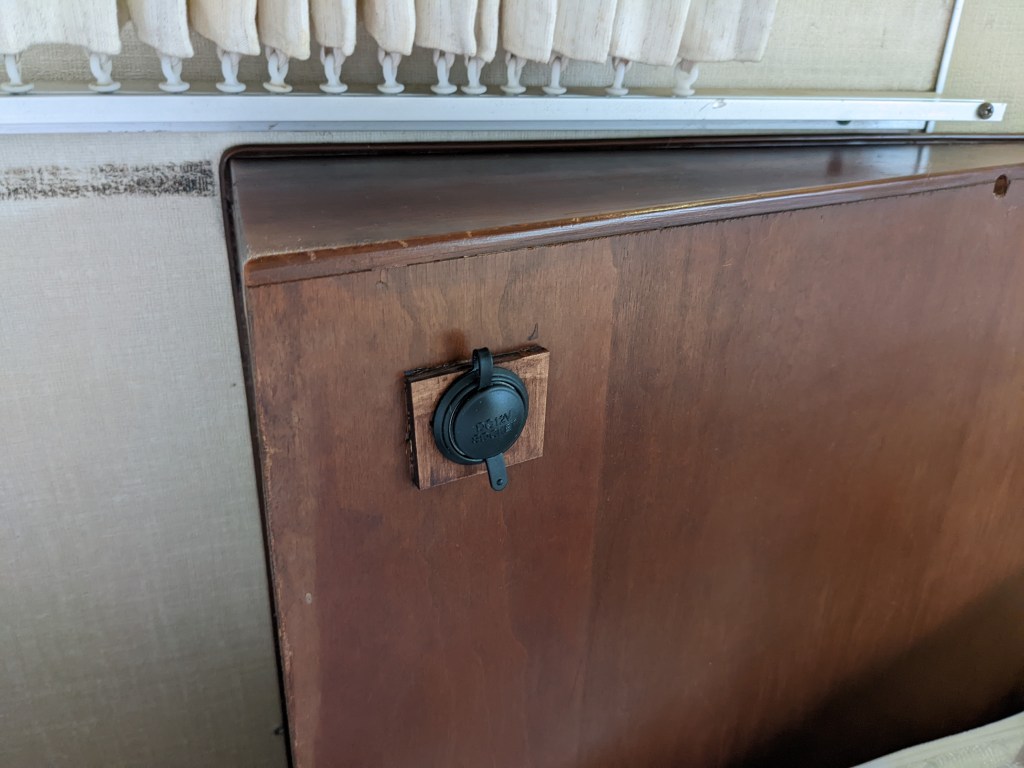
While I was hooking up the fan, I looked over and decided that the new electrical outlet needed to be sealed around the edge to help keep water from leaking in and getting inside the walls. So I carefully put a bead of Par-Bond around it, which is an aluminum colored sealant.
The cushions arrived last week, so now that everything is finished, I can do a quick clean up, get the water refilled and check for leaks, and put everything back together.
Let’s talk about toilets! Our Airstream’s original owners manual from 1968 explains how to find a campsite by pulling up to a farmer’s house and asking them if you can have a spot in their field for the night. And it also tells you how to dig a ‘gopher hole’ and put your trailer over it so the black tank can empty directly into it! And because this is how they camped in 1968, they must have thought they wouldn’t need a very big black tank – 8 gallons ought to do it.
Well, in this modern world where you can only dump at dump stations, 8 gallons is not going to last you very long when camping without hookups, which is how we usually camp since we frequent State Parks and other semi-wild places. Even when camping for a long weekend at Trout Lake, the toilet would be full by the end of the trip. It was definitly limiting how long we could stay without needing to hook up and go find a dump station.
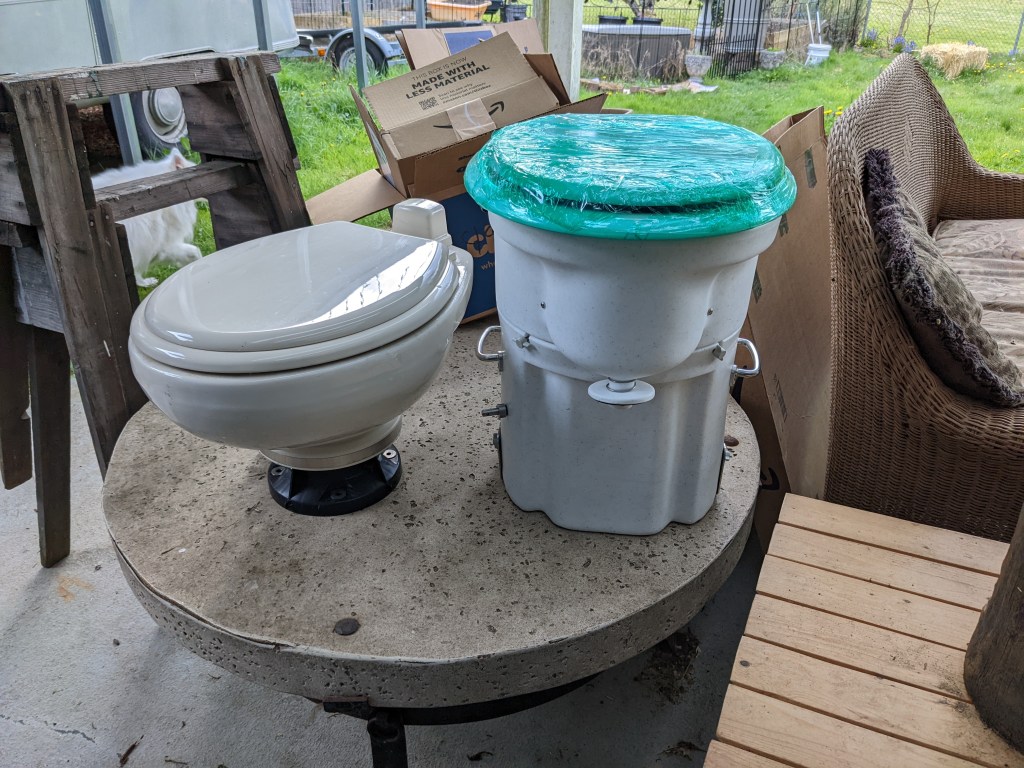
Over the years I have heard more and more people talking about Composting Toilets. Most people sing their praises, and say they would never go back. Years ago when I first started looking into it I discovered Gone With The Wynn’s videos about their composting toilet on their RV which they used fulltime.
I was pretty convinced that this seemed like the thing we needed to free us from Black Tank Anxiety on our trips. From what I was hearing, although you still have to empty the urine tank regularly on trips, the poo tank can go all summer for people who are only occasional weekenders, as we are.
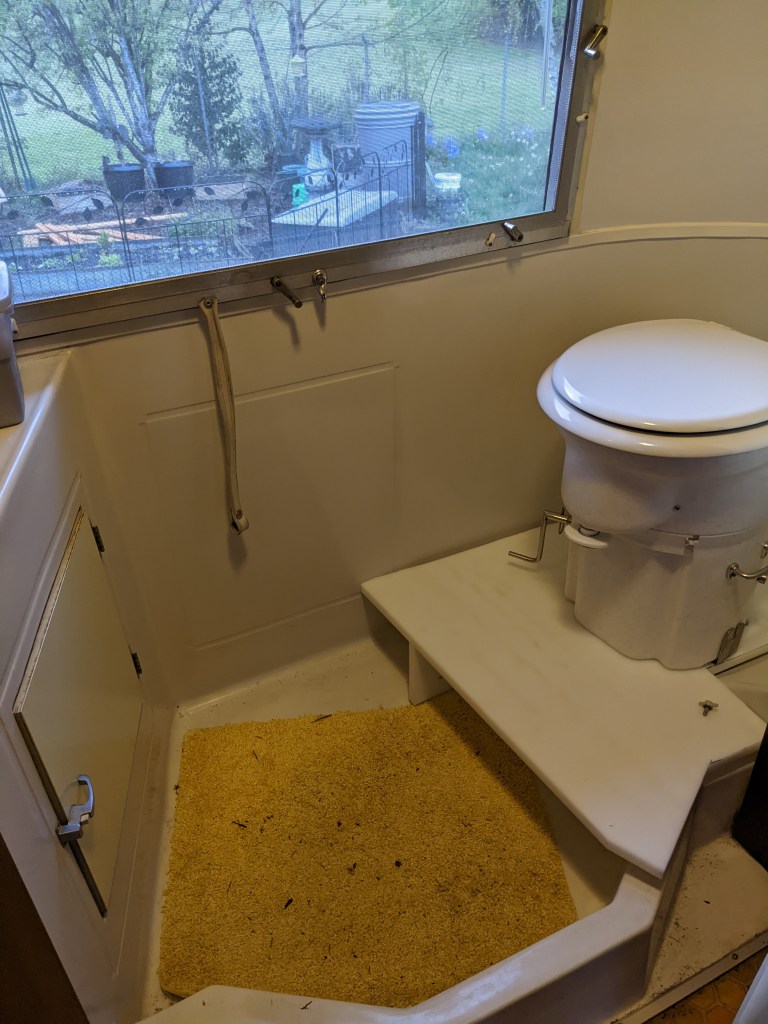
So last year I ordered an AirHead Composting Toilet. There was a long wait to get it delivered, but that gave me time to ponder how to install it. The bathroom in the Caravel is small, and the black tank is above the floor, and the bathroom has a fiberglass shell that goes above it, and the toilet sits on top of that. So the toilet is up high, and the composting toilet is even taller. I was going to need to not only mount the toilet somehow, but I would need a footrest as well.
The other consideration was that I did not want to permanently change the original toilet mount. Because I might end up hating the whole composting toilet thing! Or I might sell the trailer someday and the next owner might not want a composting toilet. So I wanted to mount this in as non-destructive a way as possible.
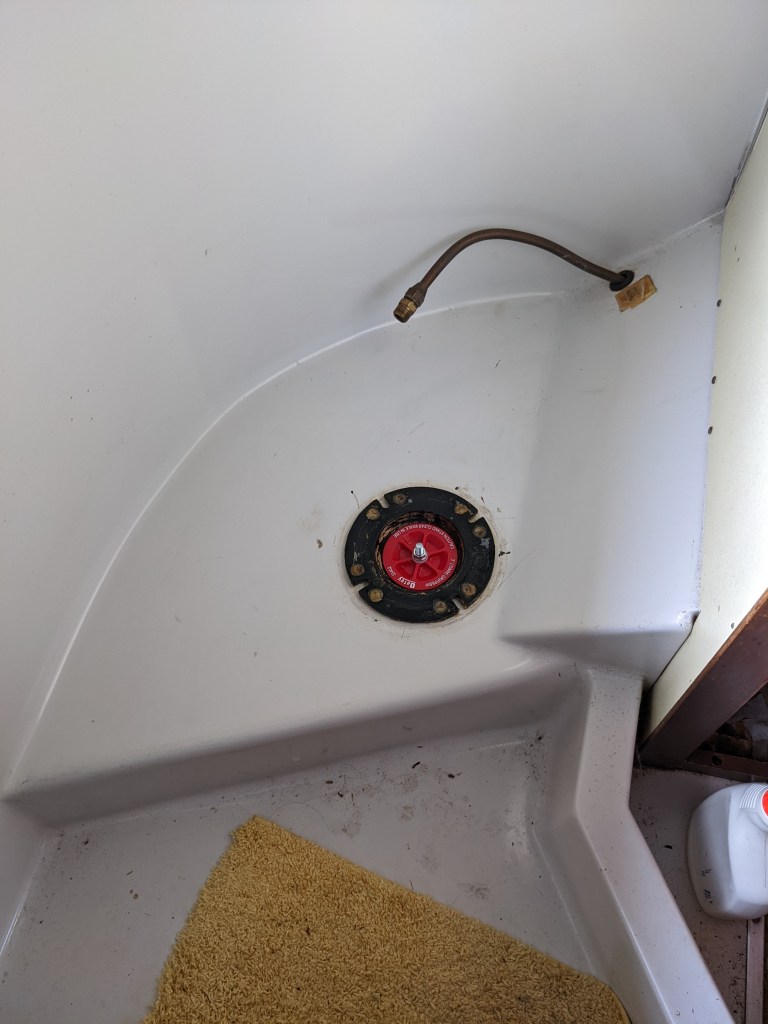
I removed the toilet and plugged the hole with a device that is made for pressure testing pipes, but it worked just as well to plug that hole, and it tightens down, so it was sealed.
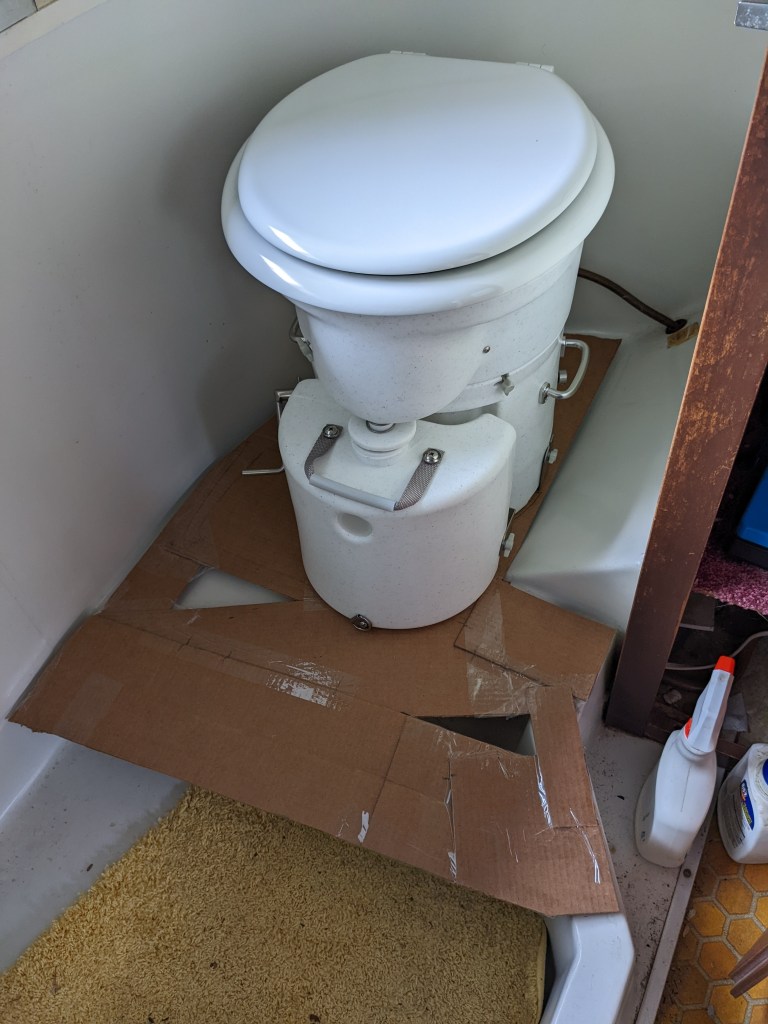
I started plotting how the toilet was going to fit in this space. I used cardboard to mock up a platform, and tried it on to see how it felt to sit on it. I wanted to push the toilet back farther, but you need a little room to move around, so really it had to come forward a bit. Also you need room to turn the crank on the side.
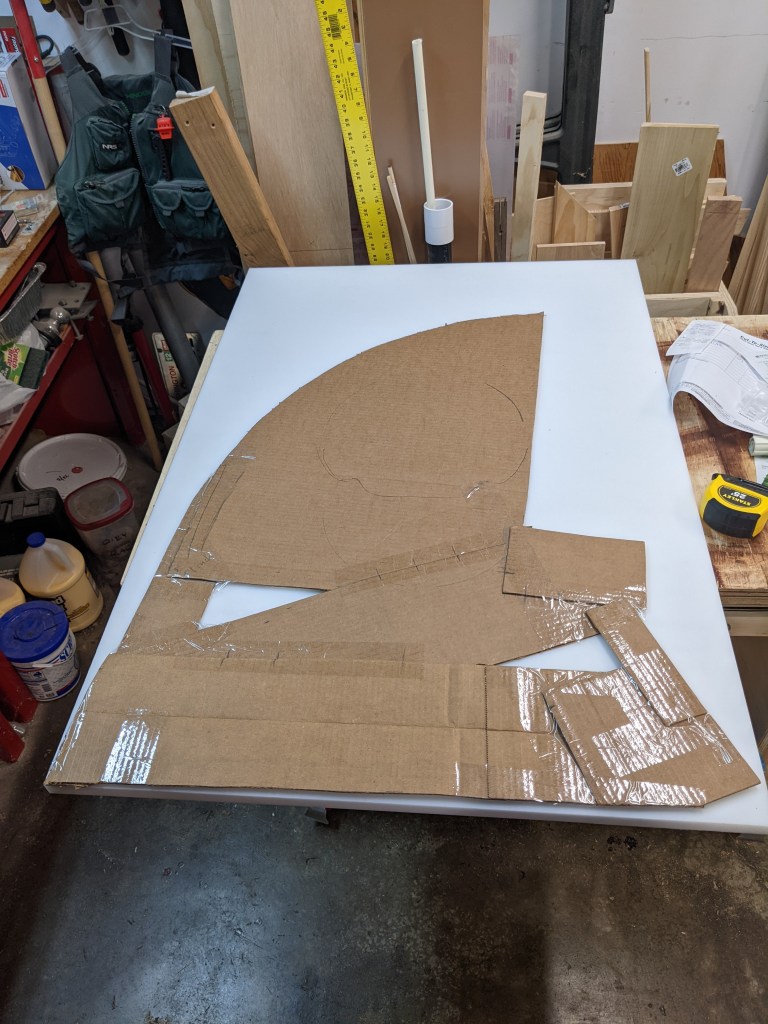
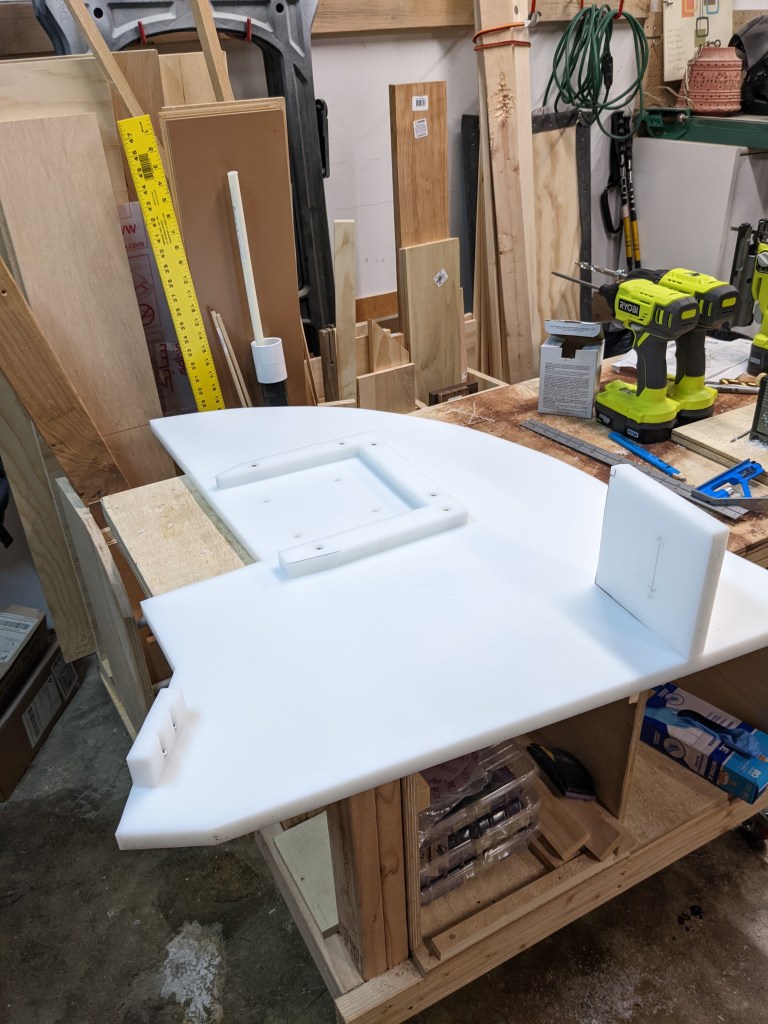
I was concerned about building a platform out of wood because it is bound to get wet from time to time. There is a place over in Portland called TAP Plastics, which is where I got the thick Lexan for my front window guard. I went over there with my template and talked to them and ended up buying a 3/4 inch thick industrial cutting board plastic. This stuff is very stiff, it doesn’t flex at all, and it can be cut and drilled like wood, and of course will be easy to clean and sanitize. It is waterproof, so if we wanted to take a shower in the wetbath (we never do, it’s too small), it would not get damaged.
I cut it to shape, and built a support to lift it up above the existing toilet flange. Then I added a couple supports for the footrest where it will be touching the existing fiberglass tub.
I mounted it using the same 4 screws on the flange that the original toilet mounted with. I made inset holes enough for the nyloc nuts to be recessed so the toilet can sit on a flat surface. Then I mounted the toilet/urine bucket brackets, and screwed the whole thing down. It is nice and solid.
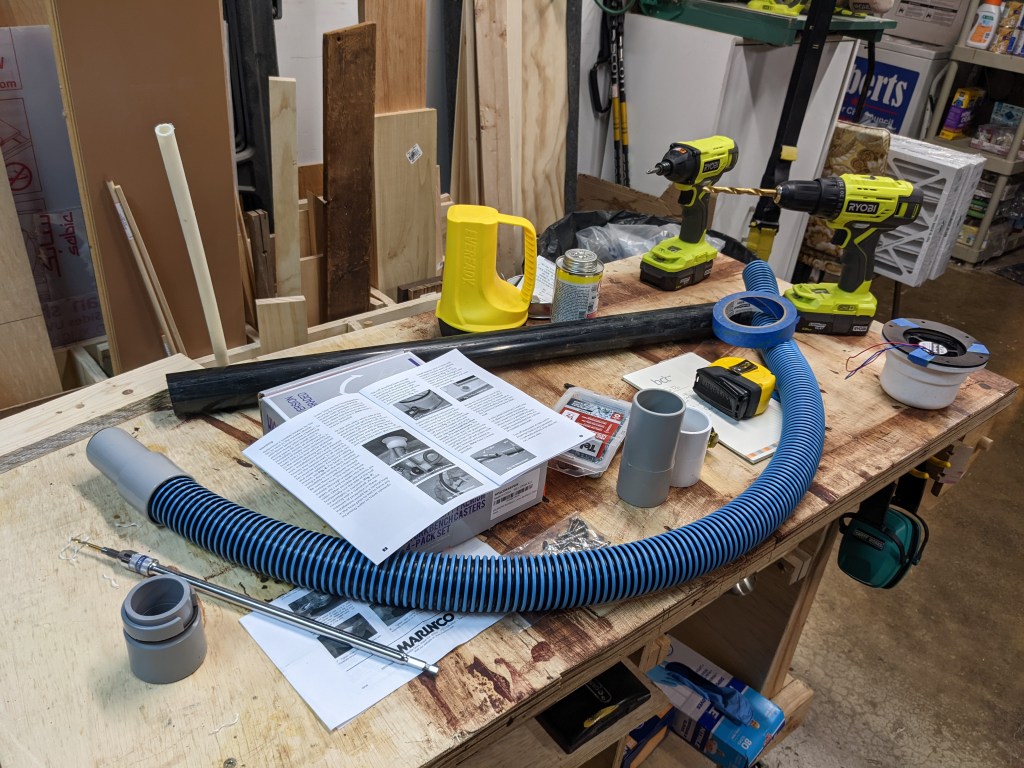
Next I have to figure out how to mount the venting tube so it can vent out through what used to be the electric cord hole up in the utility area. Looks simple enough!
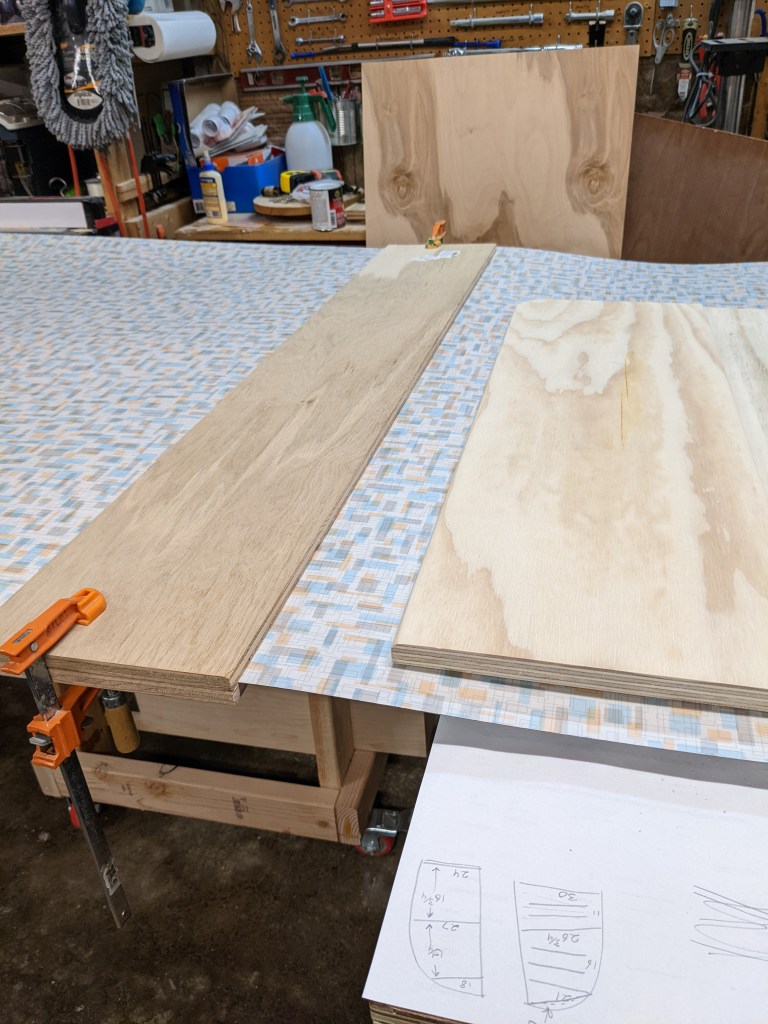
After I got the other new pieces of woodwork done, I was so impressed with the color of the new gel stain, and so disappointed in the color of the stain/poly blend I had used on the drawers, I decided to pull them out and re-do them. I wanted to get them right before I fastened the new pieces in place.
This stuff is THE STUFF!
You can see how dark these are comared to the wall, which is original.
I sanded everything down with 60, then back to 120, and then applied the gel stain. After wiping it off, I was much happer with the color.
I continued sanding them down between coats of poly, all the way to 400, then rubbed one final layer of poly on by hand. It is smoooooth now!
One other problem was the dinette seat closest to the bathroom was sitting on the edge of the wheelwell cover. This tipped it forward slightly. Since I had it all back in the shop, I took a dado blade and took off just a bit of the back of the frame to make room for the wheelwell lip, and it worked perfectly. The frame fit back into the trailer nice and flat.
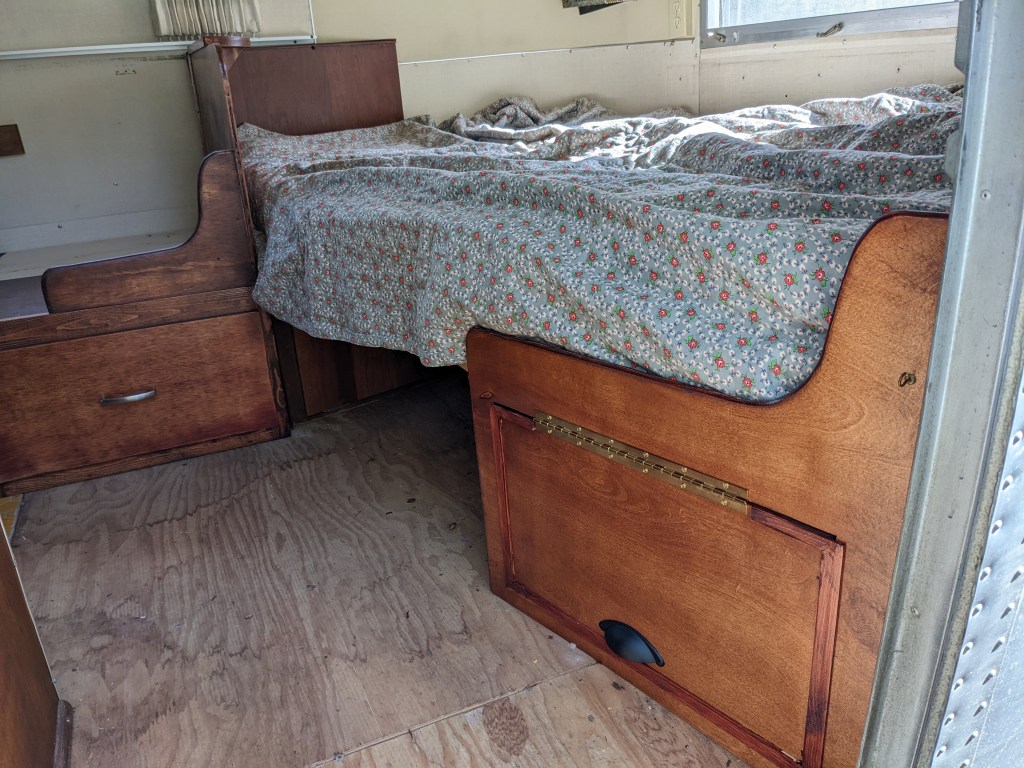
Now I was able to reinstall them and install the backrest for the right side. The stain colors match really nicely!
The backrest matches nicely to the existing headboard.
And the piece by the door looks good and fits nicely.
That is all the major woodwork. Now I need to find some carpet.
There are a couple small electrical tasks to go along with this remodel. One is to put a light over the table, because nobody wants to eat dinner in the dark. The other is to install a 12v port by the bed so we can plug in our phones to charge them. Oh, and I will need a power source for the fan for the composting toilet. Oh, have I not mentioned the composting toilet. Oh yeah, we’re going to be doing that too.
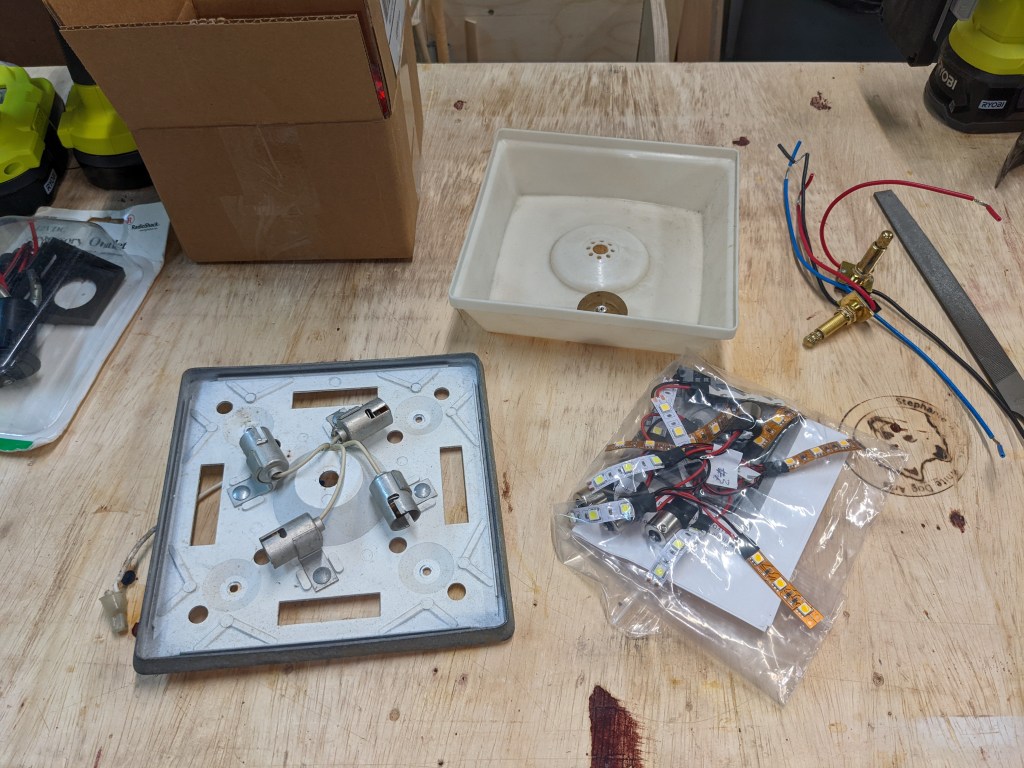
I really got lucky with the light, because the Airstream has these nice square ceiling lights. I have three original ones, which I converted to LED a few years ago. Also a couple years ago, back before the pandemic, a friend with a 68 Airstream was cleaning out some extra stuff and gave me an extra light fixture. I didn’t needed, but she insisted, so it’s been kicking around my garage for a couple years. Well, well, it is exactly what I need now!
I contacted Dan at https://led4rv.com/catalog/index.php and ordered another LED set for the light – but he was out! Supply issues, you know? But when I told him I had hoped I could get it to match my other three lights, he scraped up the parts and put one together just for me! How awesome is that?!
I also had to order a couple 3 way switches, because this fixture didn’t have one and the one in the bathroom light had been acting a little funky for a while, so I got those from https://www.vintagetrailersupply.com/ because of course they are hard to find since they have a non-standard extra long post to fit this fixture.
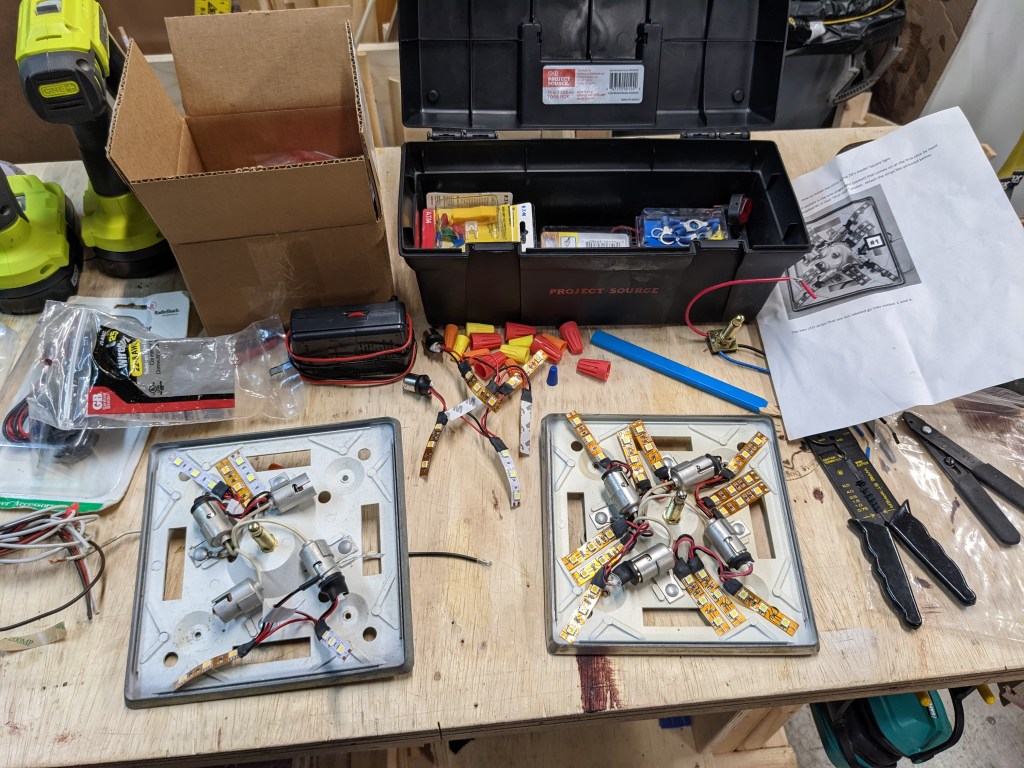
It was handy to have the bathroom light out for switch replacement anyway, because then I could look at it to figure out what to do with the LED setup.
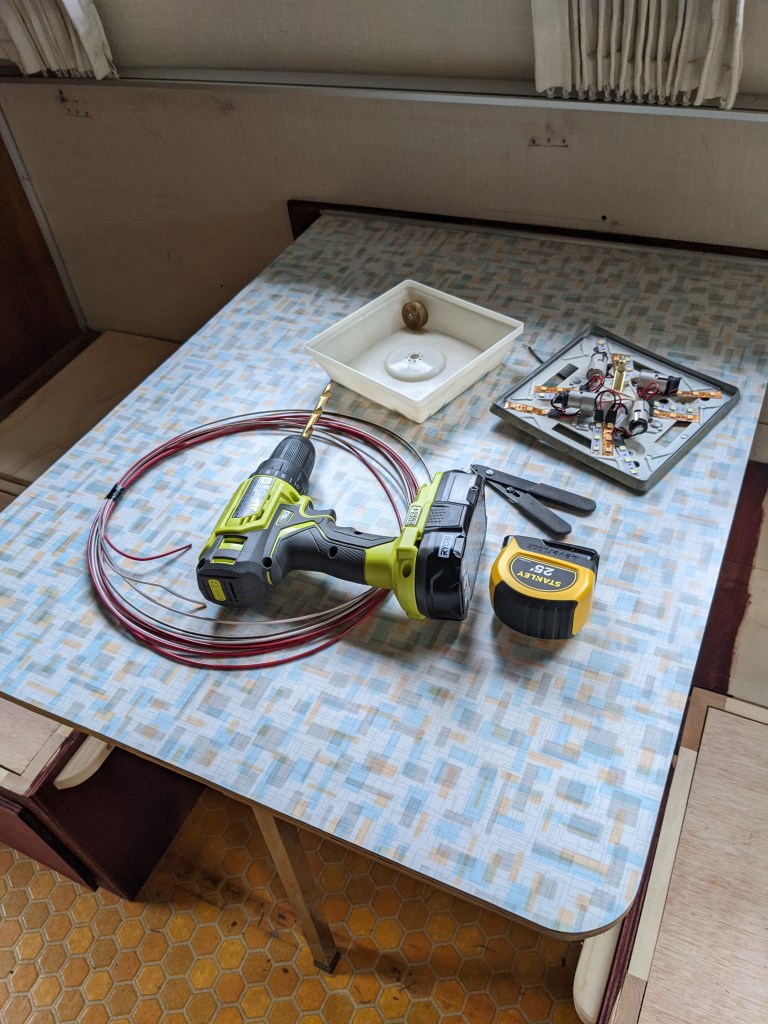
Out to the trailer we go, ready to run some new wires.
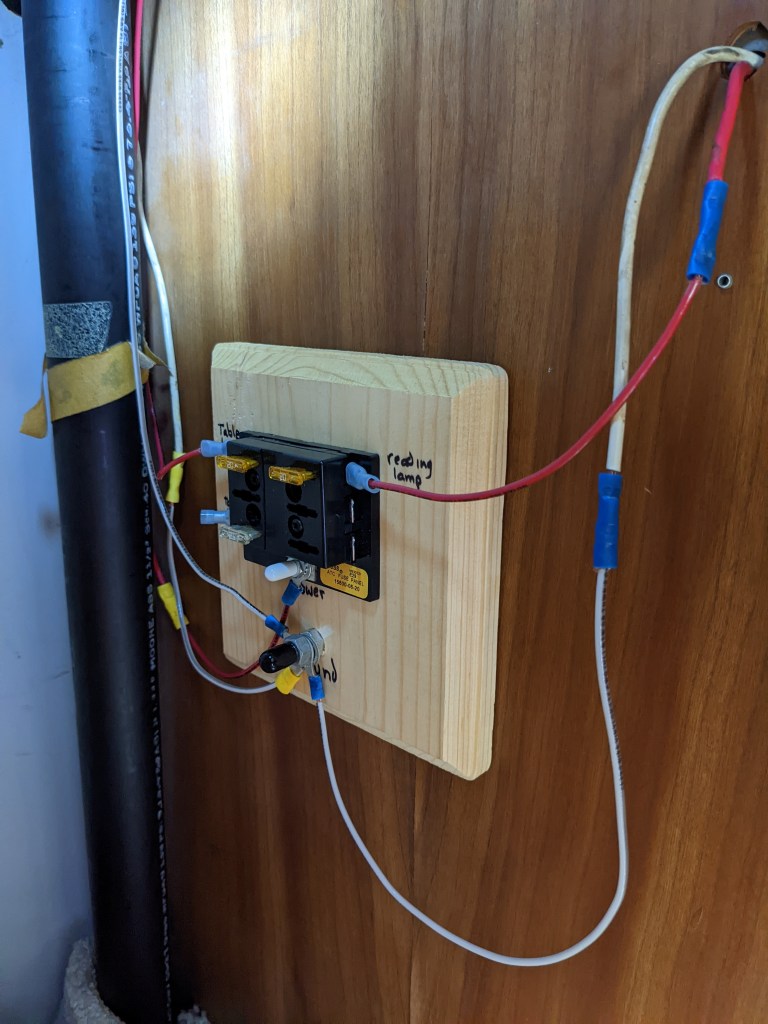
Oh, I hated to do this, but it had to be done. It will be hidden under the new fixture. I ran the wires through the upper cabinets back to the closet, where I planned to steal some power from the reading lamp. But then I realized the reading lamp wires were not long enough to splice into, and what I really needed was a junction box. This way I could take the power from the trailer, and split off the table light, reading light, and future composting toilet fan. It’s not as chaotic as it looks. I might tape those wires in place though. I don’t want anything in the closet to get tangled in a wire and pull it loose. Getting those crimp connectors on all those wires to extend them to the new junction box definitely was a challenge though. The closet is only a foot wide!
Functional light over the table!
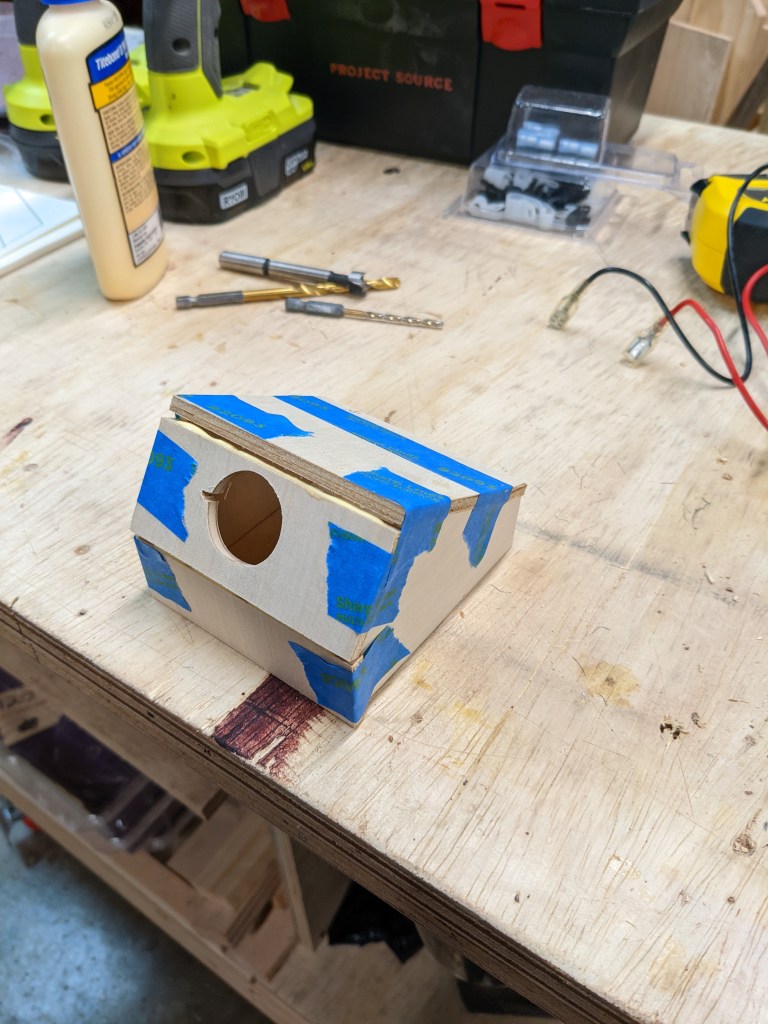
For the 12v Power by the bed, I started out by making this super complicated little box. Then while waiting for it to dry it suddenly became clear what I should do, and I just drilled a hole in the original piece of woodwork at the head of the bed and put it there. The wires drop straight down to the front junction block, where there was an open slot just waiting for it. This is going to be hidden under the shelf of the dinette seatback.
I don’t know why I try to do things the hardest possible way sometimes.
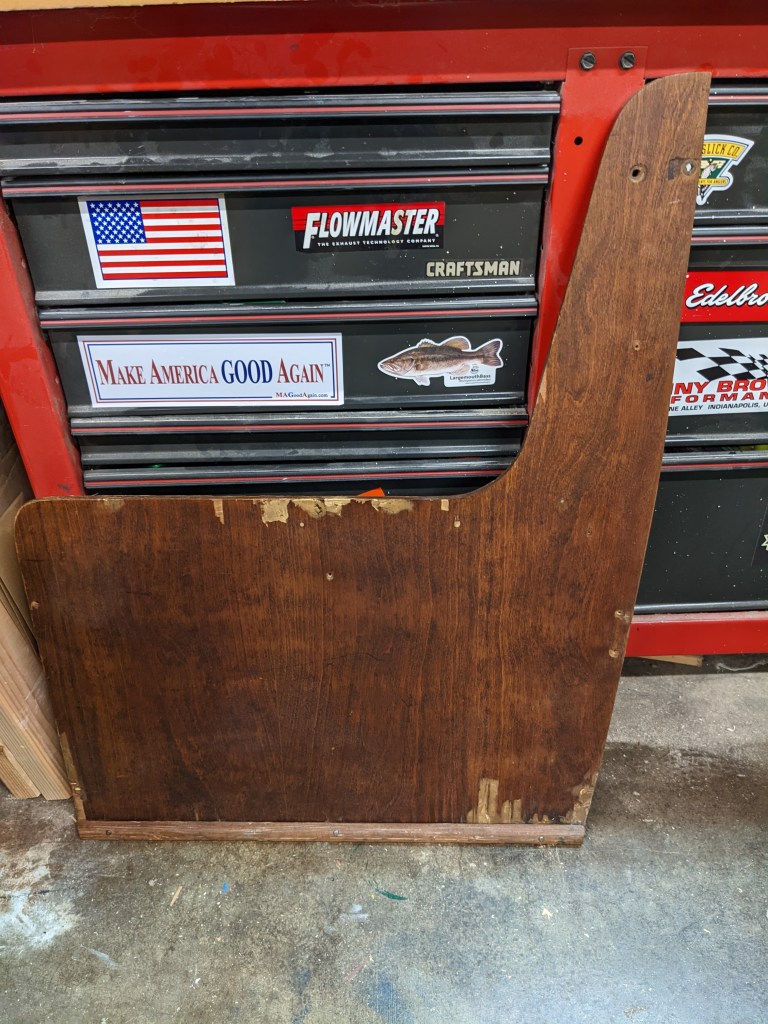
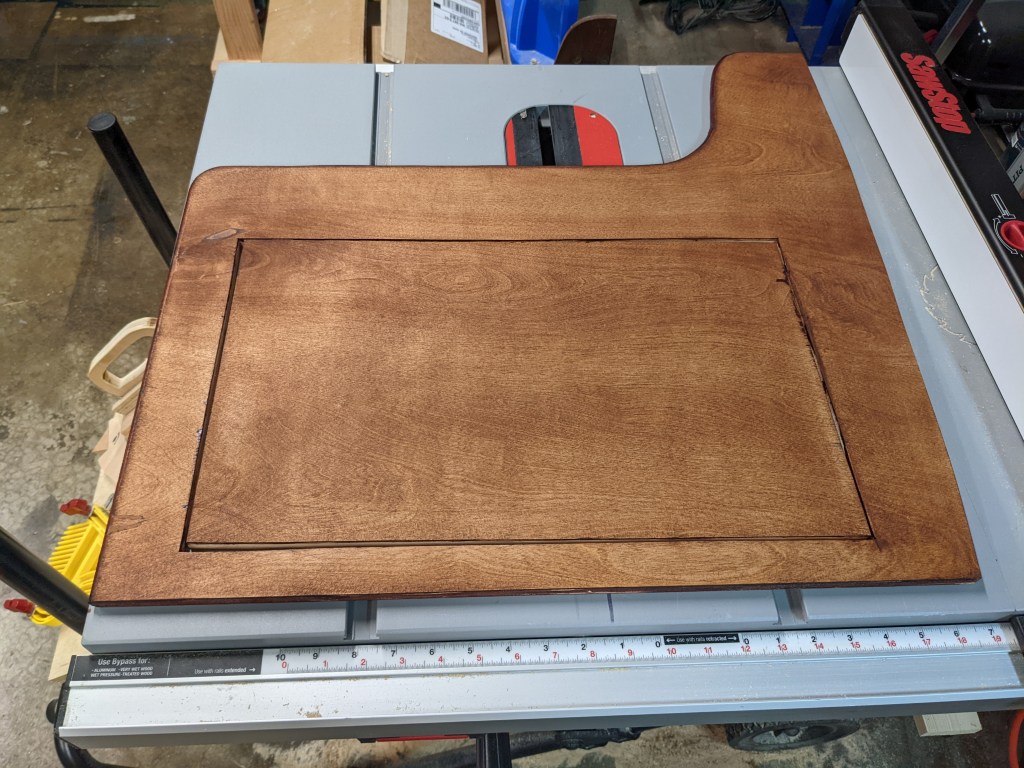
This remodel has required a few new pieces to be built around the new layout, and this one piece by the door, which used to be the end of the original dinette, just needed to be replaced, and pretty much has needed work since we bought the trailer, so it is finally getting replaced. It had many extra holes in it, old repairs, and was delaminating.
I used it as a template to cut out a new one, but with a shortened top. It doesn’t need to hold in a back cushion like the old one did, so it can be a little shorter. Also, I have always wanted a door there to access the stuff in that storage area. I need to get in there pretty much every time we set up, because I need tools out of the toolbox I keep there.
I stained it with the same all-in-one stain/poly I had used on the dinette seats/drawers, but for some reason it came out terribly blotchy, and sanding and adding more coats was just making it worse, it looked awful!
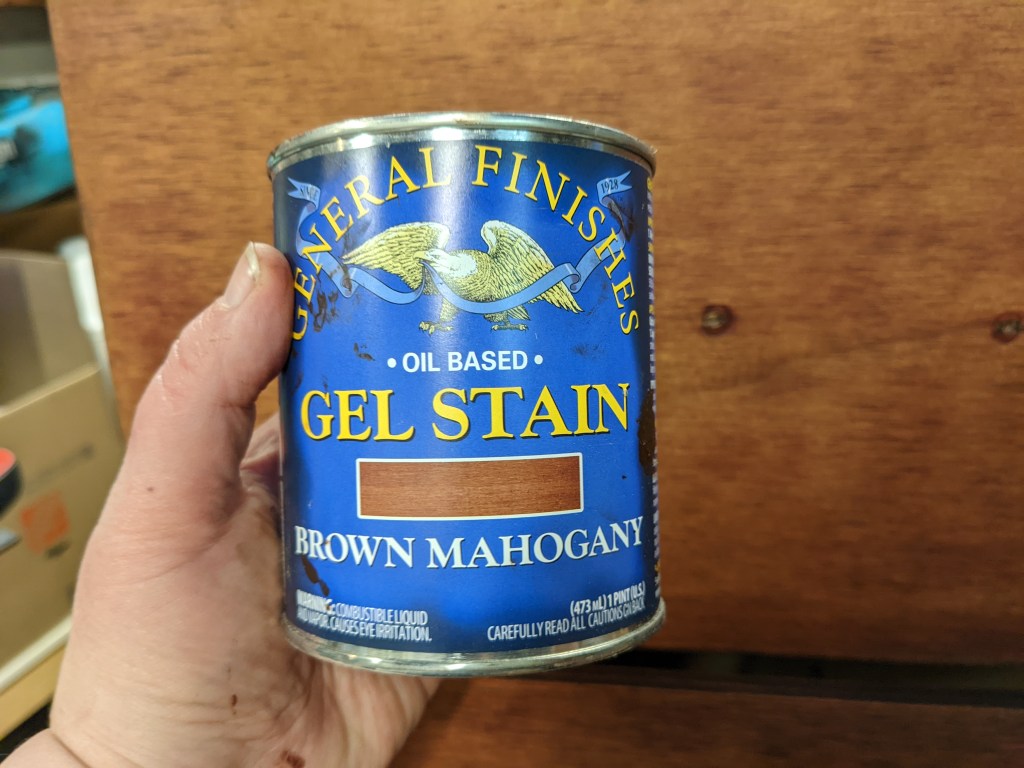
I asked on my woodworking group and one person recommended General Finishes Gel Stain, so I found some in Mahogany on Amazon (couldn’t find it loca) and waited a week for it to arrive. Once I got that in, I sanded the panel with 60/120/220 and then tried the gel stain.
Wow! It’s gorgeous! I was about to give up and toss the whole panel, I can’t believe how nice it turned out!
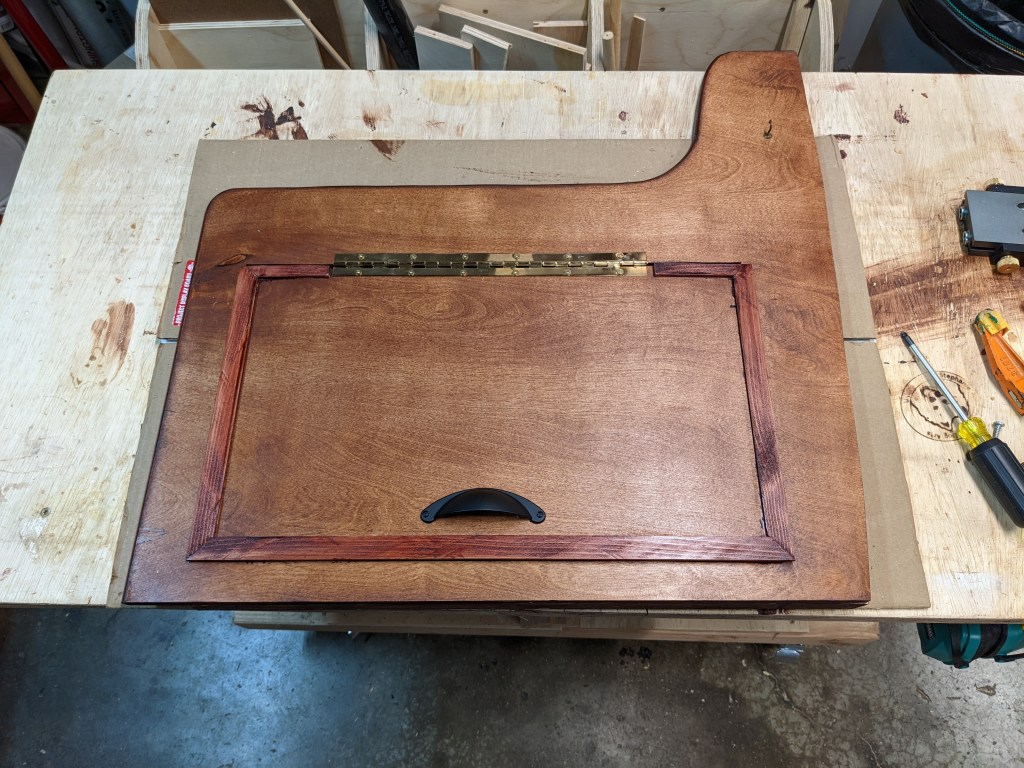
I glued the frame onto the door, and then gave both pieces the old sand-poly-sand-poly treatment until it was really looking good. Added a little hardware, and a few pieces on the back to help fasten it to the rest of the existing framework and the floor, and it’s ready to go in the trailer.
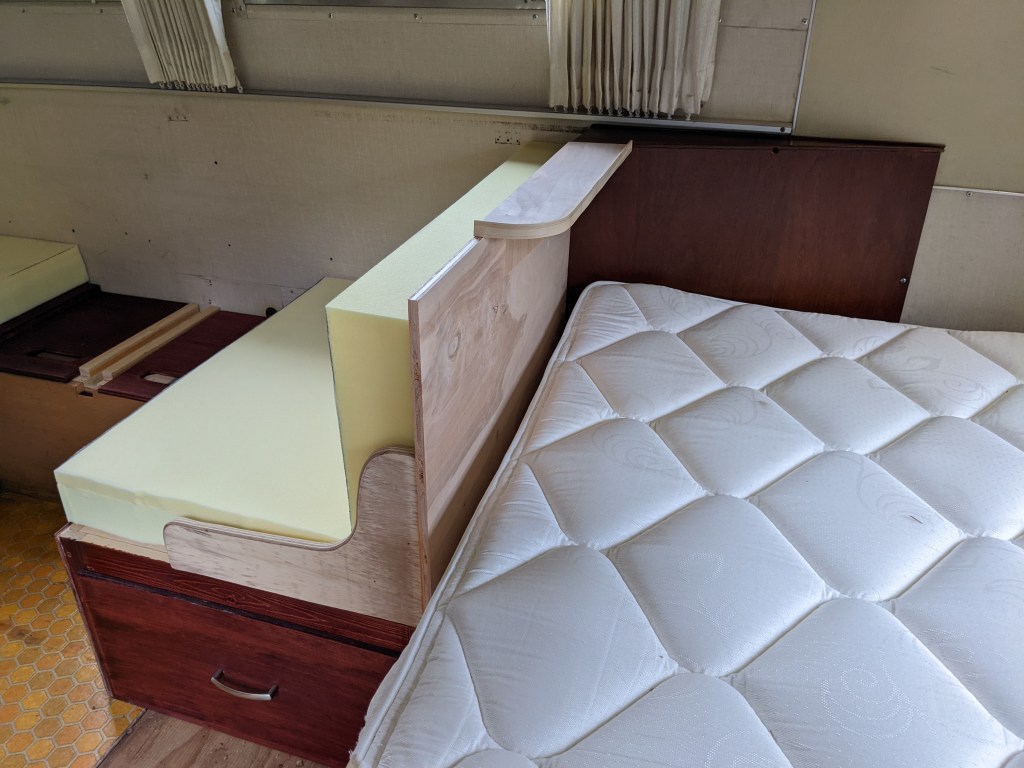
The other main piece is a new item – the backrest for the dinette. One side is the backrest, the other side faces the new bed and will have a shelf to hold phones and glasses. It will mate up with an existing piece of woodwork that is attached to the wall at the head of the bed, which will have a 12v power socket in it for handy phone charging.
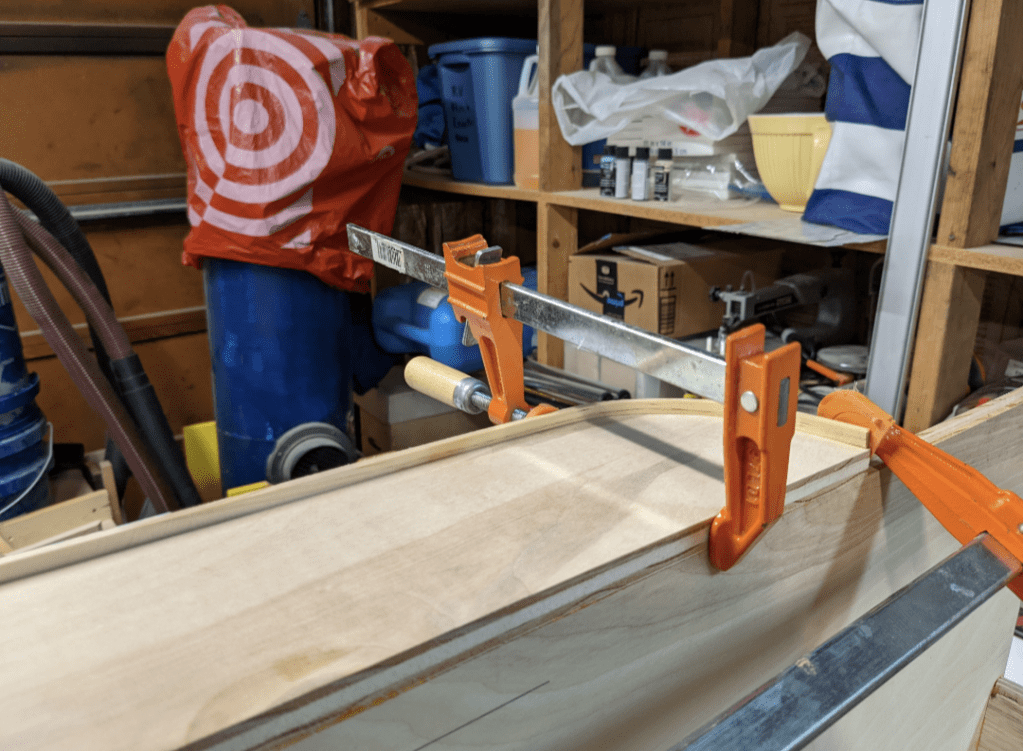
I wanted the shelf to have a little personality, so I decided to make it curved. I cut it out to match the curve on the previous piece, and then took a thin piece of wood and soaked it in boiling water for half an hour to soften it up, so I could bend it to fit the shelf.
My first time bending wood, I was pretty excited!
Test fitting! I decided I didn’t like that pointy corner though. And the shelf needed edging on the flat side too or glasses might fall off onto the dinette side.
Much better.
I held off on staining this one until I figured out the problem with the first panel, so this one only got the gel stain used on it. And it was beautiful.
And then the ol’ sand-poly-sand-poly
Oh yeah, that’s the stuff! Look at that shine! The only problem I had was the bent wood on the shelf – where the clamps had pressed it into shape while drying, the wood did not take the stain well, and it has a light spot where each clamp was. Extra stain didn’t help. It’s no big deal, just something to think about next time I bend wood for something.
So now this piece is also done. It gets some pocketholes on the dinette side, which will be hidden by the cushions, and it is ready to install. Everything is coming together now!
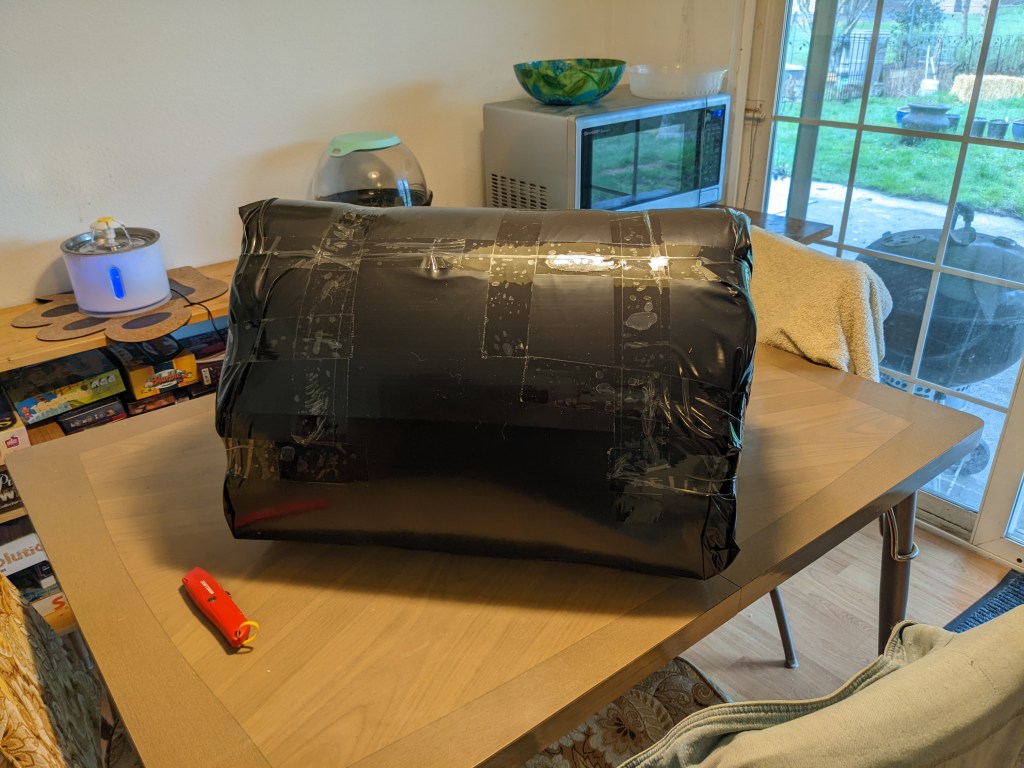
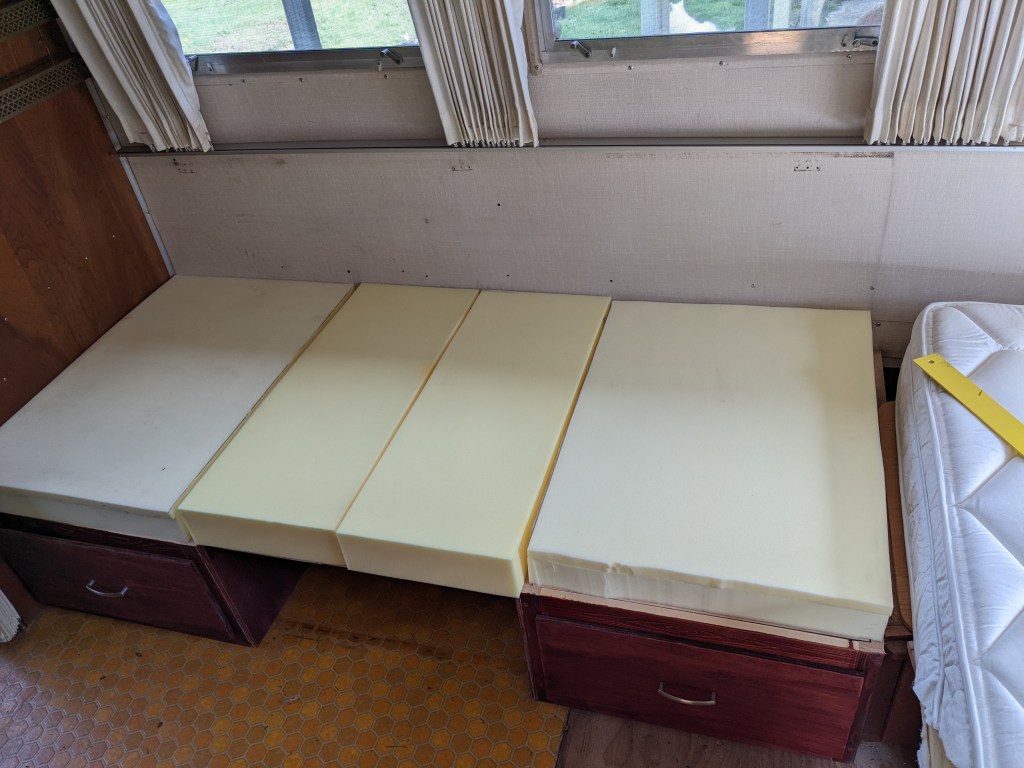
The old cusions were not quite the right size in any direction for the new dinette, so I consulted with friends who had done their own trailers, and ordered new cushions from FoamOrder.com The nice thing about this store is you can enter your exact dimentions and they will cut them to size, unlike some places that sell them like sheet goods. On my friends advice I bought hard foam seats, with a 1 inch layer of soft foam on top, and medium foam for the seat backs.
I carefully unwrapped the bundle and it sucked in a bunch of air and slowly started inflating itself – it was pretty weird!
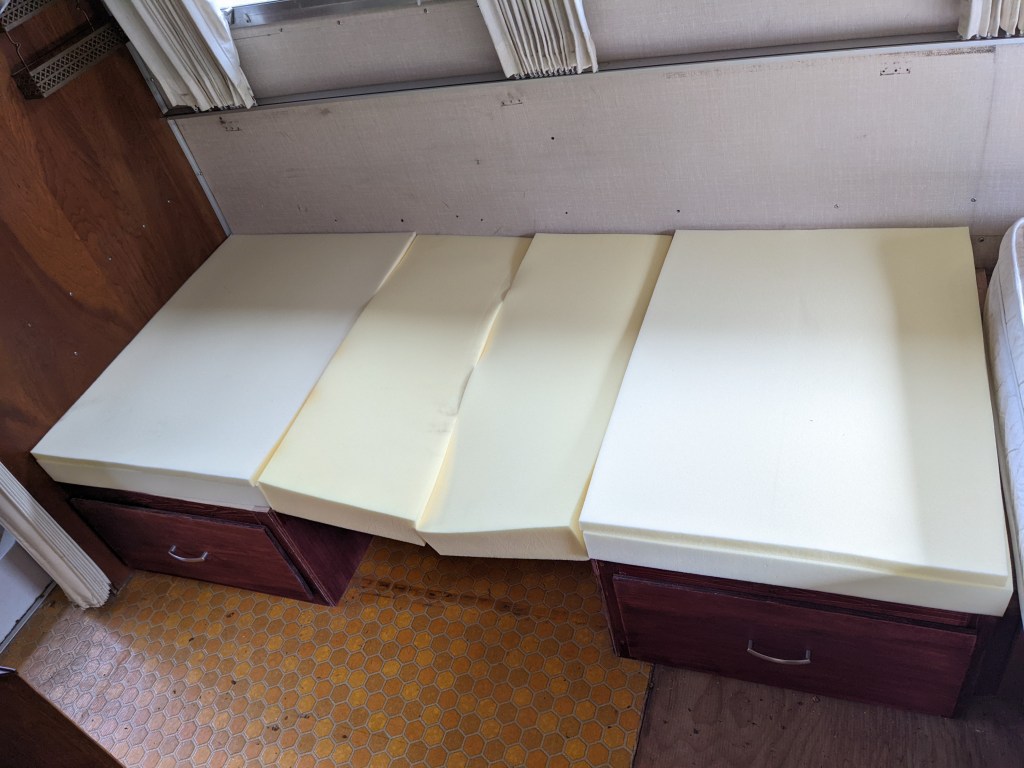
There we go!
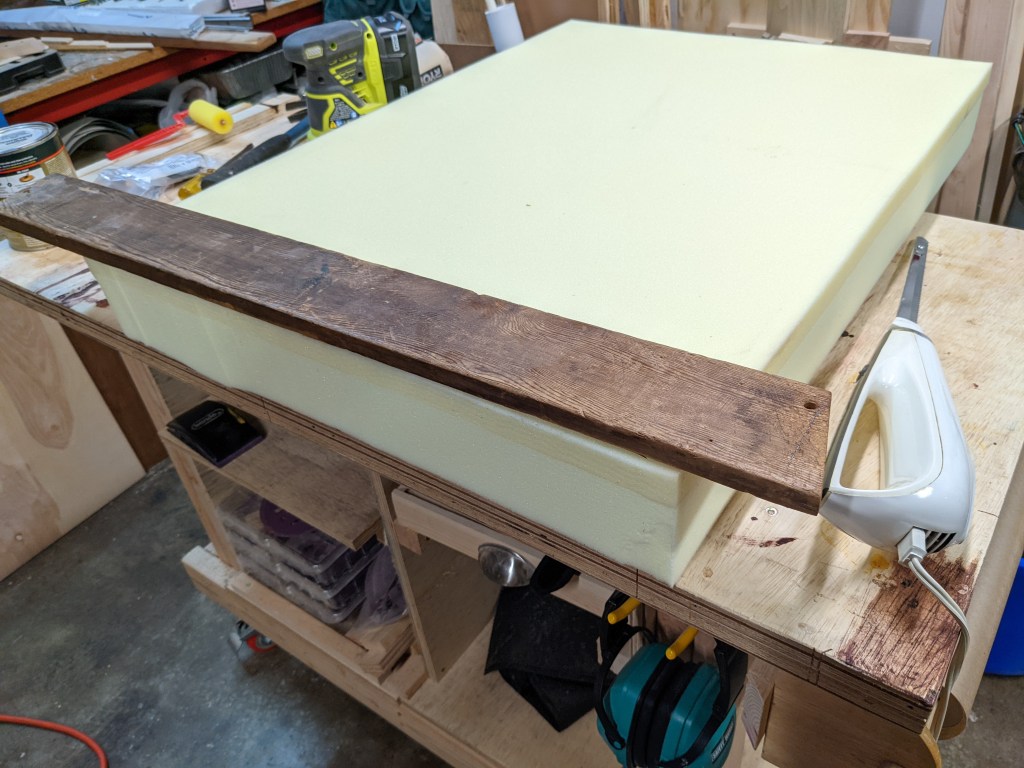
But when layed out flat they are tighter than I would like. I am going to need a little more room once they have batting and fabric on them.
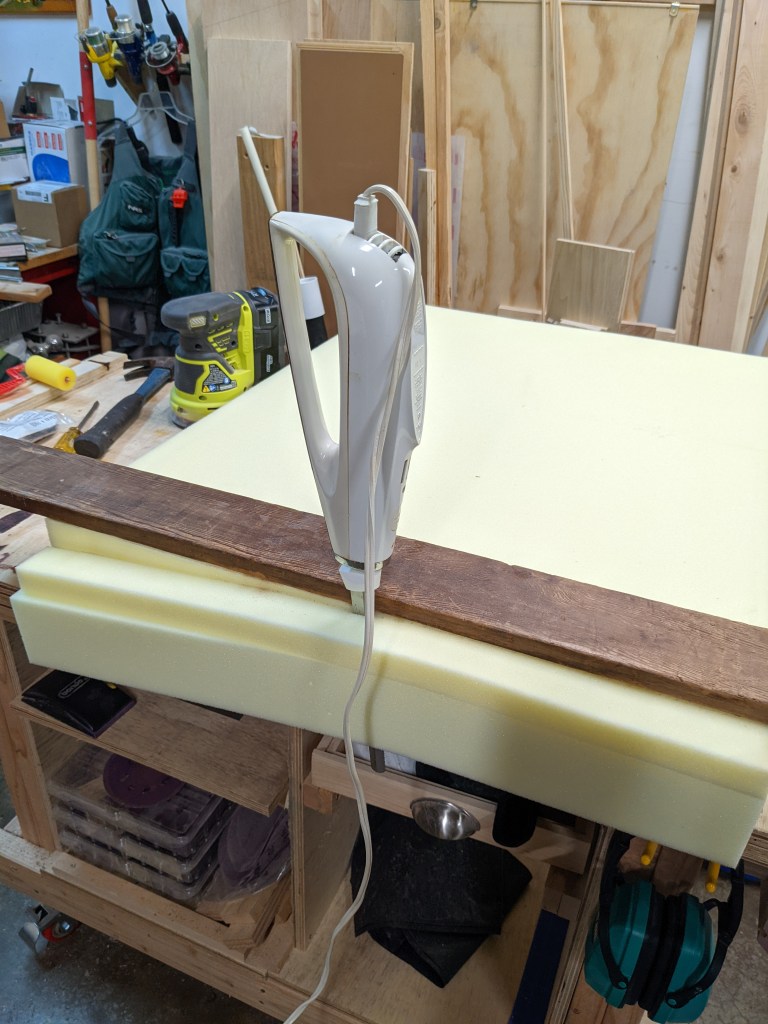
Whipping out my handy-dandy vintage electric turkey carving knife, I lined up the edge of the bench underneith and a guide board on top, and slowly, carefully, trimmed a little off of each seat cushion.
And that gave me just enough room for them to lay flat and have a little extra space around them.
Much better. I think these are ready to go to the seamstress for covers now. I also took her a couple small throw pillows from the fabric store to cover to match the new cushions. I’m super excited to see how they all look!
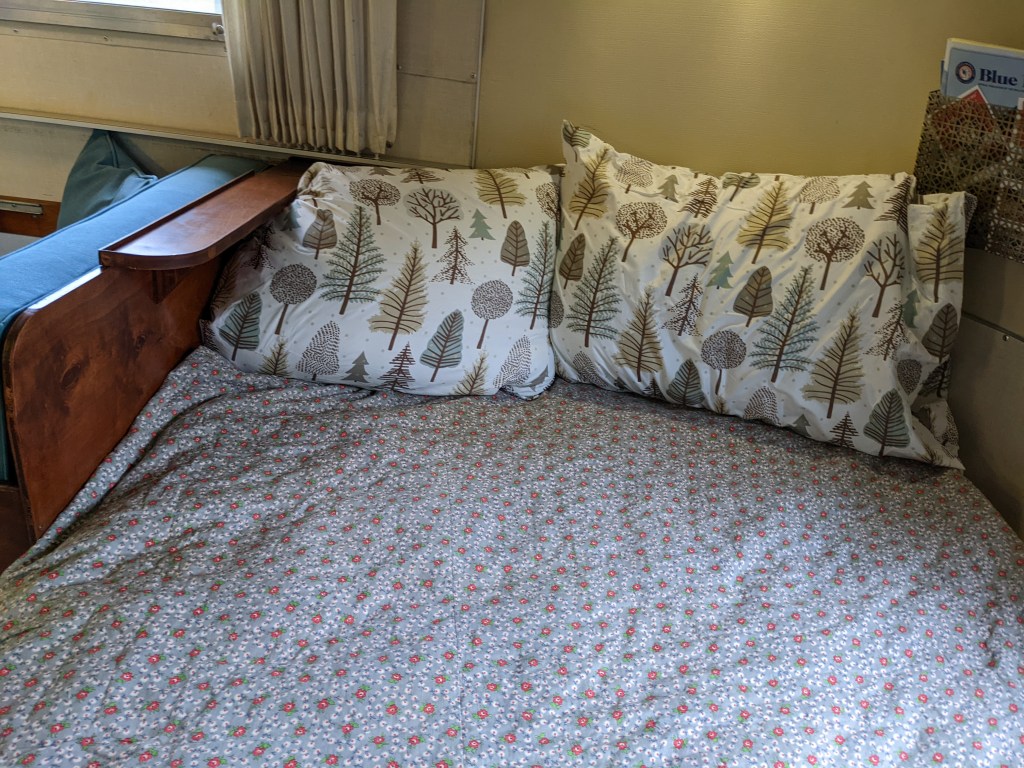
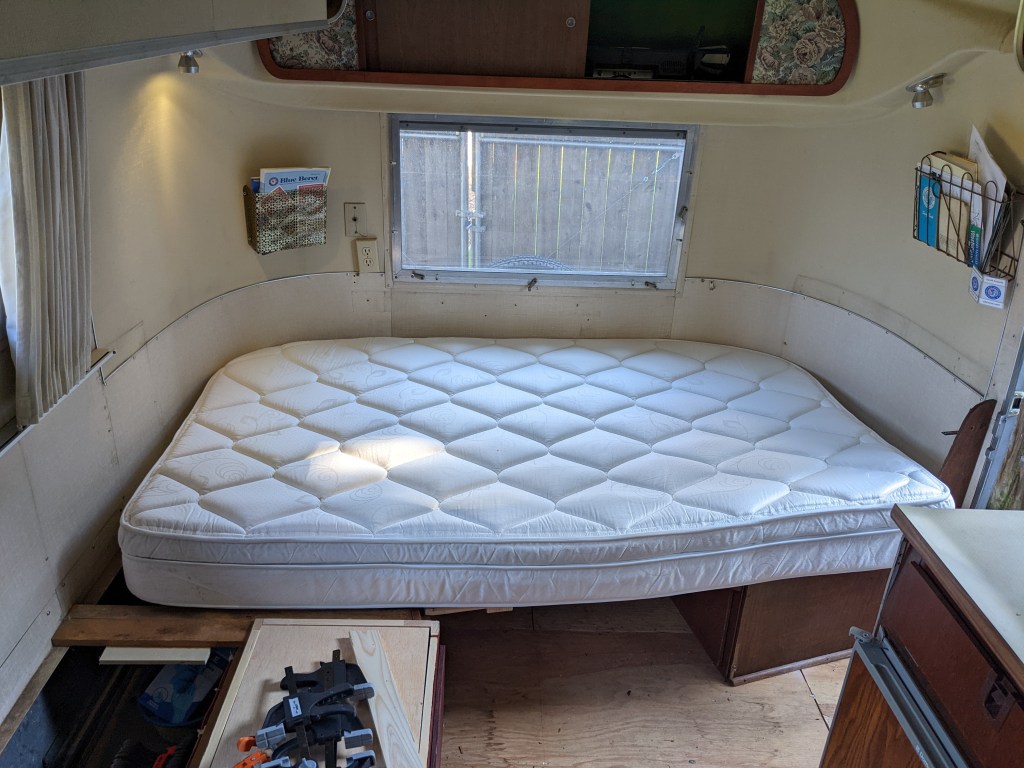
Meanwhile, I think you can see what looks like a matress peeking in on the right. I was getting ready to go buy a double foam matress at Walmart to cut to size when I saw a post on my Airstream Club forum from someone selling (for cheap) the original matress from their 16ft Airstream. That caught my eye because I know the 16s have their matress in the end of the trailer, so it has two curved corners, which is just what I needed. We drove to Salem, Oregon and snapped that up. Brought it home, dropped it in place and …
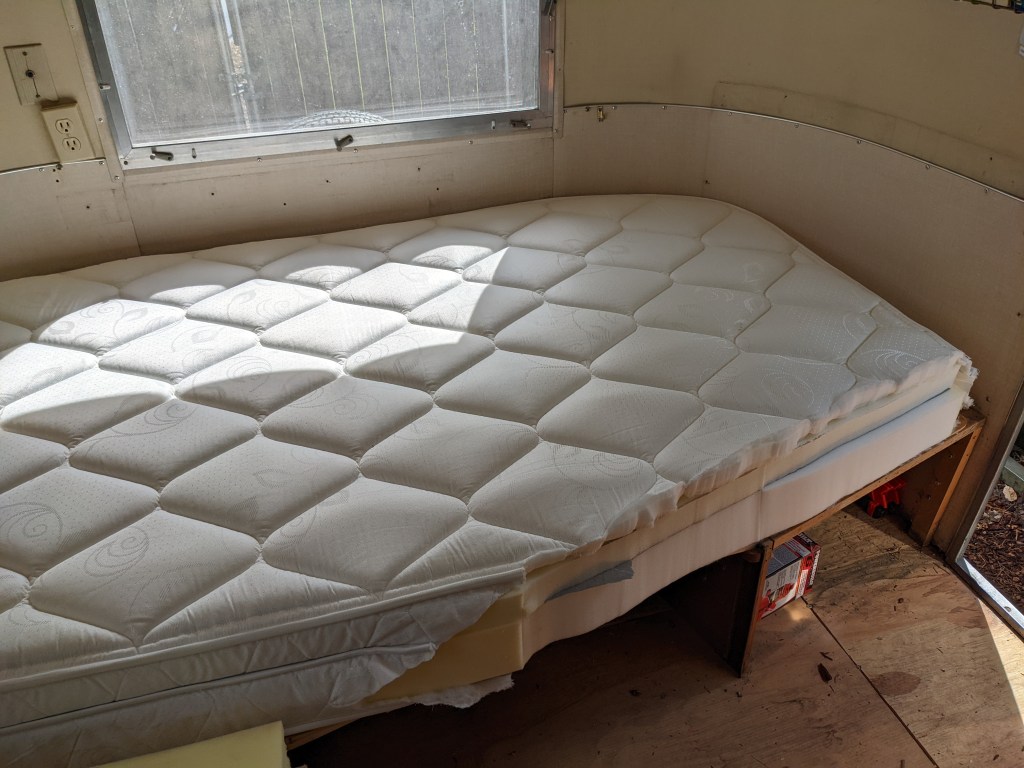
Well, that is almost perfect! Let me get my handy-dandy vintage electric turkey carving knife…
Perfect! This looks ugly, but it will all be hidden under the bedding.
I made a lift-up center section to access the storage underneath, using the original table as a pattern.
I have a couple gas struts to fit on this to hold it open while we rummage around in storage. Im saving that for when the big stuff is all done. Getting close!
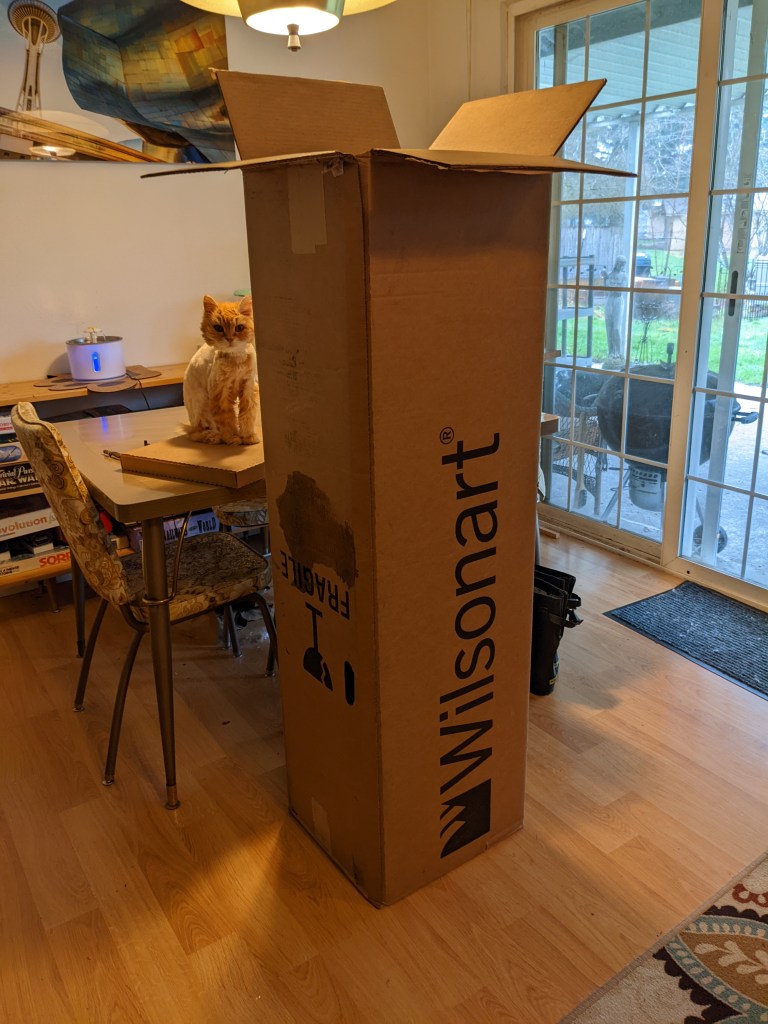
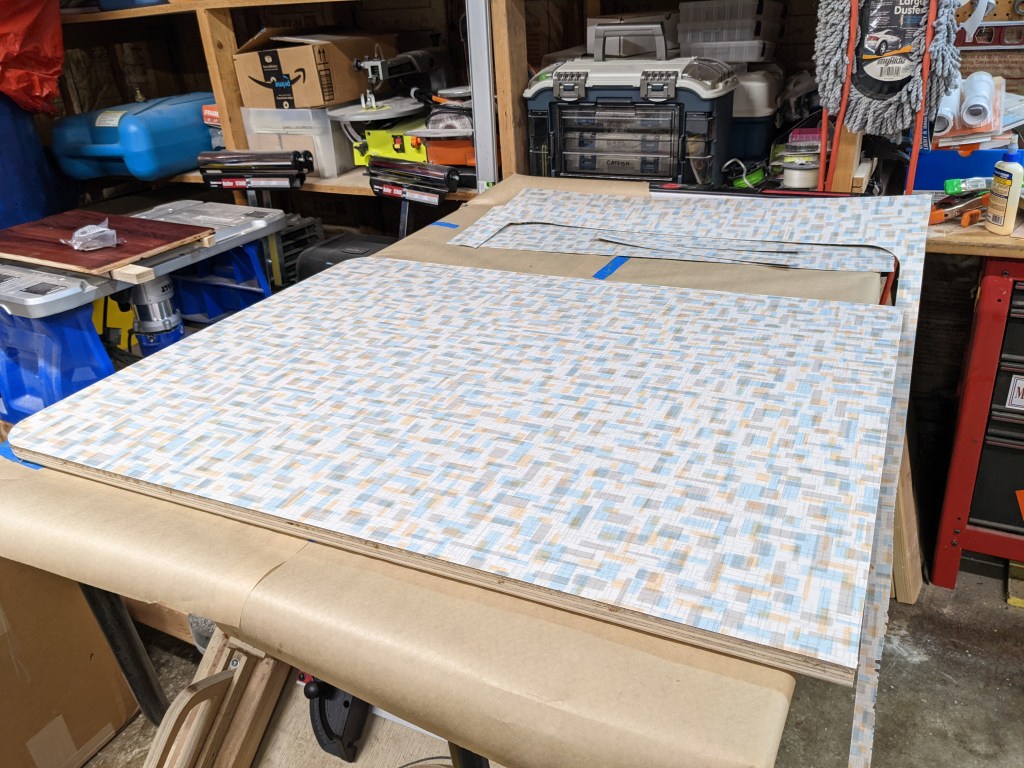
My Wilsonart ‘Betty’ Laminate finally arrived, in a box as tall as me!
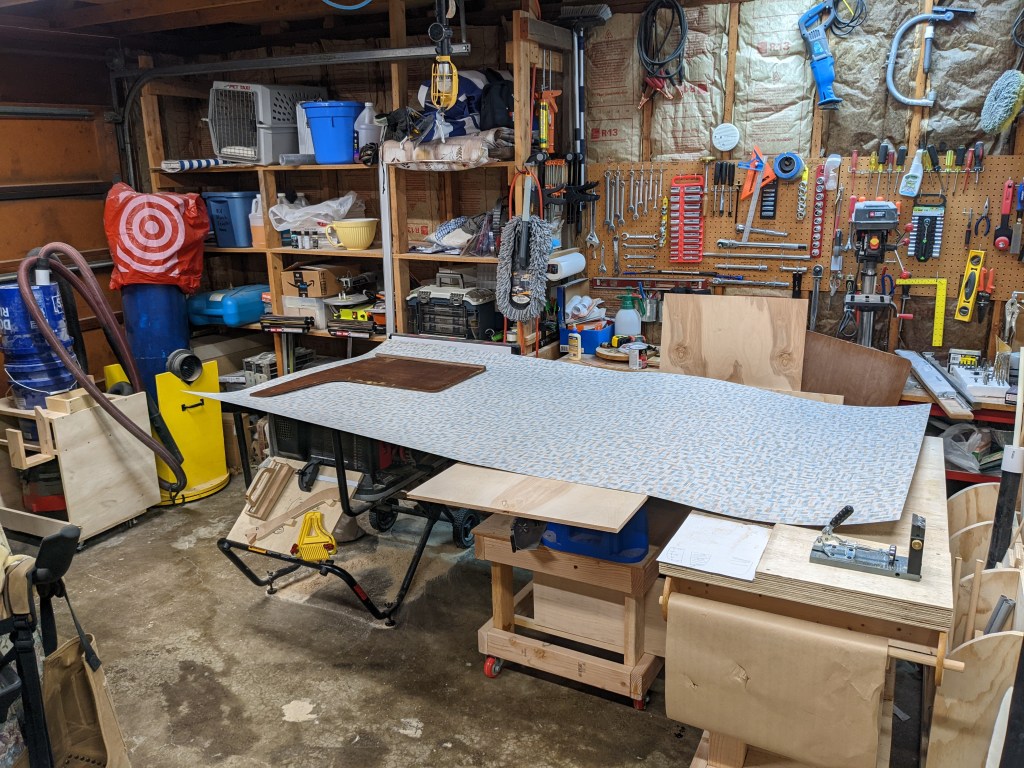
Grateful for my Mobile Workshop pieces, I laid my table saw, bench, and router table out to make a flat area big enough for the laminate to unroll and relax a bit.
First step is to cut this down to something approximately the size of the table, with a little extra on each side, which will be cut off with the trim router later.
I clamped a couple boards down to hold it still, and give my jigsaw something to ride on. I put a new blade in my jigsaw and carefully cut it. A few chips flew off here and there, but because of the excess this was not a big issue.
I put everything inside the house for a few days so it could warm up, because the contact cement warned it needed to be applied at over 50 degrees. Luckily we got a warm, if rainy, day a few days later, so I set up a sawhorse table in front of the garage (under the porch cover) for the table, and set the old trailer table on the table saw, covered in paper to protect it, and put the laminate on there. While wearing a repirator I applied the very stinky contact cement liberally to both the laminate and the table, rolling it out, and then set back and waited for it to get tacky.
No pictures of the next part, because I had my hands full, but I was able to apply it just like the instructions I had seen online, but putting dowels on the tabletop, centering the laminate, and then removing the dowels and pushing it down. Then I rolled the heck out of it with a laminate roller. Then I used a flush trim bit in my trim router and cut off the excess.
Tah-dah!
I filed the edges of the limoleum to make sure they would be easy on our hands and sanded the plywood edge of the table until is was silky smooth, and then finished it with a clear protective finish. I like the look of the bare plys.
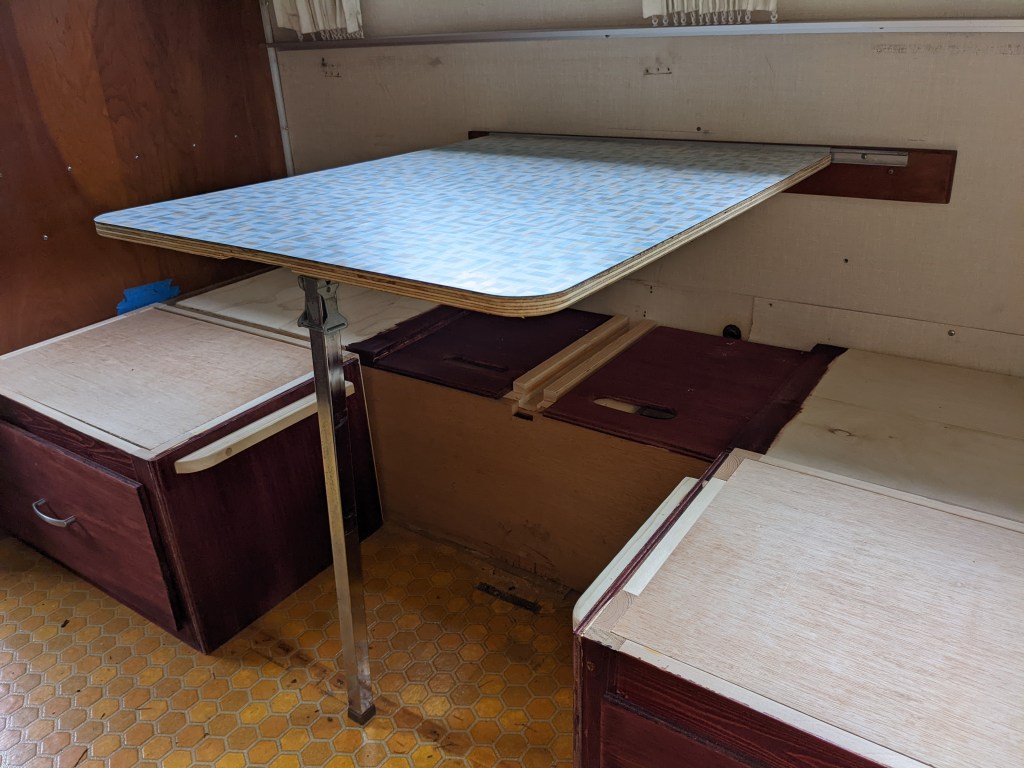
After that all I needed to do was attach the old leg and mounting strip from the original table, and sand and refinish the mount that held the table to the wall. I’m reusing all the hardware from the original table to save some $$$, and it’s all good hardware, so why buy new? I installed the mount, with Dave’s help to get everything level, and…
..by golly, I have a new table! This is such a big step forward, I’m starting to think this project is really going to turn out ok!
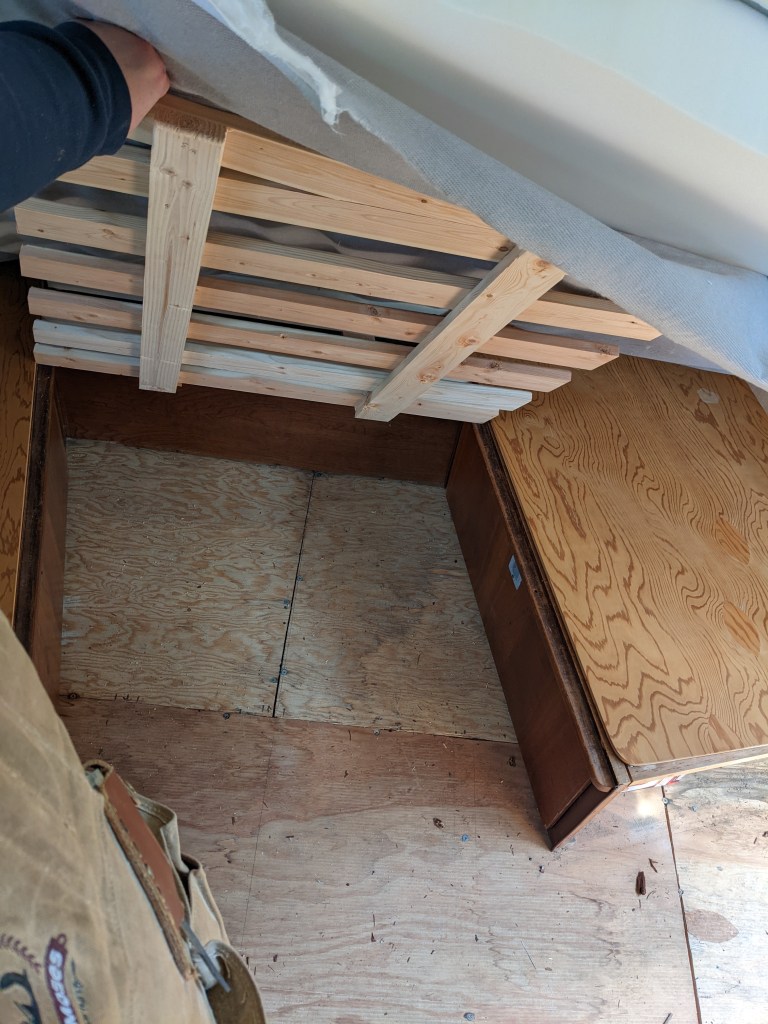
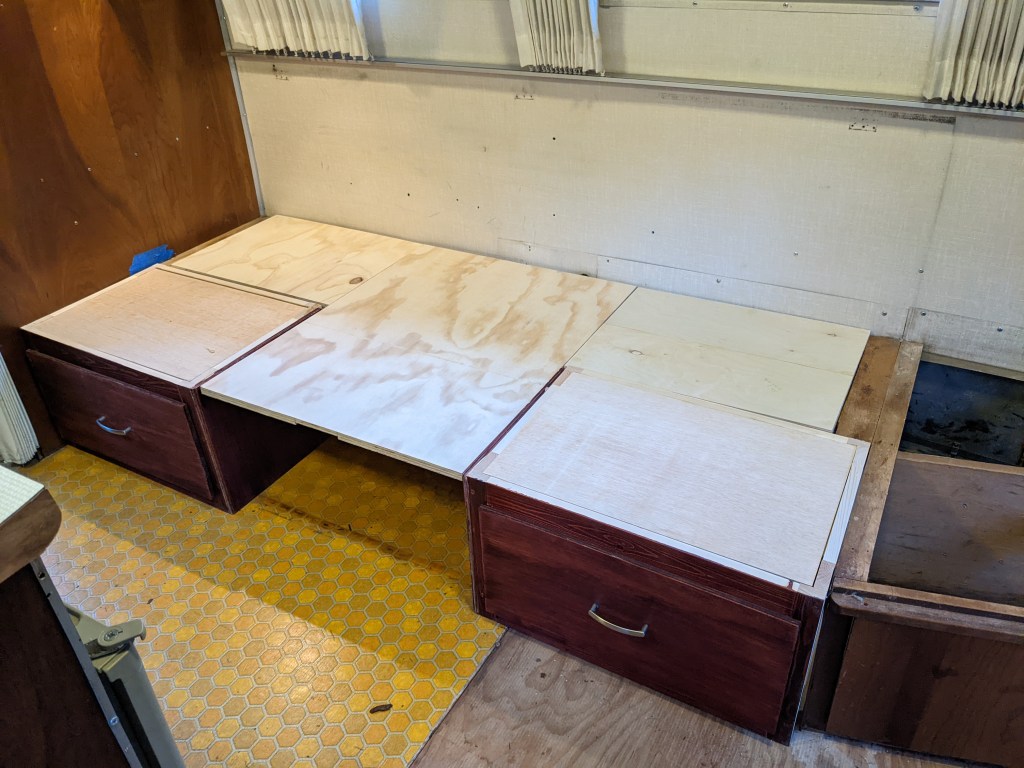
Covering the Utility Tunnel under the new dinette turned out to be trickier than expected, because there was one level I wanted to keep everything at, so the cushions will lay flat over the whole area. So I built the seats based on the height of the existing tunnel wall, and I want the covers to sit down in there flush with that.
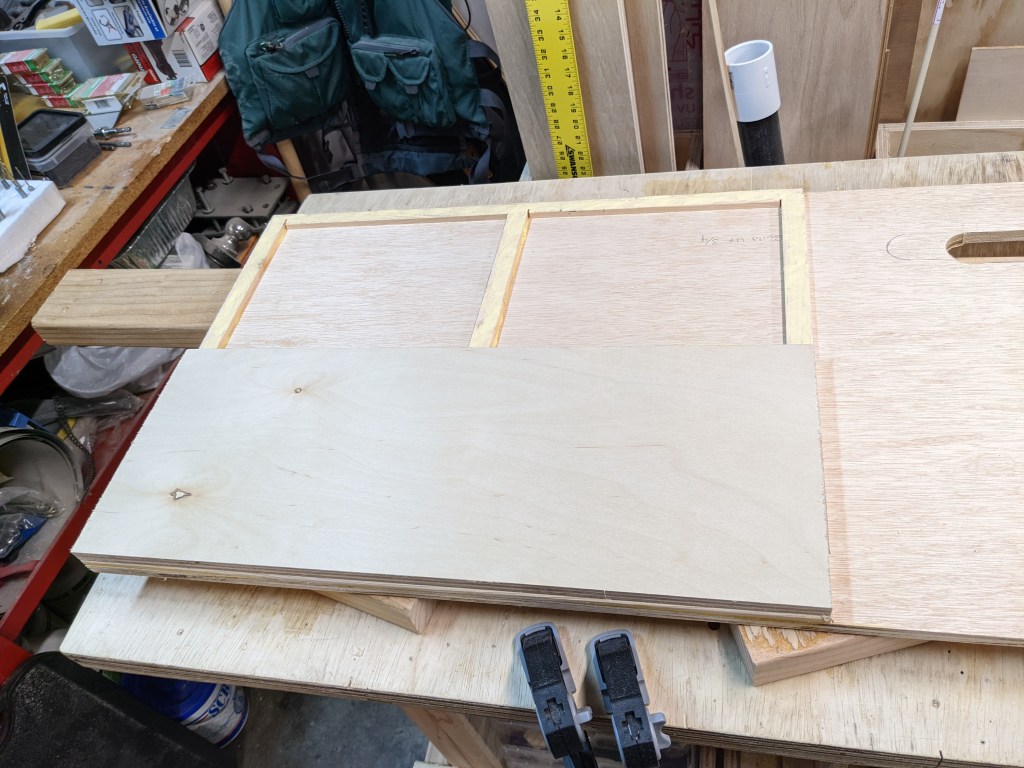
The seats are actually 3/4 inch higher, because the tunnel covers need to be higher next to the seats, and lower in the middle area, because when the table is folded down, that is where it will go, and then the whole thing should be flat.
Because I am concerned about weight, I didn’t want to just use 3/4 Plywood for the raised part, so I used 1/2 ply, and 1/4 strips to make a frame under the ply to add up to 3/4. Maybe more work than necessary, but it also let me use some scraps instead of cutting into another expensive piece of 3/4 ply.
Then I did build the table out of 3/4 ply, because I want it to be strong and sturdy.
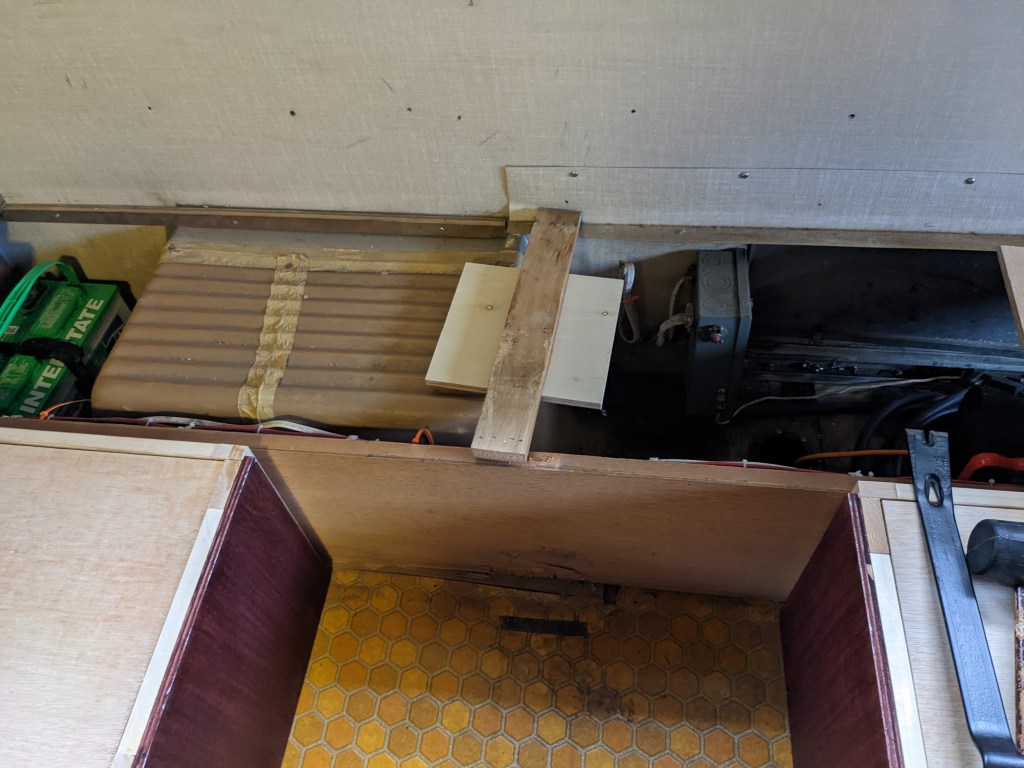
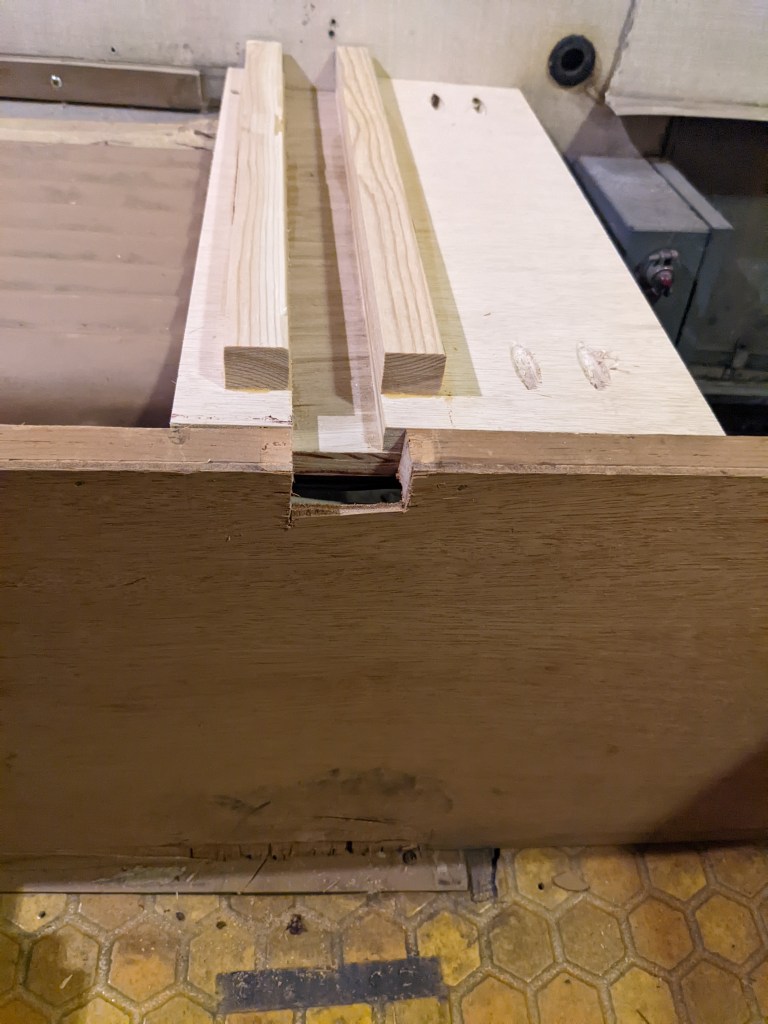
And by some miracle it actually all fit together and is nice and level on top. But when I looked at mounting the leg on the table, I realized I had forgotten the leg was long enough it would need to go under the table and back into the tunnel area.
This caused me a lot of headach as I tried to figure out how to remove the existing support, build a new support that would hold up the two tunnel covers, and yet make a little slot for the leg to fold up into, and there was also a limitation of how far down the whole assembly could go because the whelwell liner is in the way. I ended up needing to use my new dado blade to remove 1/4 off the bottom of the table, and then I could modify the tunnel structure just enough to get my piece in there, and by golly, it all worked, at least in theory, since the table is not fully assembled with the leg yet, but I’m confident I’ve got it worked out. Everything test fit ok.
A little bit off the table…Just enough room for the folded up table leg.
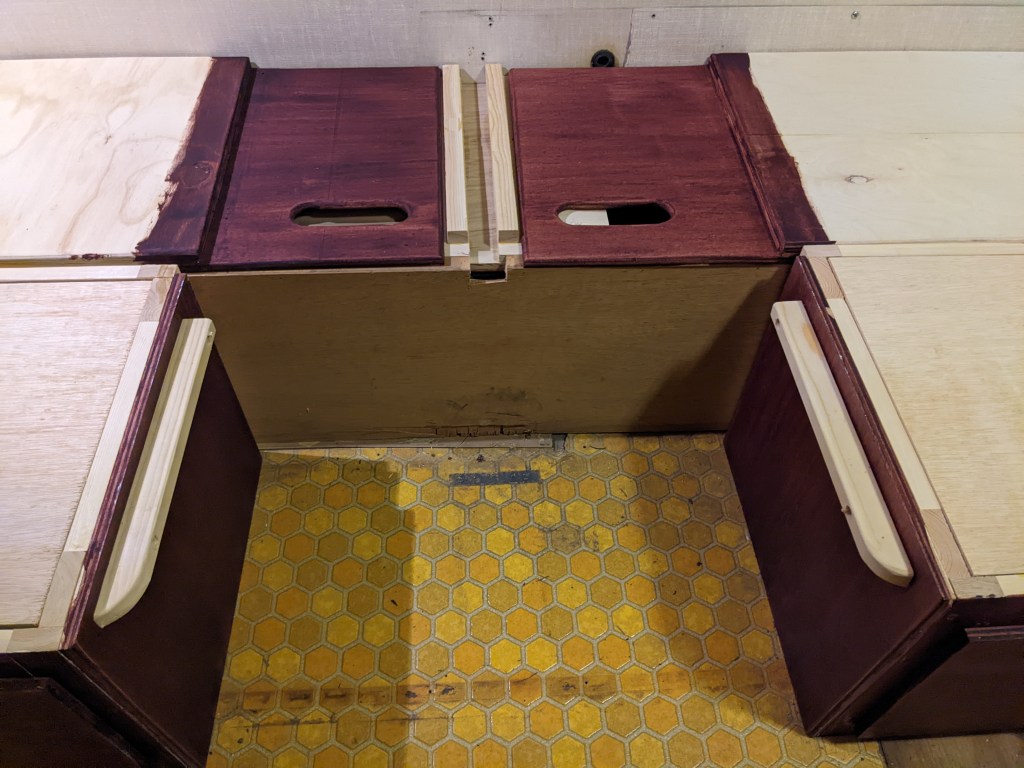
And everything fit back together just right.
The hand slots make it easy to pull up those tunnel covers for maintenance.
Now to finish the table and get that all assembled. Waiting for my awesome retro Wilsonart Laminate to arrive…
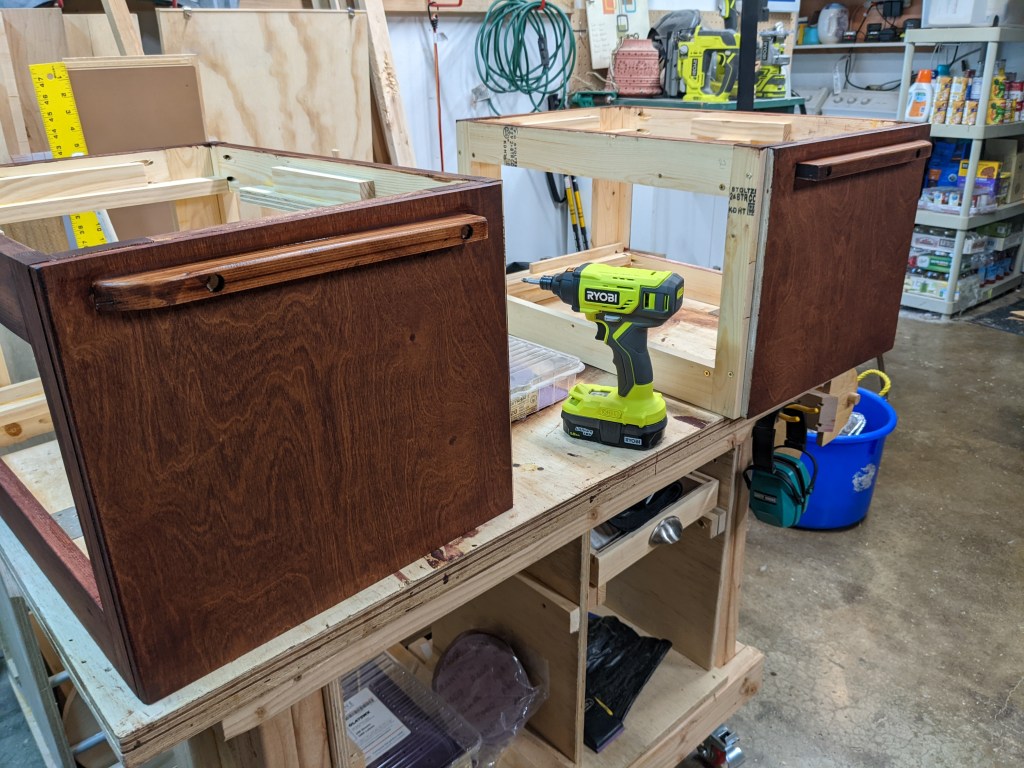
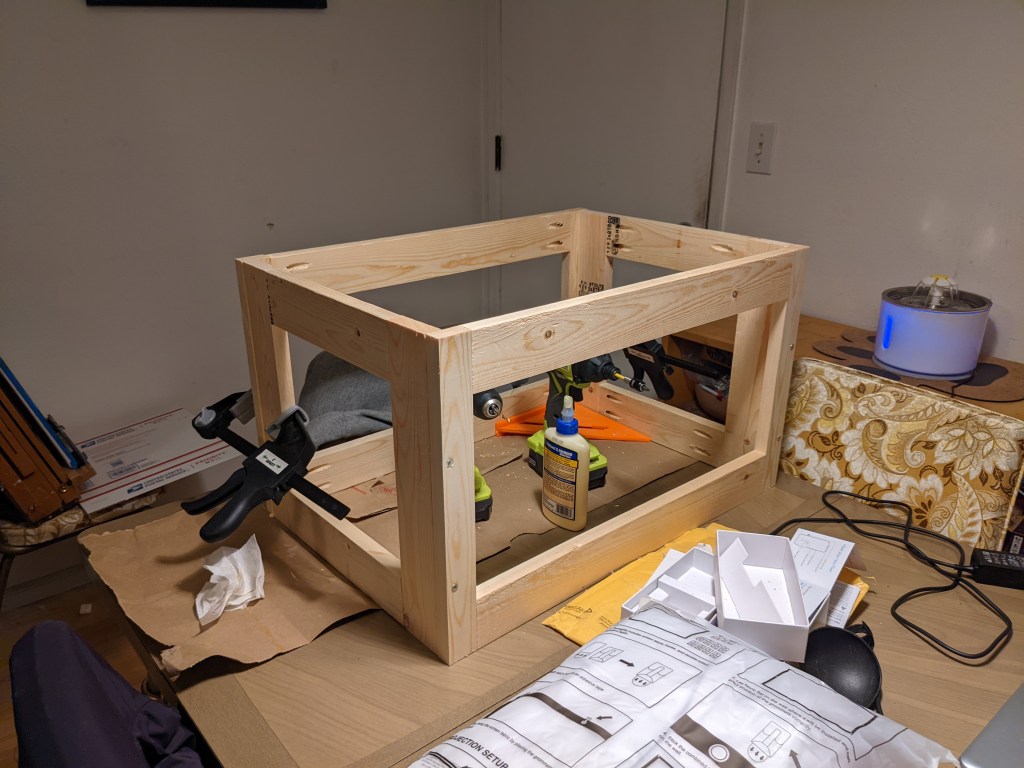
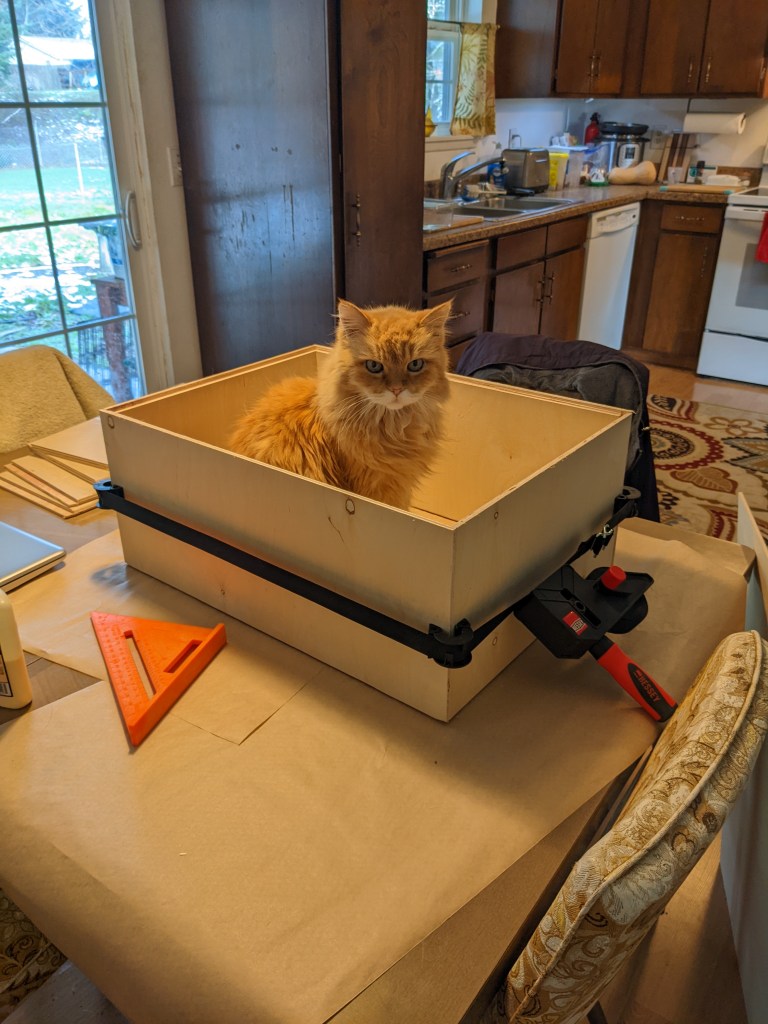
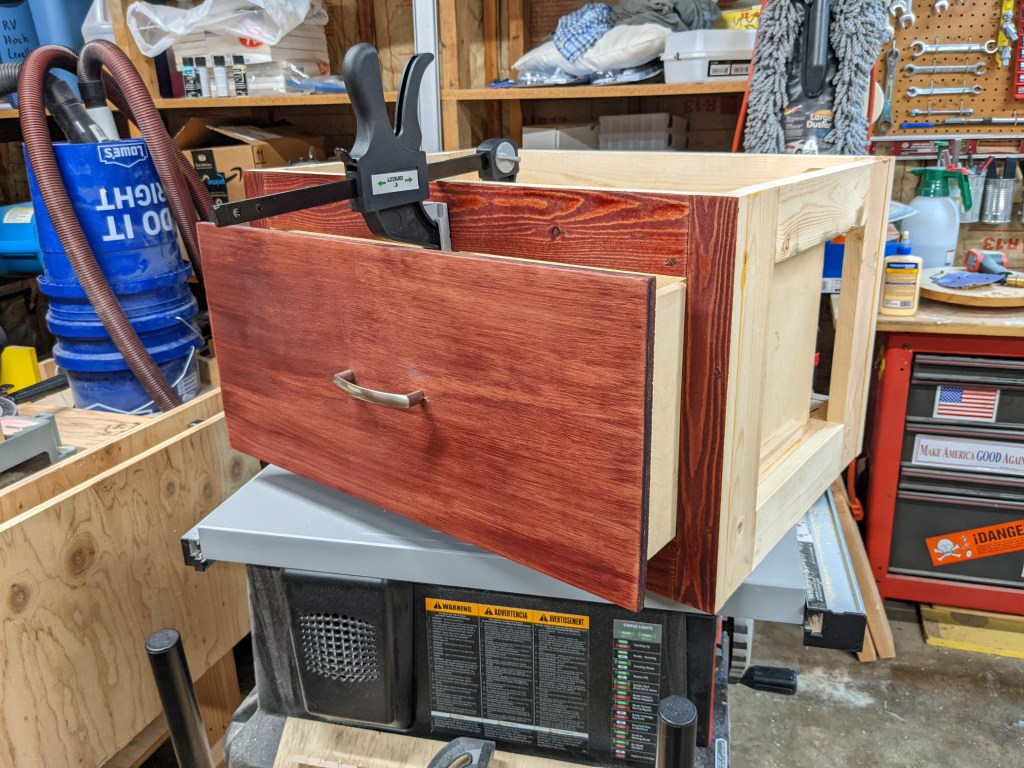
I started with the Dinette seat. They were going to be small, because they will butt up against the utility tunnel, and they will have drawers for storage. I followed Steve Ramsay’s Tablesaw Cart video because it was just what I needed, except mine was going to be even simpler. One big drawer. Or I thought it would be simpler. All the details actually got more complicated as I went along.
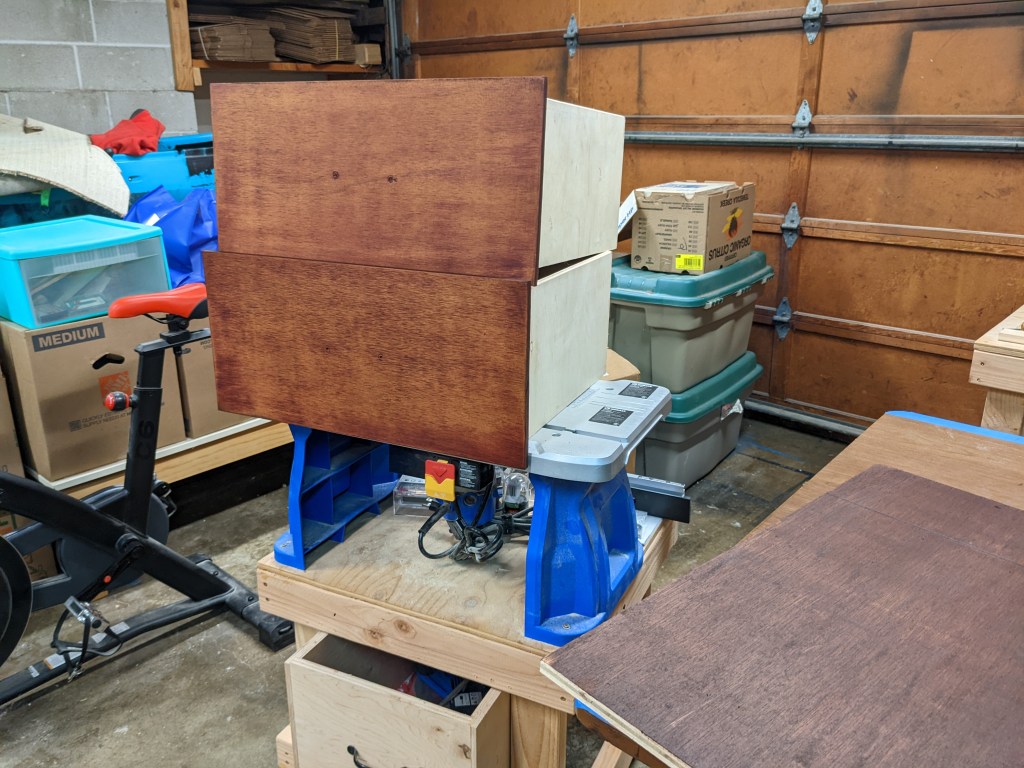
For one thing, things were complicated by it being so cold I had to bring everything into the house to glue up.
Super helpful, Mighty.
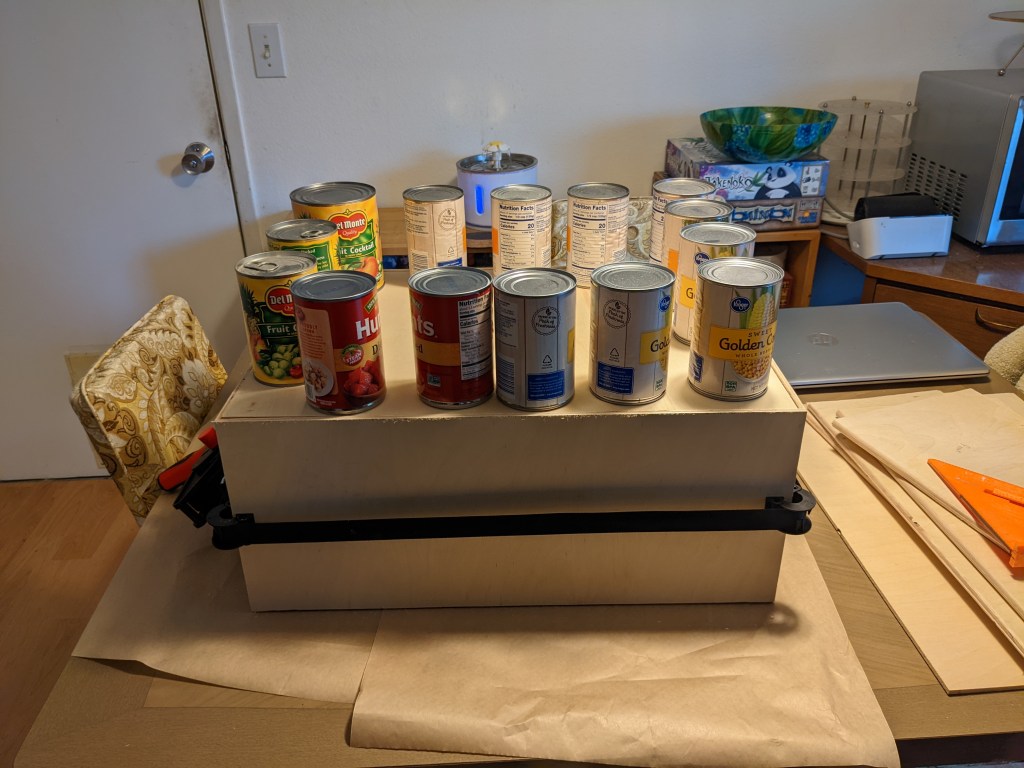
A little extra weight applied from the pantry.
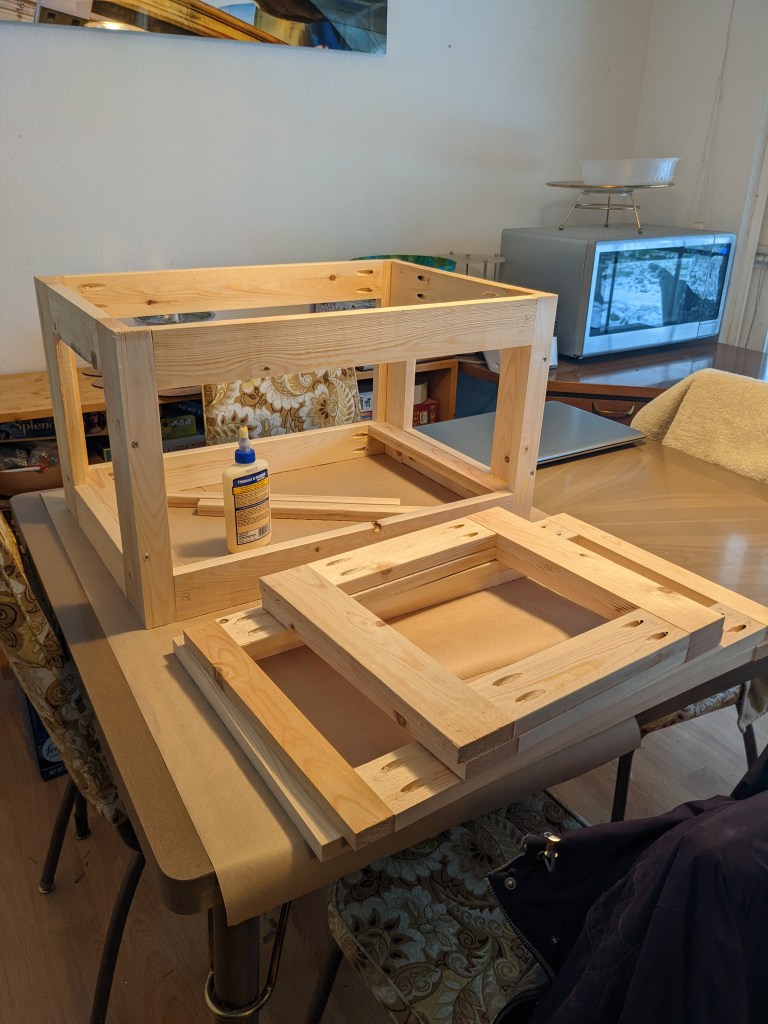
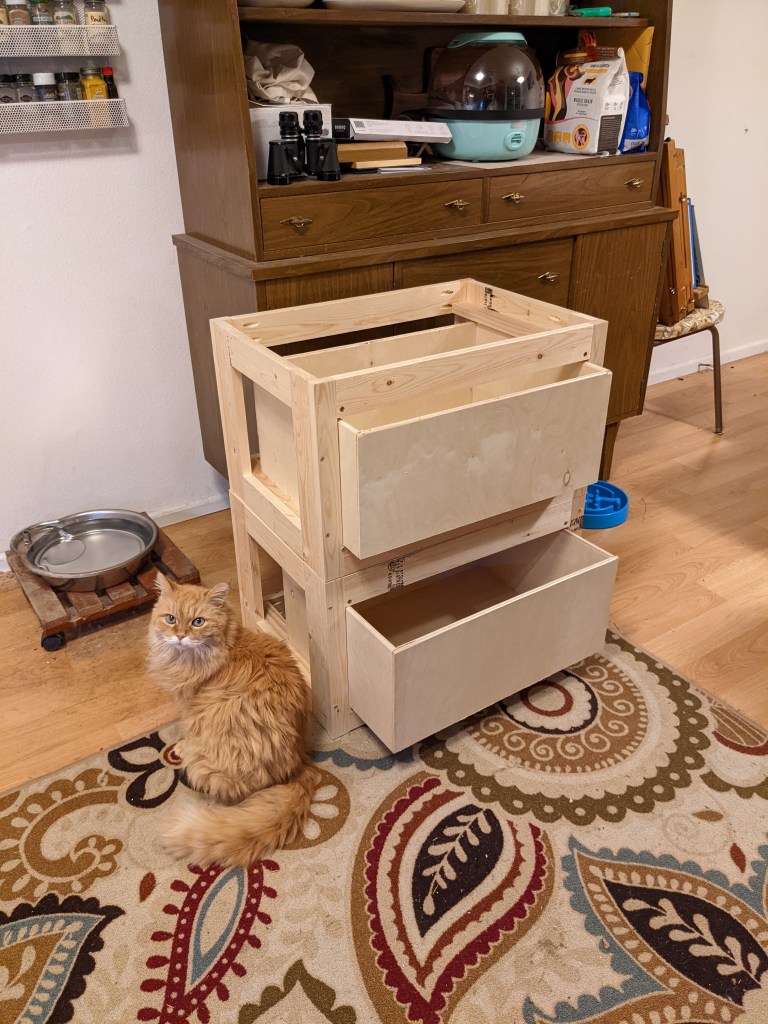
I got a pocket hole jig which made assembly super easy.
And in no time I had two nice frames with drawers. Of course then the drawers tipped forward when you pulled them out too far, so a friend suggested rails at the top to keep them level, and then they needed to stay closed while on the road, so I added magnetic catches. I painstakingly stained them Bombay Mahogany, which I thought matched the deep reddish color in the trailer, but then I realized that the trailer was several different colors inside due to fixes done over the years. Well, now we are going with Bombay Mahogany.
Before staining I countersunk all the screws in the frame and filled the holes with a bit of oak dowel, just to hide the screw heads.
I added nice handles to kind of match what had been there before, and got them installed.
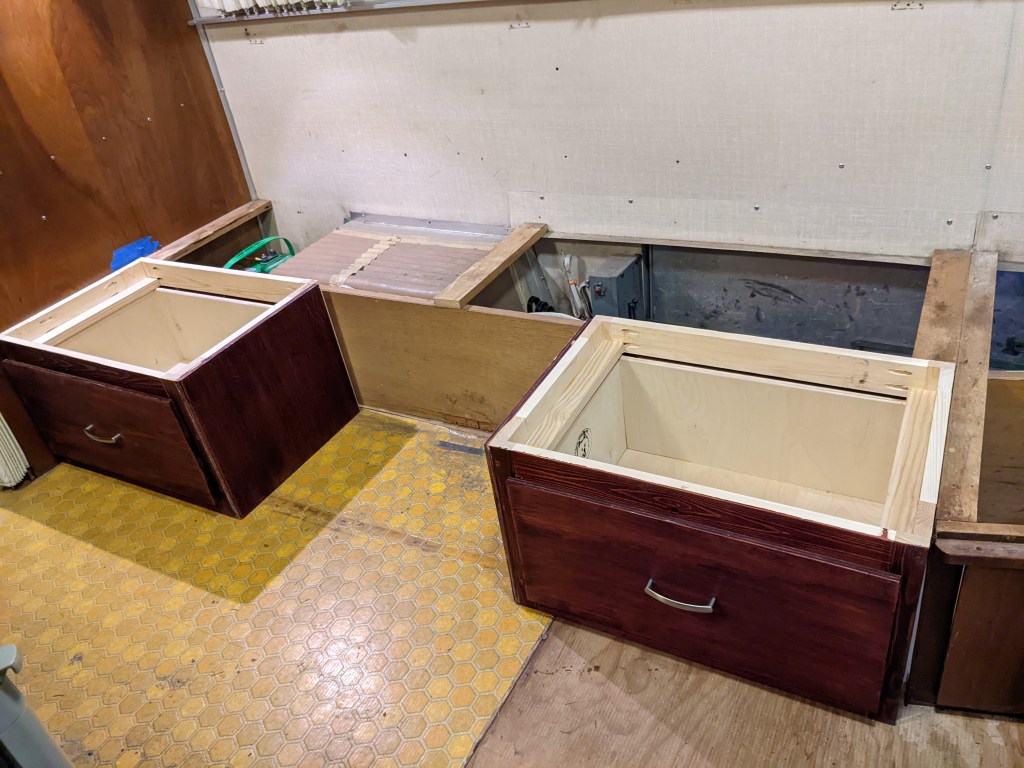
The final step was adding a piece that fit into the top for sitting on. Once that was in I could start test fitting the panels that will go over the utility tunnel.