Let’s talk about toilets! Our Airstream’s original owners manual from 1968 explains how to find a campsite by pulling up to a farmer’s house and asking them if you can have a spot in their field for the night. And it also tells you how to dig a ‘gopher hole’ and put your trailer over it so the black tank can empty directly into it! And because this is how they camped in 1968, they must have thought they wouldn’t need a very big black tank – 8 gallons ought to do it.
Well, in this modern world where you can only dump at dump stations, 8 gallons is not going to last you very long when camping without hookups, which is how we usually camp since we frequent State Parks and other semi-wild places. Even when camping for a long weekend at Trout Lake, the toilet would be full by the end of the trip. It was definitly limiting how long we could stay without needing to hook up and go find a dump station.
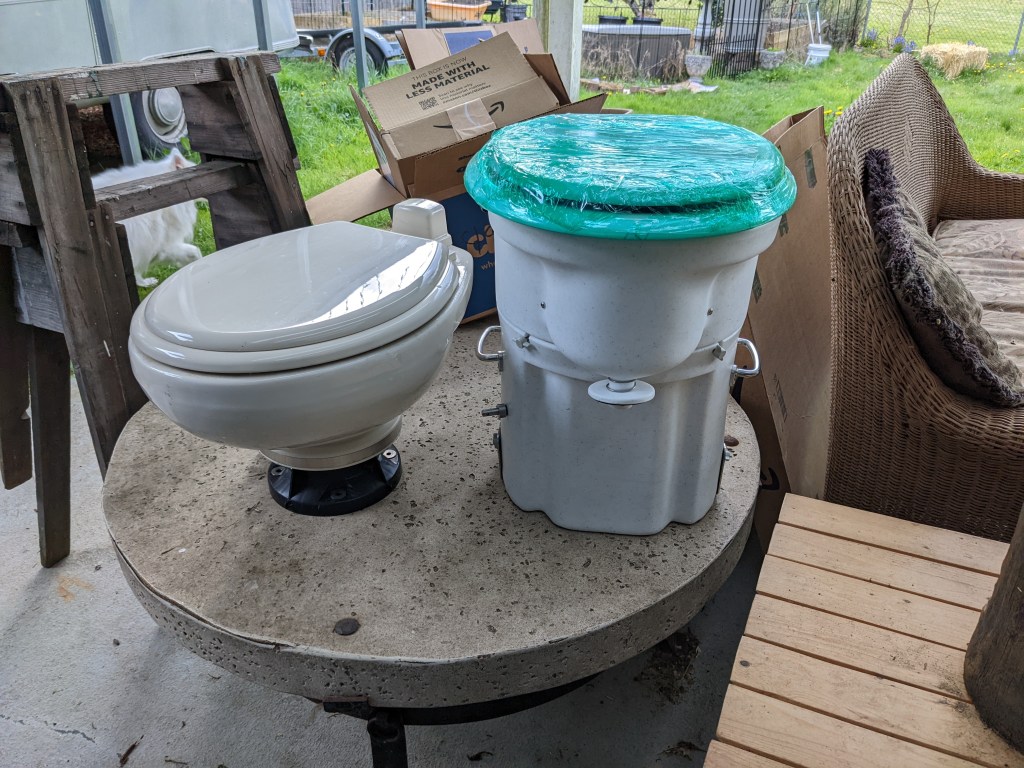
Over the years I have heard more and more people talking about Composting Toilets. Most people sing their praises, and say they would never go back. Years ago when I first started looking into it I discovered Gone With The Wynn’s videos about their composting toilet on their RV which they used fulltime.
I was pretty convinced that this seemed like the thing we needed to free us from Black Tank Anxiety on our trips. From what I was hearing, although you still have to empty the urine tank regularly on trips, the poo tank can go all summer for people who are only occasional weekenders, as we are.
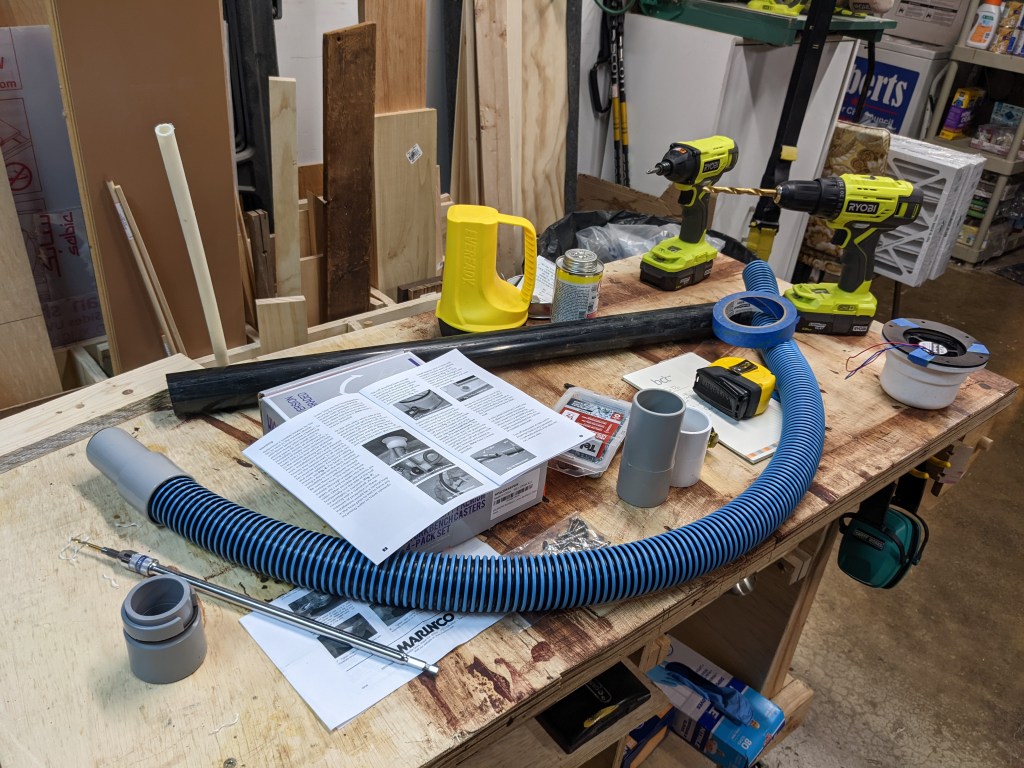
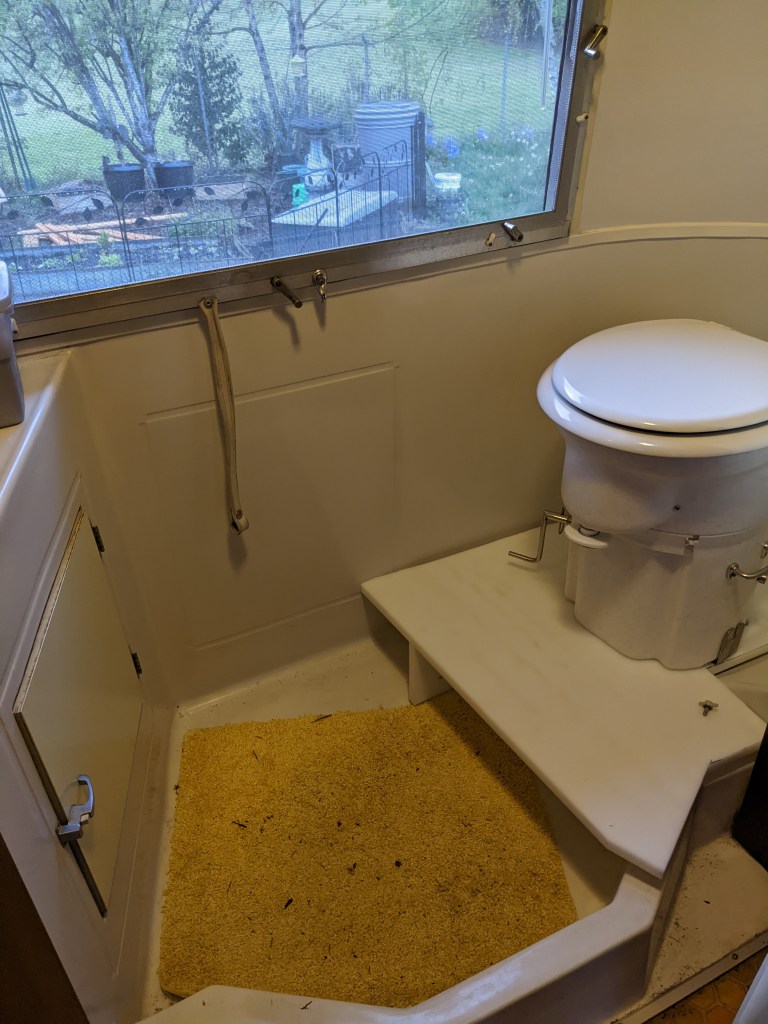
So last year I ordered an AirHead Composting Toilet. There was a long wait to get it delivered, but that gave me time to ponder how to install it. The bathroom in the Caravel is small, and the black tank is above the floor, and the bathroom has a fiberglass shell that goes above it, and the toilet sits on top of that. So the toilet is up high, and the composting toilet is even taller. I was going to need to not only mount the toilet somehow, but I would need a footrest as well.
The other consideration was that I did not want to permanently change the original toilet mount. Because I might end up hating the whole composting toilet thing! Or I might sell the trailer someday and the next owner might not want a composting toilet. So I wanted to mount this in as non-destructive a way as possible.
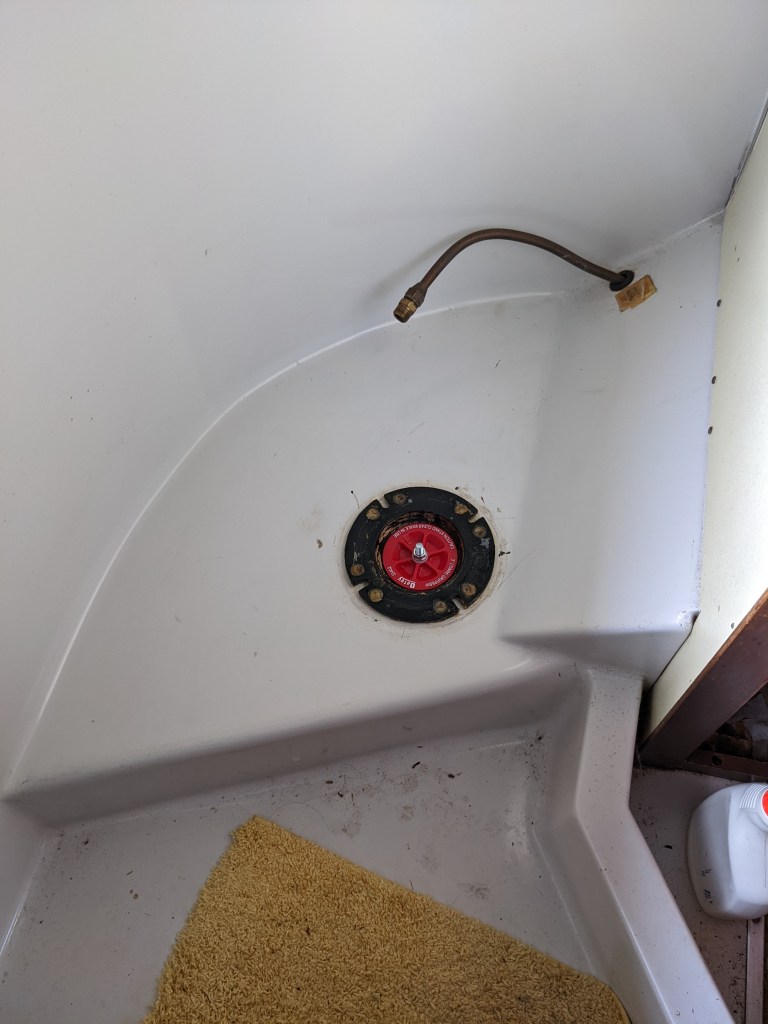
I removed the toilet and plugged the hole with a device that is made for pressure testing pipes, but it worked just as well to plug that hole, and it tightens down, so it was sealed.
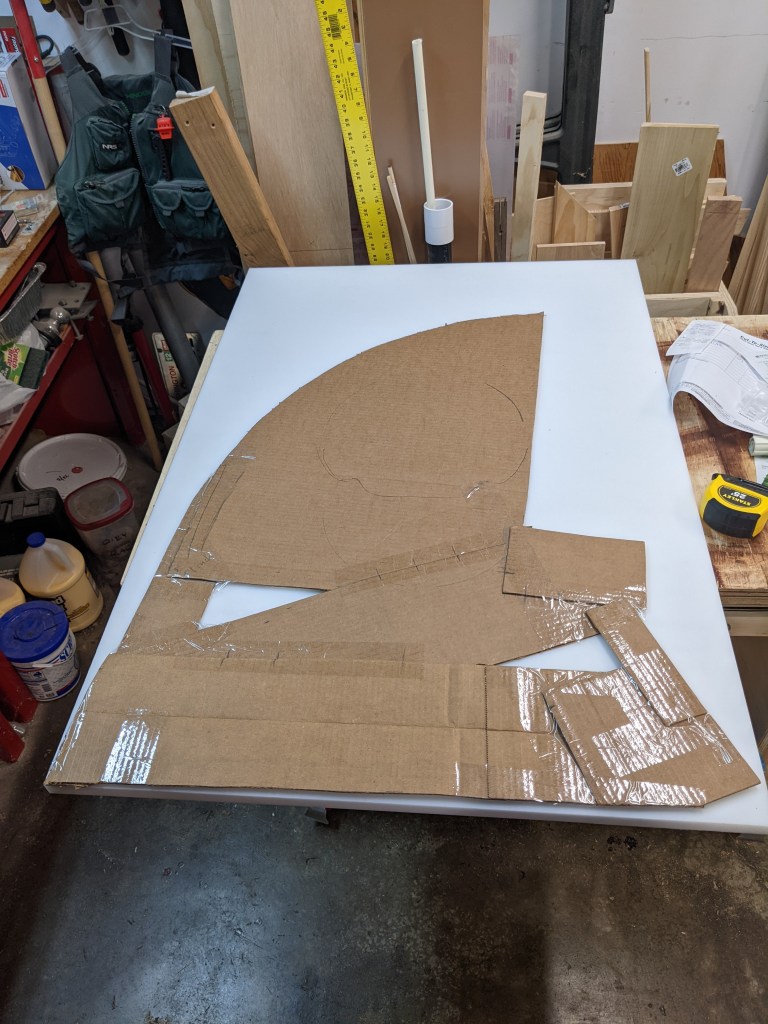
I started plotting how the toilet was going to fit in this space. I used cardboard to mock up a platform, and tried it on to see how it felt to sit on it. I wanted to push the toilet back farther, but you need a little room to move around, so really it had to come forward a bit. Also you need room to turn the crank on the side.
I was concerned about building a platform out of wood because it is bound to get wet from time to time. There is a place over in Portland called TAP Plastics, which is where I got the thick Lexan for my front window guard. I went over there with my template and talked to them and ended up buying a 3/4 inch thick industrial cutting board plastic. This stuff is very stiff, it doesn’t flex at all, and it can be cut and drilled like wood, and of course will be easy to clean and sanitize. It is waterproof, so if we wanted to take a shower in the wetbath (we never do, it’s too small), it would not get damaged.
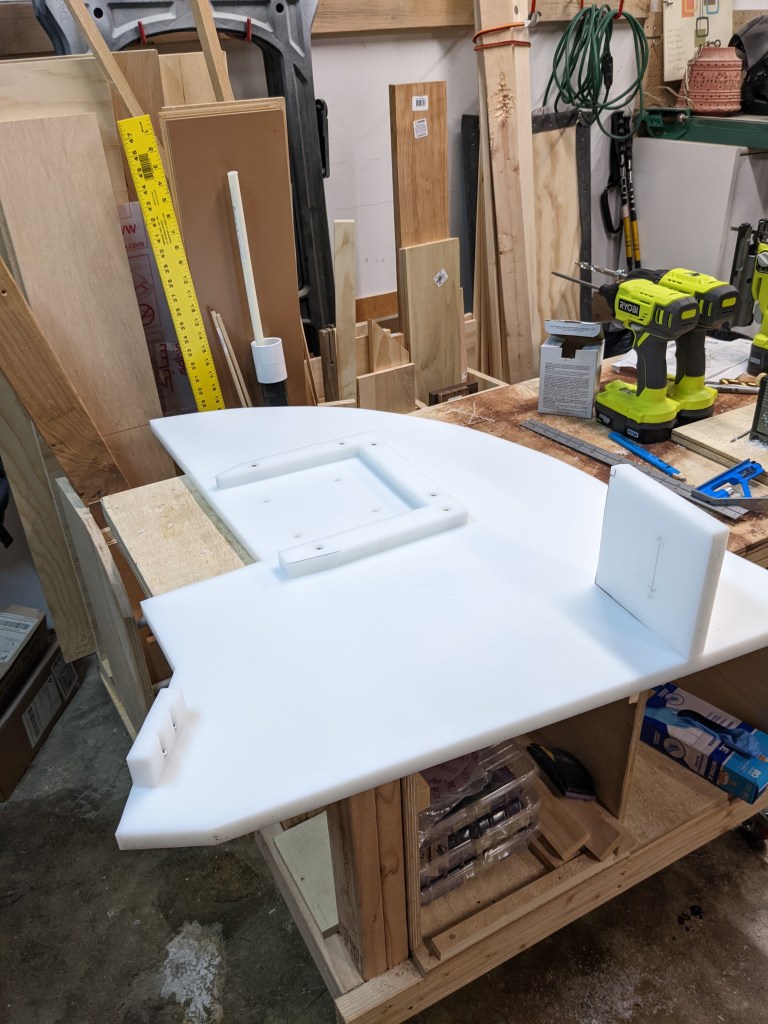
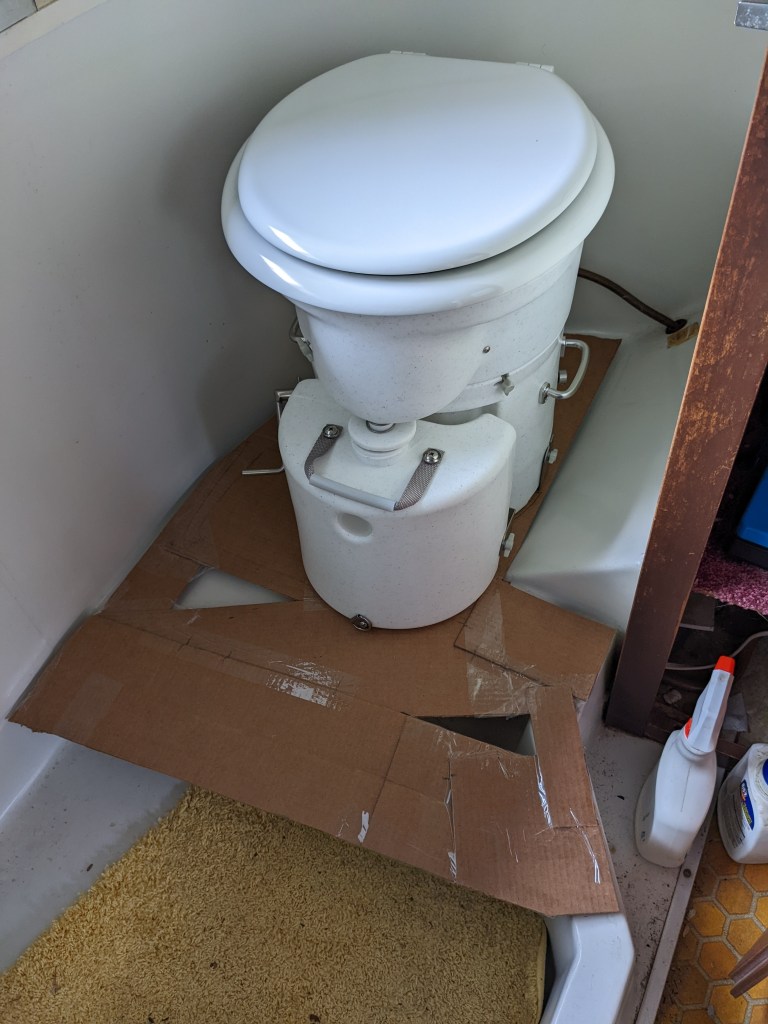
I cut it to shape, and built a support to lift it up above the existing toilet flange. Then I added a couple supports for the footrest where it will be touching the existing fiberglass tub.
I mounted it using the same 4 screws on the flange that the original toilet mounted with. I made inset holes enough for the nyloc nuts to be recessed so the toilet can sit on a flat surface. Then I mounted the toilet/urine bucket brackets, and screwed the whole thing down. It is nice and solid.
Next I have to figure out how to mount the venting tube so it can vent out through what used to be the electric cord hole up in the utility area. Looks simple enough!