Backyard remodel

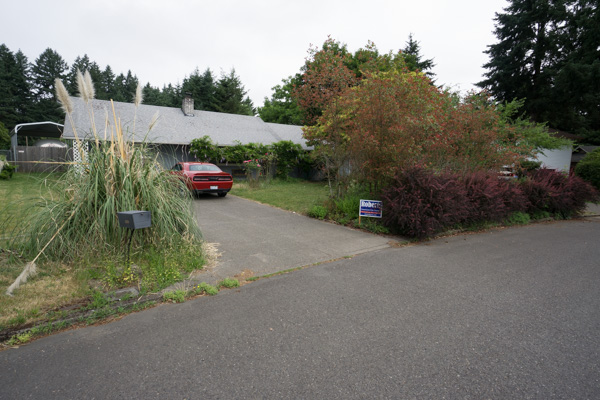
Last year we did the front yard, taking out the overgrown bushes that the previous owner had put up to create a buffer between our house and the crack-house across the street, and putting in a nice lawn. That went very well, and it is still looking beautiful. This year the project is the back yard.

When we moved in the backyard was a formal garden, with pathways and sitting areas, a big dahlia garden, a vegetable garden, and a flower garden. The previous owner had been retired, and he obviously spent a LOT of time working on it. It was a maintenance nightmare for a couple working folks like us. So we had slowly cut back on the formal stuff anyway, but this year the lawnmower wouldn’t start in the spring, and by the time I got a new carb for it and got it running again, things were extra out of control.

2018-05-04 17.19.39

So we rented a walk-behind string trimmer, and I worked my butt off mowing it all down. I was kind of sad to see it go, because it reminded me of our pasture in spring, and I loved watching the grasses wave in the breeze.

With everything back under control, I figured it was time to begin the backyard remodel I had been planning. There were a few problems. As previously mentioned, Navi is a digger, so any gardening needed to be fenced away from her. Also, there is a plum tree in the corner of the yard, and the dogs enjoy eating the plums and chewing up the pits, which are toxic, so I had it temporarily fenced off with a dog x-pen, but it was not a permanent solution. I have this plan:

backyard plan

Which I have deviated from slightly as my desire to have a garden got stronger. When we lived on the farm, I had a huge garden, and I worked really hard to get better and better at it every year, and I hated to give it up when we left. This year I finally got my act together enough to put in a tiny container garden with a few tomatoes and peppers and herbs. But I would like to grow our own lettuce and greens as well. So I took the corner marked Bushes on my plan, and fenced it off to make a garden, and keep the dogs away from the plums.

DSC07208

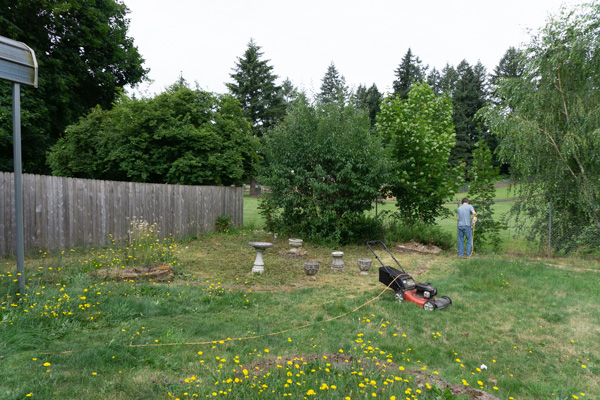
We had a lovely mild day, not too hot, not too sunny. Mowing and weed-wacking commences…

DSC07211

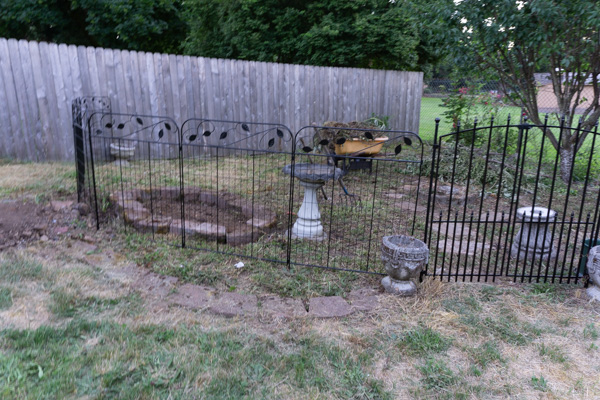
Then we went to Lowes and found a no-dig fence style we liked. They have stakes that you pound into the ground, and then slide the fence panels onto them. Tall enough to keep out the dogs, and they look nice.

DSC07213

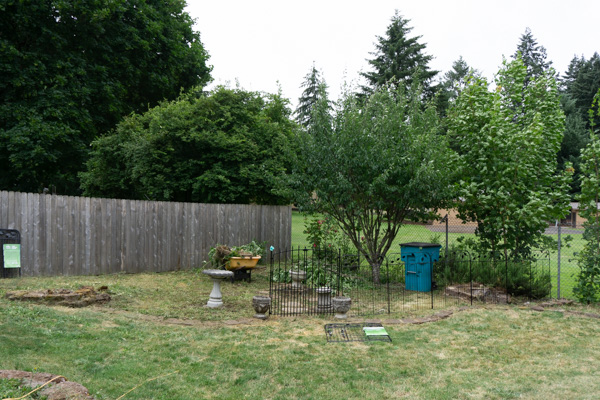
The corner already has a brick outline, but it was curved, and the fence could not curve as much as the bricks, so we made the fence line fairly straight and left the curved areas outside it for planting some bushes to soften the area up. We also got a nice no-dig gate that fit perfectly in the little entrance-way.

DSC07217

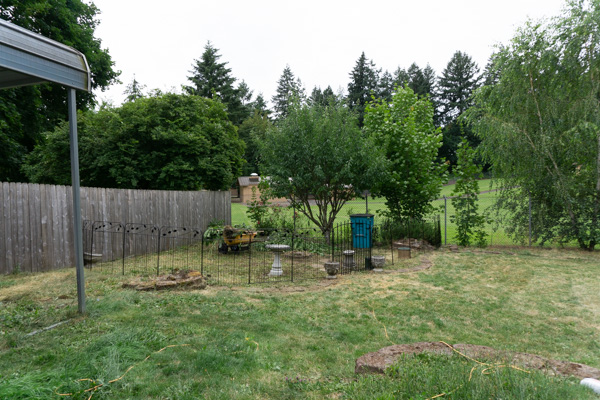
Completed. Now the dogs are unable to get to the plum tree, or any planting beds I want to put in there.

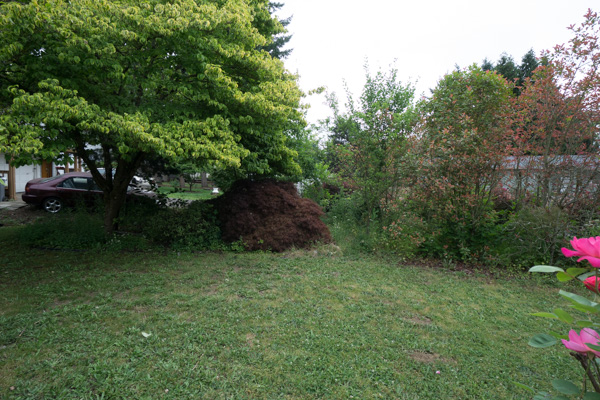
We continued mowing and trimming around the rest of the yard.

DSC07218

DSC07220

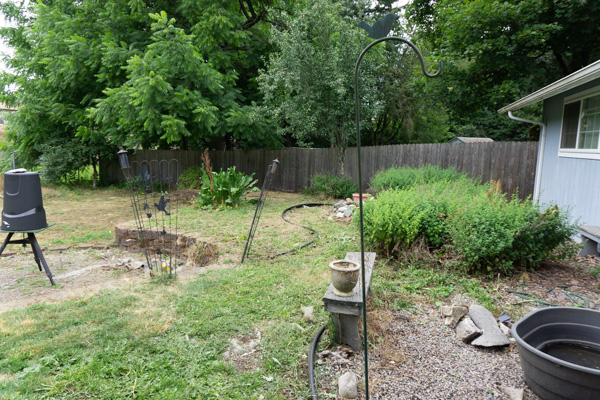
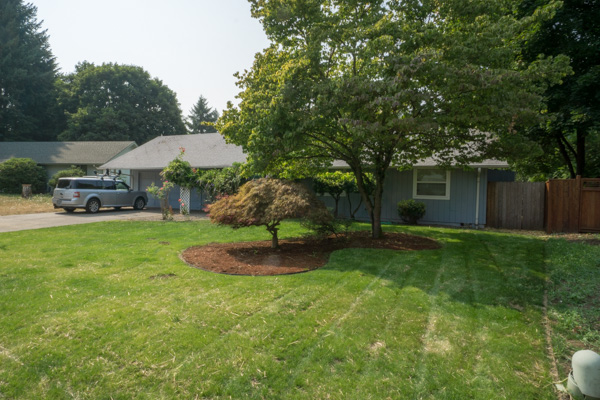
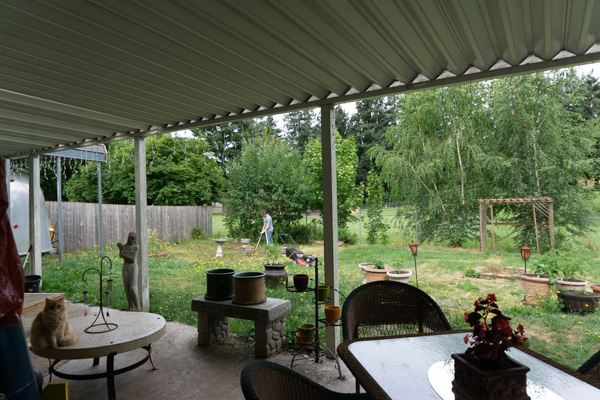
Much better! Still needs clean up, but it will get there. This is where I want a stone patio eventually.

DSC07219

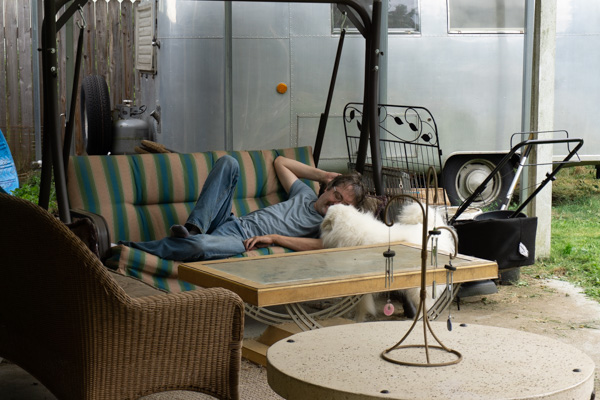
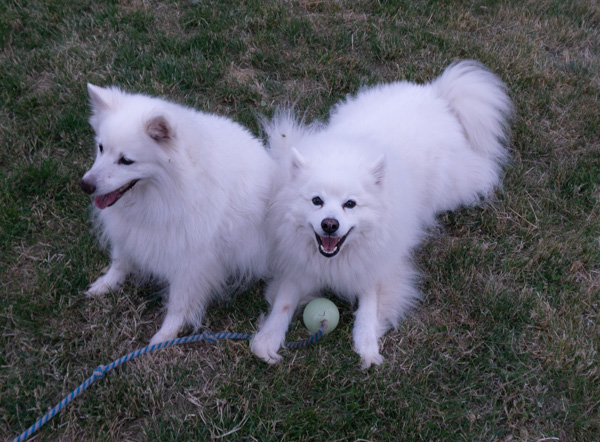
Dave gets a well-deserved rest and smooches from Barclay ❤

DSC07215-2

Day 2

DSC07229

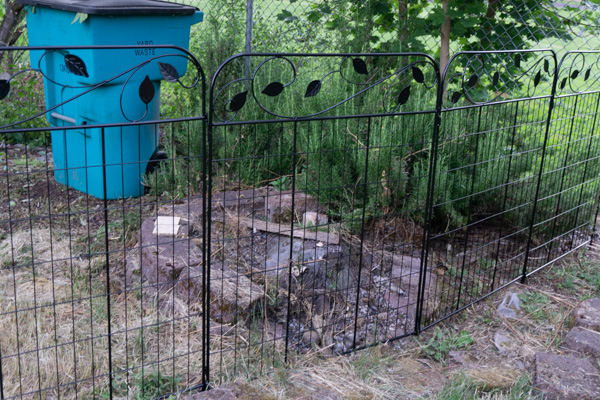
The garden area has these two brick circles, one on either end. This one had a greek statue on it, and it shifted and she fell over a couple winters ago, so now she is up on the patio. I am not fond of these brick circles, they look sloppy, and appear to be full of debris – broken bricks, old tile, etc. I want to take one down and reuse the bricks to outline a garden bed.

So I started tearing the other one apart, and discovered 1) it gave shelter to the biggest spiders I’ve ever seen and 2) it was hiding a stump! I picked through the bricks one by one, brushing off spiders and tossing them into the fenced area, then arranged them into a curvy garden bed.

DSC07223

Leaving behind the stump, which is much less obtrusive than the brick circle had been.

DSC07237

DSC07228

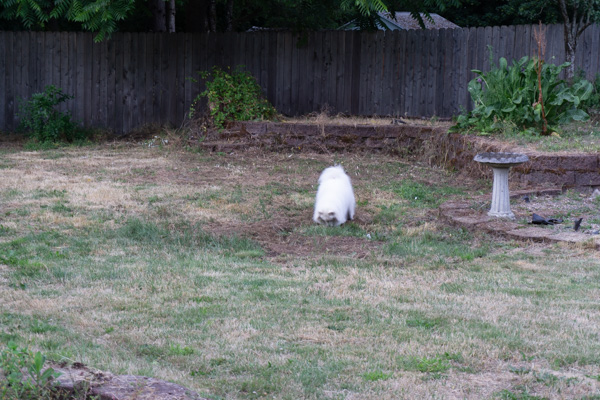
Meanwhile Navi dug holes big enough to stick her whole head in! That’s the next area to work on.

DSC07236-2

But that’s enough work for one afternoon. I stickballed Barclay until he was worn out and jumped in the tub to cool off, and called it a day.

DSC07221

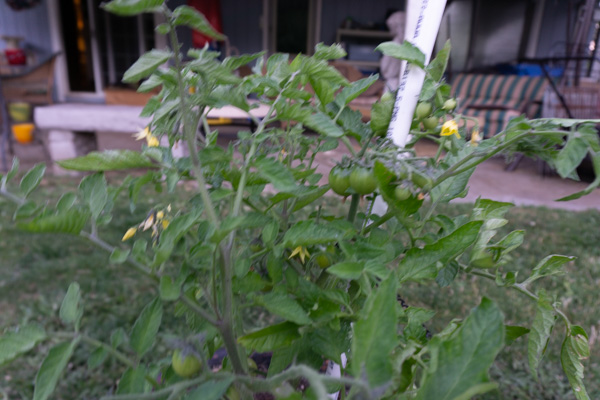
Bonus – tomatoes growing in my container garden – yay!


The Mailbox

As you can see from this pic of the front yard pre-remodel, the mailbox was a plan black box on a little wrought iron arm. It was black that had oxidized to grey, and had some surface rust, and the post had some rust too. It was also super wobbly and the mount was all rusty. I thought I would use the long Labor Day weekend to do something fun with it.

Disassembly took some time. Dave helped me Dremel off the rusty screws on the mount just to get it into the garage. I cleared off the spider nests and bent the door back into shape. I removed the handle and flag, and scraped off the old numbers, cleaned it and sanded it until everything was fairly smooth. It has a few dents and some marks where it looks like it was shot with BB pellets, and I considered bondo-ing those away, but decided it adds character (I’m pretty sure this is the original mailbox), and the weekend is short and I’d like to have this back up for the mail-lady on Tuesday.

I put my first three coats of ivory on it, and then let it dry as the can indicated, and masked it off for the next color, but discovered the 4 hours they said it needed to dry wasn’t an exact science. When I peeled off the masking, it took some of the ivory off with it, so I had to re-mask the blue and re-spray the ivory.

I left a border between blue and ivory on purpose for a silver accent stripe. I tried to apply it with a ‘silver paint pen’ but that did not work very well. I ended up trying to apply some spray silver I had by spraying it onto a plate and brushing it on with a foam brush I found.

I’m actually pretty happy with how it came out.

I also painted the post and the mounting pieces underneath and used all new hardware so it should be good for many more years to come. I still want to spray on one last gloss top coat, but I wanted to get it mounted in time for the mail tomorrow. I was going to spray it on the post, but there is ash currently raining down on us from fires in the Gorge, so I guess when that is over I will give it a finishing coat to protect it.

The next project will be trim and a cool mid-century paint treatment on the garage door. The Rancho is looking pretty snazzy out front. Next year we’ll have to work on the back.

_

The Front Yard

The front yard at Rancho Relaxo was a bit of a jungle.

The previous owner had planted a wall of photinias and spikey red bushes along the curb to keep the carny’s across the street at bay. He had also sprinkled in a few fruit trees, and a pine tree, and a circular rock planting bed which was all grown over in one corner. We had to cut back the limbs on the side where the neighbor’s driveway was so it wouldn’t brush his cars.

The front row had spilled out beyond the curb and onto the street, where Dave and I fought to cut them back so you could actually see the curb. They were a mess.

Looking into the yard from the house, you could barely see a little japanese maple snuggled under the big dogwood. Really you couldn’t see any of these just driving by.

It did do a good job of blocking the neighbors, but the bad neighbors left last year, and the new neighbors are nice folks with a nice neat house. Our yard was bringing down the neighborhood! So we invited a few landscapers over for estimates, and after considering doing it ourselves we decided we wanted it done right, so I handed over a sizable chunk of money, and the guys we picked did this:

We had them remove everything except the dogwood and the little maple (and a little bush that sits between them), trim them up and make a kidney-bean shape around them, and then put down new grass everywhere else. It is so nice! It took a couple weeks for the new grass to start growing from seed, and since it’s summer we’ve had to water it like crazy, but it’s looking good. We love the new view of the neighborhood and seeing our cute little house when we drive up instead of an unmanageable mess.

_

Bored? Games!

We had an awesome after-Christmas part last night, with Michelle, Scott & Sherry, and Sitka and Sake. We stuffed ourselves silly and played board games, and after discovering we were all really awful at Trivial Pursuit, we moved on to Apples to Apples, followed by a rousing game of Pictionary – a good time was had by all!

Even Mighty didn’t let the company or the pack of eskimos bother her, she spent most of the evening sitting in laps, clawing the guests, and lounging in the middle of the action with her tummy up.

So, today I felt like we needed some more board games to add to our party stash. Now that we live in town, we can have friends over more often, might as well be prepared!

We headed out to the local games store and examined all the board games. I was very temped to pick up Settlers of Catan, just because I’ve always heard great things about it, but it was pretty spendy. Instead we picked up a new card game, I’ll report back on that later. Then at the first Goodwill store we found another old card game that sounded interesting. But the last Goodwill store turned out to be the jackpot, as I not only found a used copy of Settlers of Catan for $4 (!!!), but for another $2 I brought home something really unique!

The amazing acrylic tower is a game called See-Queue – and it’s a 3-D tic-tac-toe game. It was made by a company in Salem Oregon in 1993, and designed by Mr Karol Kersh, but I can’t find out much about it on the web. It was ‘some assembly required’, but everything was there except for the marbles. We headed back out to find some marbles…

All set up and ready to play. Do you know how hard it is to find colored marbles nowdays?

The trickiest part was figuring out all the win conditions, and then trying to build them without attracting your opponents attention. It was really fun! I imagine it would be crazy with four people! You can turn the board around as you play, and you are making rows using all four levels sometimes, it’s kind of mind-bending. Cool game!

_

Timber!!!

We woke up to a crash this morning! I was still lazing around in bed, trying to deny that I had to get up and go to work, when a crashing noise on the roof convinced me to jump out of bed and at least look out the window. What I saw…

The neighbors huge tree had shed a giant limb from about twenty feet up, and it came crashing down on the corner of the house and our fence. 
We could see the broken branch it had come from way up high in the tree!
The neighbor is an elderly lady and her adult son was in the backyard when we went out to inspect the damage, and he made it clear he would have nothing to do with it and that she wasn’t around. His reaction could have been a little more helpful, but it was clear no help would be coming from there. 
After work a friend brought a lightweight chainsaw over and we cut it up into handle able size pieces and chucked it back over the fence. Luckily the bent fence boards went back into place once the weight was off of them. No damage done. But I am a little worried about the rest of that giant tree and what might peel off of it next. The old lady’s son said she can’t afford to have professionals come out and prune the tree. I certainly am not paying to prune her tree, but I’d rather not find myself paying for roof repairs next time. I guess we will just have to figure out what to do.

Snow Day, 2014

1-DSC_0004
Barclay wants us to go outside and play!

2-DSC_0007
Pretty Please?

01-DSC_0015
Dave threw him some snowballs.

06-DSC_0026
He didn’t always catch them…

02-DSC_0016
Dave threw some to Navi, but she had her head in a hole!

03-DSC_0018
Did someone throw something at me?

04-DSC_0020
05-DSC_0023

17-DSC_0041
Barclay wants to play stickball

07-DSC_0027
08-DSC_0029
12-DSC_0034
13-DSC_0035
14-DSC_0036
Too cold for this!

16-DSC_0039
The snow just keeps coming down.

15-DSC_0037

18-DSC_0044
We took the Flex out to Fred Meyers to pick up some groceries. It did great! I think the van would have gotten stuck in the driveway!

19-DSC_0048
Our first big snow at The Rancho!
20-DSC_0049
Barclay is glad we went outside to play!

_

Parsnips

When we first moved here, Barclay and Navi loved digging up all the carrots the previous owner had planted in the garden. After the carrots were gone, I thought the entertainment was over. We ignored the rest of the garden, including the row of parsnips, and let them grow. They got quite tall – taller than me!

DSC_0003

Then Barclay discovered that parsnips are fun to chew on – like carrots!

DSC_0018

All he has to do is dig them out and haul them away.

DSC_0022

These are sure big!

DSC_0023

Nom nom nom…

DSC_0025

DSC_0026

Good stuff!

_

Wall shelves for the living room


We have a big empty wall in the living room, and not much to put on it, except this cool vintage clock Dave’s Dad Gave us. I decided to build a shelf around it, so we could have a place to put a few knick-knacks. I sketched up a design.

wall


Then, I hung the clock, and laid out the design using painter’s tape


DSC_0002


I went out and took advantage of my newly organized garage and built the shelves (and simplified them by leaving off a couple short shelves I felt weren’t necessary), then laid on a couple coats of stain, but it came out ugly and drippy. So I sanded it clean and got a gel stain, applied that, and it again came out looking terrible. Finally Dave suggested I paint it, and knowing that it would look terrible if just painted brown, I suggested green, to match the carpet.


DSC_0013


Dave helped me put in some screws to hang it from the studs so it would be secure.

DSC_0019


Tah dah – just as I envisioned it!

DSC_0021


_

The bedroom accent wall

I was reading on my favorite vintage-house blog, Retro Renovation, about vintage houses that featured wall murals. I guess it was a thing back in the day. So I went searching around on the web for vintage wall murals, and found a site which features just about any image you can imagine, blown up to wall size. Intrigued by the boldness of a wall-sized image, I started searching for 70’s style images in the colors I was interested in, and found one I thought was pretty awesome and 70s looking. Only problem – wall size murals cost about $200. That’s a lot of money to pay and then decide you hate it. On the other hand, if I painted it myself, for the cost of less than $50 in supplies, I could decide if I liked it or not, and then just paint it all a solid color if it was not to my taste.

And hey, I was home sick anyway this weekend, so why not have a little fun?

DSC_0003

I laid out the tape by hand, following the top half of the image above as a pattern.

DSC_0005

DSC_0007

At this point the first layer of colors are in, and I can’t wait to get the tape off and see how it looks with white outlines.

DSC_0016

I laid on a second coat of all the colors late last night, and this morning, stripped off the masking tape to see how it looks with white outlines – I love it!

DSC_0017

The masking tape had a lot of bleed-under that needs to be touched up.

DSC_0023

All the touch-ups are done, and the final touch is a piece of wall art we picked up a few months ago. I knew it was going to fit perfectly in here somewhere!

DSC_0021

And the outdoors/geese theme bedroom is complete. We love it!

_

Art around The Rancho


We have been having so much fun picking up art for our new home, decorating it with little fun things that make us happy. Really, to me even the furniture seems like art, since it’s all old and unique – it’s unlikely to find similar pieces to the ones we’ve found.


DSC_0003

Let’s start with the centerpiece of the bedroom – the geese painting. We found this at an antique store in Portland, but I went home and thought about it for a day before going back to buy it. It wasn’t expensive, I just wasn’t sure about it. I’m glad we got it though, the colors are great for the bedroom, and it started giving us a nature theme to decorate around.

I like the style of it – it feels 70s to me. The way the clouds are just shapes with no definition but the geese look more realistic. The trees and brown grass and reflections in the water, well, that all reminded me of our home in the country and our visits to the Ridgefield Wildlife Refuge.


DSC_0005

It appears to be an actual painting, not just a print. That’s kind of cool to know we have something which someone actually created with their own hands. Good job, ‘Jane’, whoever you are!

Now we have a goose/nature theme going on in the bedroom. We were buying our couches at another antique store when I spotted these wall plaques, and had to have them:

 DSC_0010

A closer look:

DSC_0009

These were probably part of a triptych, with the center piece being a clock, but the clock is gone. I saw a very similar set with flowers instead of geese on them. But I’m happy to have these, they look great on the wall behind the TV.

There are more bedroom geese coming, but I have one more wall to paint before I show those off. Maybe this weekend.

In the front room we have the Japanese silk paintings, which I’ve shown off before, and the picture of Barclay, and I just added a matching picture of Navi, so these two make a cute set on the wall.


DSC_0001


And then there’s the Matador…

DSC_0002

Every 70s home needs a Matador! Dave grew up with a Matador painting over the fireplace in his parent’s house. We saw this one on CL for $40, but it was about an hour away. Eventually we saw it in an antique store for $100 and we thought, well, they must have bought it and marked it up and now it was way out of our price range, which was too bad because it was pretty impressive in person. It’s a print with painted highlights. Then we saw it on CL again the next week! There were two of them in town! So we ran out to the folks selling it for $40 and bought it. As the lady handed it to us she gave us a funny look and said ‘Are you sure this fits into your décor?’, in a way that indicated she didn’t think it could possibly fit into ANYONE’S décor! Oh yes, we assured her. And it fits very nicely into the living room, particularly with the yellow couches. We LOVE the Matador!


My latest acquisition was a Goodwill find. This afternoon after volunteering at the barn, I went back up to Battle Ground to order food at our favorite Thai place and bring it home. I had a little time to kill so I went to Goodwill to look for frames I could buy and put my own photography in, and spotted this:

DSC_0002-001

Hmmm, I thought, that’s pretty groovy. It says John Eastman, 1973 on it. I couldn’t decide if I should buy it or not though – fully framed and behind glass, it was a whole $4. Maybe I am a little cheap!

So I called Dave after I picked up our food and asked him what he thought, and he was like ‘duh, for $4? GO GET IT!’ So I went back, and poking around found another one! (the lines down the middle are reflections)


DSC_0003


And yeah, they are pretty groovy. I hung them in the kitchen, which is the only place we still have some bare walls!

DSC_0001


So that’s it for now. We’re having so much fun decorating our vintage house. Just wait until you see what I have planned to finish off the bedroom!


_