Making Prunes


Our house came with a plum tree

DSC_0037

We didn’t know what kind of fruit tree it was until plums started falling off, and the dogs were eating them.

DSC_0031

DSC_0035

They were very tasty, but more plums all at once than the three of us could eat (me and the dogs, Dave’s not interested in plums)

So I dug out the dehydrator

DSC_0038-001

A bucket of plums turned into four trays of plum-halves.

About 15 hours later, I had prunes.

DSC_0002

They are super sweet!

DSC_0001

I went ahead and froze them to ensure they will not mold. I thought I had them dry enough, but not enough to trust putting them in the cupboard. Even though they are taking up a little freezer space, they take up a lot less space dehydrated than they would if I’d just frozen them fresh.

_

Oatmeal, Peanut Butter, Chocolate Chip cookies

I believe I have discovered my favorite cookie – ever!

Oatmeal – Peanut Butter – Chocolate Chip Cookies

I found it in my old Better Homes & Gardens Cookbook, which I have had since striking out on my own as an adult, but I never ran across that recipe before. I pulled the book down the other evening, looking for an easy cookie recipe I could do with items I already had in the house and there it was. What a wonderful idea! All my favorite cookies rolled into one!

And oh man, are they good…
But not too good. You wouldn’t want to sit down and eat a whole tray of these – which I always want to do with chocolate chip cookies, and peanut butter cookies never last long at our house either! But the oatmeal in these make them filling so one or two little cookies, and you feel satisfied, and you’ve had your little sweet-tooth fix. They’re perfect!
Last time I made them I saved half the dough for later, but it was very hard to work after having been refrigerated. So this time I made the extra dough into ready-to-bake portions on parchment paper, and froze them.
It was a little hard to do in my tiny side-by-side freezer compartment, but I fit them in. Once they’ve frozen I’ll bag them up, and then they’ll be ready for when I just want to pop a few in the oven for a quick dessert – because there is nothing better than a soft, chewy, warm golden-brown and delicious cookie right out of the oven. 
Go make some, you know you want to…
_

Canned Chicken Soup

Yesterday we went grocery shopping and got a good deal on a half dozen bone-in chicken breasts. I brought them home and de-boned them, and froze most of them, and then I roasted the bones with some onions. When those were good and browned, I put them in a stock pot with carrots, garlic and some dried herbs. I let them simmer until after dinner, about 6 hours later. Then I cooled it off and popped it in the fridge over night.

This morning I skimmed off the fat and heated the stock back up, and added diced carrots, onions, garlic, corn, and more herbs, until it tasted good. I also added two chicken breasts, cut up into small cubes. Once that was all cooked through I hot-packed it into quart jars and pressure canned it using instructions from the University of Georgia So Easy To Preserve book. UG is the nations testing kitchen for safe home-preservation recipes, so I know that’s a good book to work from.

This was my first attempt at pressure canning soup. I decided to try it because a few weeks I made some soup that came out fantastic, and I froze it and enjoyed it for several lunches, so I thought canning some homemade soup would be just as nice. I canned 7 quarts, and one didn’t turn out, the lid didn’t seal for some reason. The rest all turned out ok, so I have 6 quarts for the cupboard, and one in the fridge. I can’t wait to try them out and see how they taste after being canned for a while.

_

Following directions – green tomato salsa

Last year my favorite thing of all the food I canned was the green tomato salsa. It was seriously YUM – and I just finished my last jar of it, so it was the perfect time to make more. There’s no shortage of green tomatoes right now either.

Lots of green tomatoes! Don’t worry, there’s still plenty left to ripen (if they ever do).

I spent a couple hours chopping all the onion, peppers, garlic, and tomatoes, in fact I spread the job over two days! Finally, I had it all in the pan, with the liquid – a mix of lemon and lime juice, and spices.

I boiled it, meanwhile I boiled the jars, and soon it was all ready to put together. I was following a canning recipe exactly. I had a little assembly line set up. I thought I had it all but I forgot one really important step! After you fill the jars you’re supposed to use something to gently get rid of the bubbles down inside the jar before processing. I realized just as I put the last filled jar into the water bath that I hadn’t done this! I pulled the jar back out and looked at it, and sure enough there were big air bubbles throughout the jar. I was really disappointed in myself – I’m supposed to be a master food preserver, and getting out the bubbles is basic stuff! I went ahead and processed them.

The trick is that if you realize you screwed up within 24 hours, you can reprocess the food safely. I had Dave pick up some more jar lids, and once it was cool enough to handle, I opened all the jars. I noticed the salsa was pretty chunky, and I remembered my teacher saying it should be kind of thin, so I dumped the jars, two at a time, into the blender and gave them a quick spin before dumping them into a pot.

While that heated to a simmer I washed the jars and got them heated up in the water bath again. Then I refilled them with the blended salsa. This time the salsa was so thin there weren’t any air bubbles to worry about. I lidded them up and processed them like before.

There are very few small bubbles visible in the jars after processing, but that’s ok. It was worth the time to reprocess these. All I lost was a few lids, and that’s better than having to throw out spoiled salsa a few months from now. I think I will be enjoying these until it’s time to make more next year!

_

Canning Stock

We went grocery shopping late Labor Day evening, and ran across a pleasant surprise – the store had roasted too many chickens and was clearing them out for $3.50 each! What a score! You can’t usually buy a whole chicken for that price, let alone roast it yourself! We bought two, brought them home, and picked all the meat off them, and threw the bones in the pressure cooker. I also got a deal on a package of 6 half breasts, so I de-boned those and threw the trimmings into the stockpot and froze the meat for later. Then I threw in all the onion and carrot trimmings I’d saved up in the freezer, along with some garlic and celery, and I let the pressure cooker do it’s thing, and by evening I had a giant hot pot of stock.

The brilliant part is that my last batch of stock was packed in the freezer, so I took it out and dropped those stock ice-blocks into the pot of strained stock, and as they melted they cooled off the new batch, and within minutes the whole thing was ready for the fridge. I thought that worked particularly nicely! After a day in the fridge I skimmed off all the fat, and it was ready to can.

So today I spent my morning pressure canning 17 pints of stock. It took all day, because it required two batches. I should have done quarts, then it would have only taken one batch, but I usually use it a pint at a time. The pressure canner wasn’t as nerve-wracking as last time. I’ve used it to pressure cook stock a couple times, and this is my second time canning. I think it gets easier the more times you practice.

Beautiful!
_

First canning session of the year

I pulled out the turkey fryer (electric water-bath canner) and got ready for a marathon canning session today. I found a bucket of pickles out in the garden!

Some were really big, and some were just in the 3-4 inch size. I decided to slice up the little ones into spears for dills, and slice up the big ones into chips for sweet pickles.

8 pints of quick pack kosher dills…

And 8 pints of sweet pickle chips – yum! I was down to just one jar left from last year, so the timing was perfect!

Then we went to visit a friend who has a blueberry farm! We all chatted and picked a bush clean, and came back with a bucket-full of delicious blueberries. 12 quarts! I cleaned some and put them in the freezer, and more went in the fridge, and then I mashed some up for jam.

This may have been the most work I did all day!

 Ah, the fruits of my labor – filling the pantry until next season!

_

Turkey noodle soup – oh, yeah!

Turkey Noodle Soup – part 2 – The stock simmered in the crock pot all night, and this morning I strained it, and added one onion, two carrots, two celery sticks, all diced, along with some thyme, salt & pepper, and garlic. Let that stew until lunchtime. Then I added noodles and white meat leftover from last night. Once those were cooked I thickened it with a little cornstarch, and served it for lunch with some no-knead dinner rolls. So good! I’ll be doing this every time I have a carcass leftover! That could NOT have been any EASIER! And what a way to squeeze every last little bit our of a turkey!

_
_

Making the most out of a turkey

Dave wanted turkey for dinner, and the only turkey breast they had at the store was a whole turkey breast – $15! Well, it’s ok, because I brought it home and de-boned it, and that left half to go in the freezer for another day. Then I took the carcass and put it on a roasting pan with carrots, celery, onion, and an extra leek that was past it’s prime, and popped them all in the oven to roast. I also roasted the breast half we were having for dinner. My favorite recipes are simple, and turkey breast is awesome when roasted simply with olive oil and salt & pepper. I put the breast half in my iron skillet, and roasted it for 45 minutes as well.

When the carcass was done cooking, it and the vegetables were nicely browned. I took them out and put them in the crockpot with enough water to cover, along with sage, and thyme. I’ll let that cook all night, and by morning I’ll be ready to make turkey soup for dinner tomorrow, and the extra I’ll freeze for quick lunches.

As for the dinner breast, it came out crispy on the outside, juicy on the inside. And my favorite trick is roasting in the skillet, because then I can rest the meat on a plate, and make gravy in the skillet with all the lovely brown bits left behind. So delicious! And we not only had dinner, but more than half the breast was still left for lunches or another dinner later this week. I’d say that turkey was $15 well spent!

_

Homemade canned chicken stock

Ok, I say chicken stock, but I’m not sure if it’s technically stock or broth. It’s thick, made from bones, and it will gel up in the fridge, so I call it stock.

I started out with my usual steps for chicken stock. I thawed out my bag of chicken parts. I save all the necks, backs, gizzards, hearts, anything I don’t use when I cut up a chicken, and pop them in a big zip lock in the freezer until the bag is stuffed full. One bag holds about 4 lbs of parts! I lay it all on a roasting pan with some onion (skins on), carrots, and celery – give it all a misting of olive oil, and pop in a 450 oven for an hour or so.

Once that’s done the house smells so incredible we’re all wondering why we didn’t just roast some chicken, but no, we’re working on stock! Instead of putting it in the big pot with water and simmering it for 20 hours or so (like usual) – I put it in my new pressure cooker.

I learned to use the pressure cooker/canner at the food preservation classes I took last summer, but I didn’t have a chance to actually buy one until a couple weeks ago when a friend got a really great deal on some and sold me this one, brand new, for about half what they go for in the store.

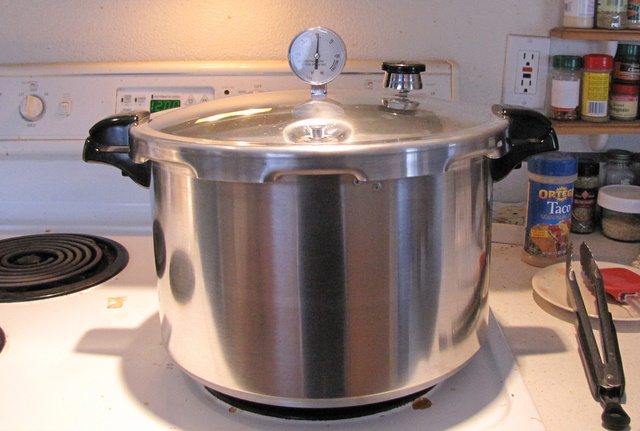
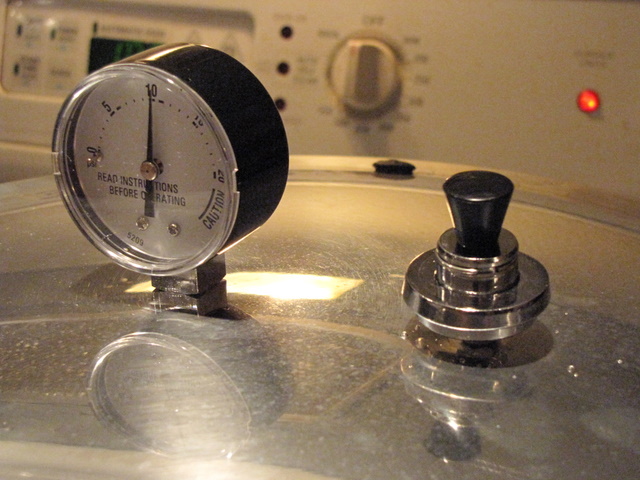
Lots of people are scared of pressure cookers, but they are not as scary as they seem, as long as you understand them and remember to always treat them with respect. Modern canners have some important safety features to protect you. As the water in the pot heats up, steam is vented through a vent pipe. Once it is ready to cook, you put a weight on top of the vent pipe which is just heavy enough to allow the canner to pressurize to the amount you want, and it wobbles back and forth letting out excess pressure. As the pot pressurizes the Lid Lock pops up and prevents you from removing the lid until it is de-pressurized. In the back of the lid is a tiny black rubber plug which is a safety valve. If the pressure gets too high it will blow that plug out and release the pressure – so no worries about the lid exploding off. The dial gauge is nice to have just so you can monitor the pressure. Gauges should be checked every year for accuracy.

** That weight on the vent pipe is probably the most likely thing to cause a problem. You put it on to pressurize the pot, but you can’t remove it until the pot has cooled off and depressurized on it’s own. If you remove it, scalding hot liquid could come out through the vent as it rapidly depressurizes, and that would be BAD – so once the weight is on, don’t touch it again until the gauge reads zero!**

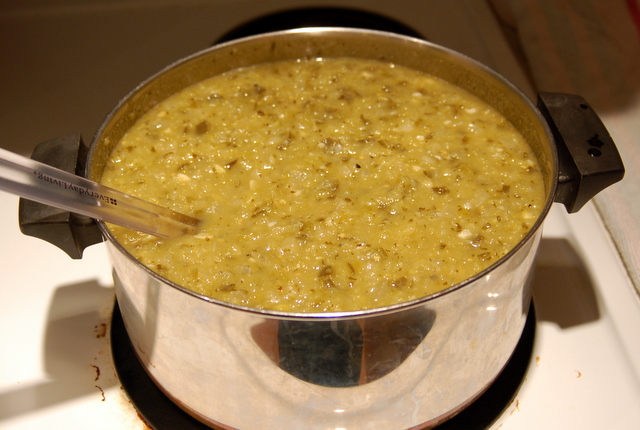
After only 20 minutes in the pot, 4lbs od chicken was reduced to a soft mash (which I gave to my chickens and they really enjoyed)!

And I had a couple quarts of the most flavorful stock I’ve ever made! Seriously, this tasted more like chicken soup than any I’ve made so far.

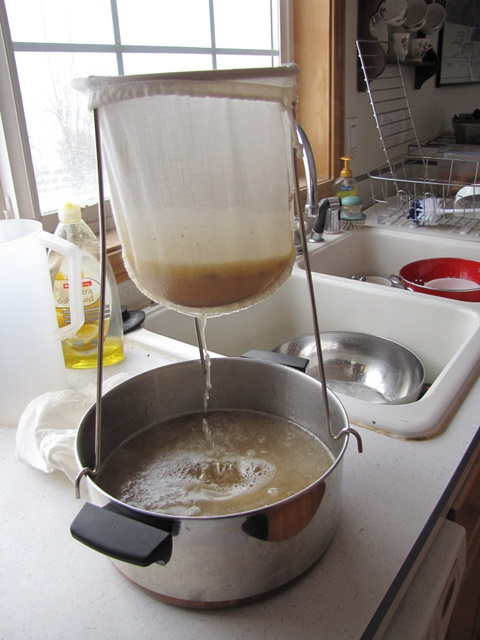
So once I had enough stock to can, I had to set up my canning gear. This includes:

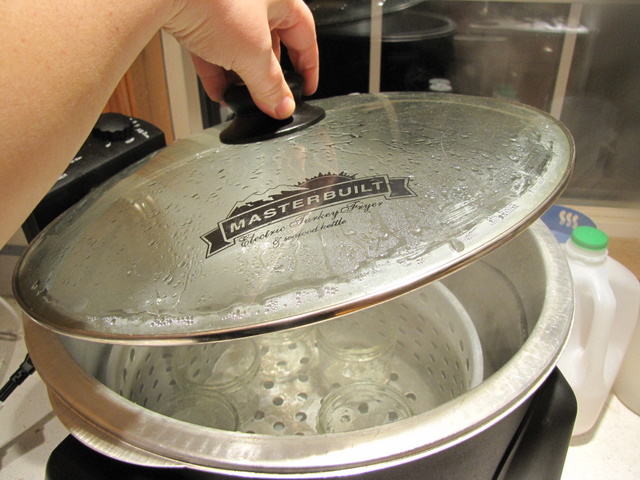
My turkey fryer/water bath canner – just to sterilize and heat up the jars so they won’t crack when filled with hot broth. Also a small pan with hot water for the lids. And all the canning tools. And towels. Gosh, what a production. And of course the pressure canner, cleaned up and ready to go again.

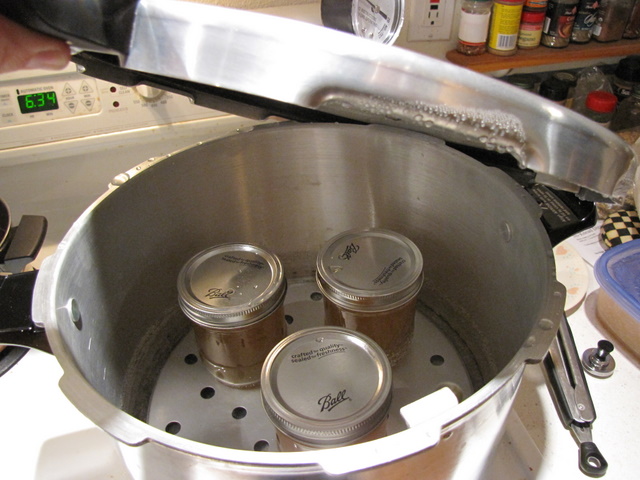
As I filled each hot jar with hot stock, I put it in the pressure canner to wait for a full load.

Finally they were all in, and I had to vent the air out of the canner. This is where you wait for a steady tower of steam shooting out of the vent pipe (hard to see in the picture above). You wait until it is steady steam, and let it do that for 10 whole minutes!

Then put the weight on and let it pressurize. Notice the canning weight is different from the cooking weight. You cook at 15 lbs pressure, but you can at 11 lbs. Again the weight sits there and wobbles, letting out pressure and keeping the canner at 11 lbs. Because I wanted to roast my chicken and make the stock with vegetables, I consulted with the other master food preservers and decided it would be safest to can the stock using the recipe for vegetable soup – 75 minutes processing time, instead of 20 for plain chicken broth.

I hung around the kitchen the whole time, watching the pressure gauge, making sure the weight was still wobbling away. If it goes below pressure you have to start the time over! Finally it was over, and I moved the pot off the heat to cool. There’s a process that must be followed for canning, and I followed it precisely! Improperly canned stock could contain botulism, and I didn’t want to chance that!

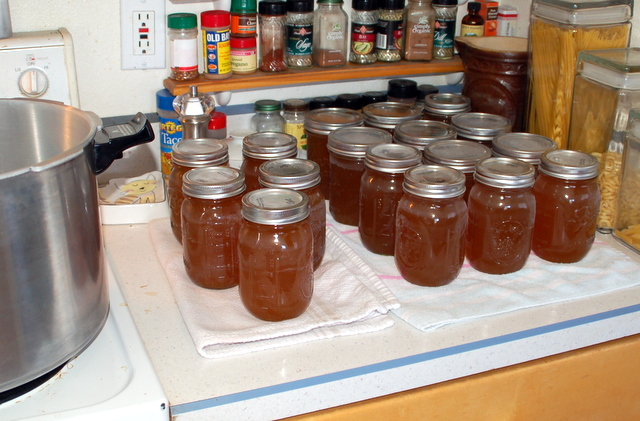
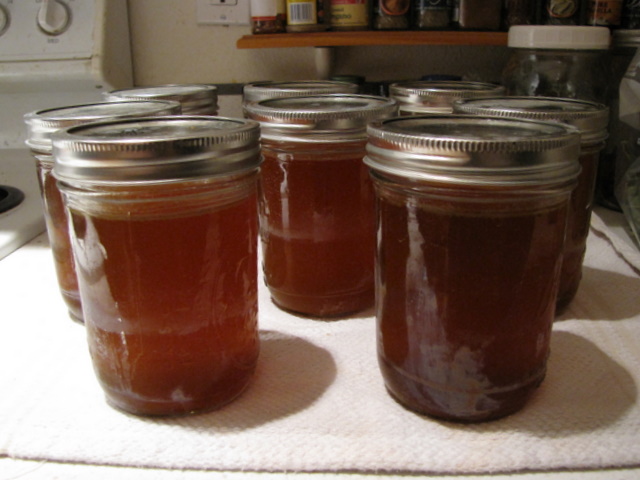
Beautiful! 8 Pints of shelf stable stock, going in the cupboard instead of filling up my little freezer!

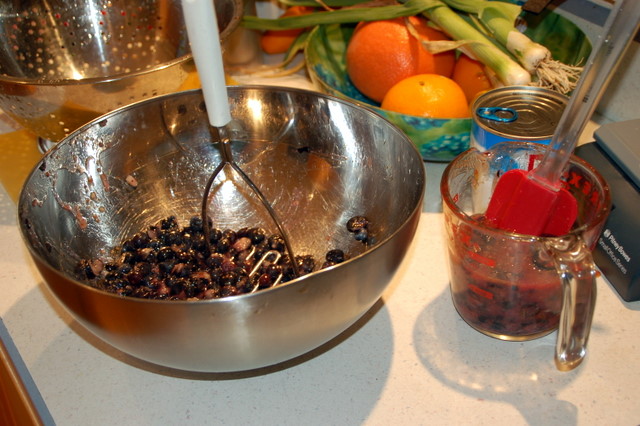
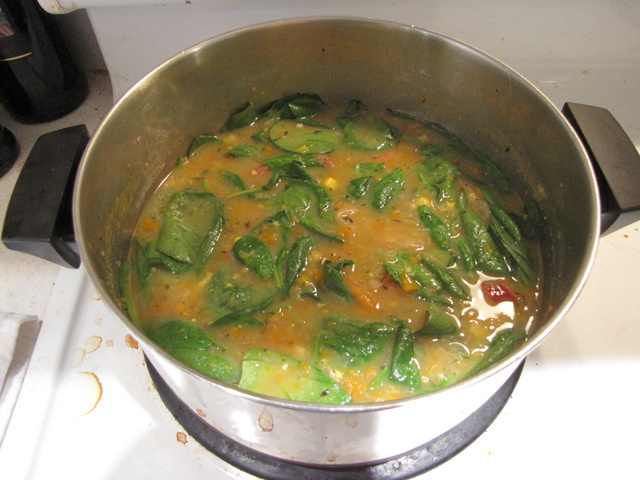
And with the leftovers I made some Northwoods Bean Soup – and even Dave thought it was great! You can’t make good soup without great stock. Making it myself is probably the one thing I have learned that really makes a big difference in my cooking.

Churning Butter

Yes, I said Butter. I bought a half gallon of whipping cream from the local dairy – real, local milk from right here in Clark County. I let it come to room temp, added a pinch of salt, and let the Kitchen Aid go to it. It only took about three minutes to go from whipping cream, to whipped cream, to break over in to butter.

Even with the spatter shield on, this is a messy job!
But look – Butter!

After it was separated, I had to rinse the butter repeatedly under cold water while kneading it to get out all the buttermilk. This quickly turned into a giant mess where I was getting butter everywhere! I’ll think before I stick my hands into it next time! But it worked and I formed three logs to freeze, and refrigerated a pint of it. Had it on waffles this morning and it was great – not as salty as regular salted butter, and had more of a sweet cream taste.